Disassembly
Removing the Hard Disk Drive 2 - 9
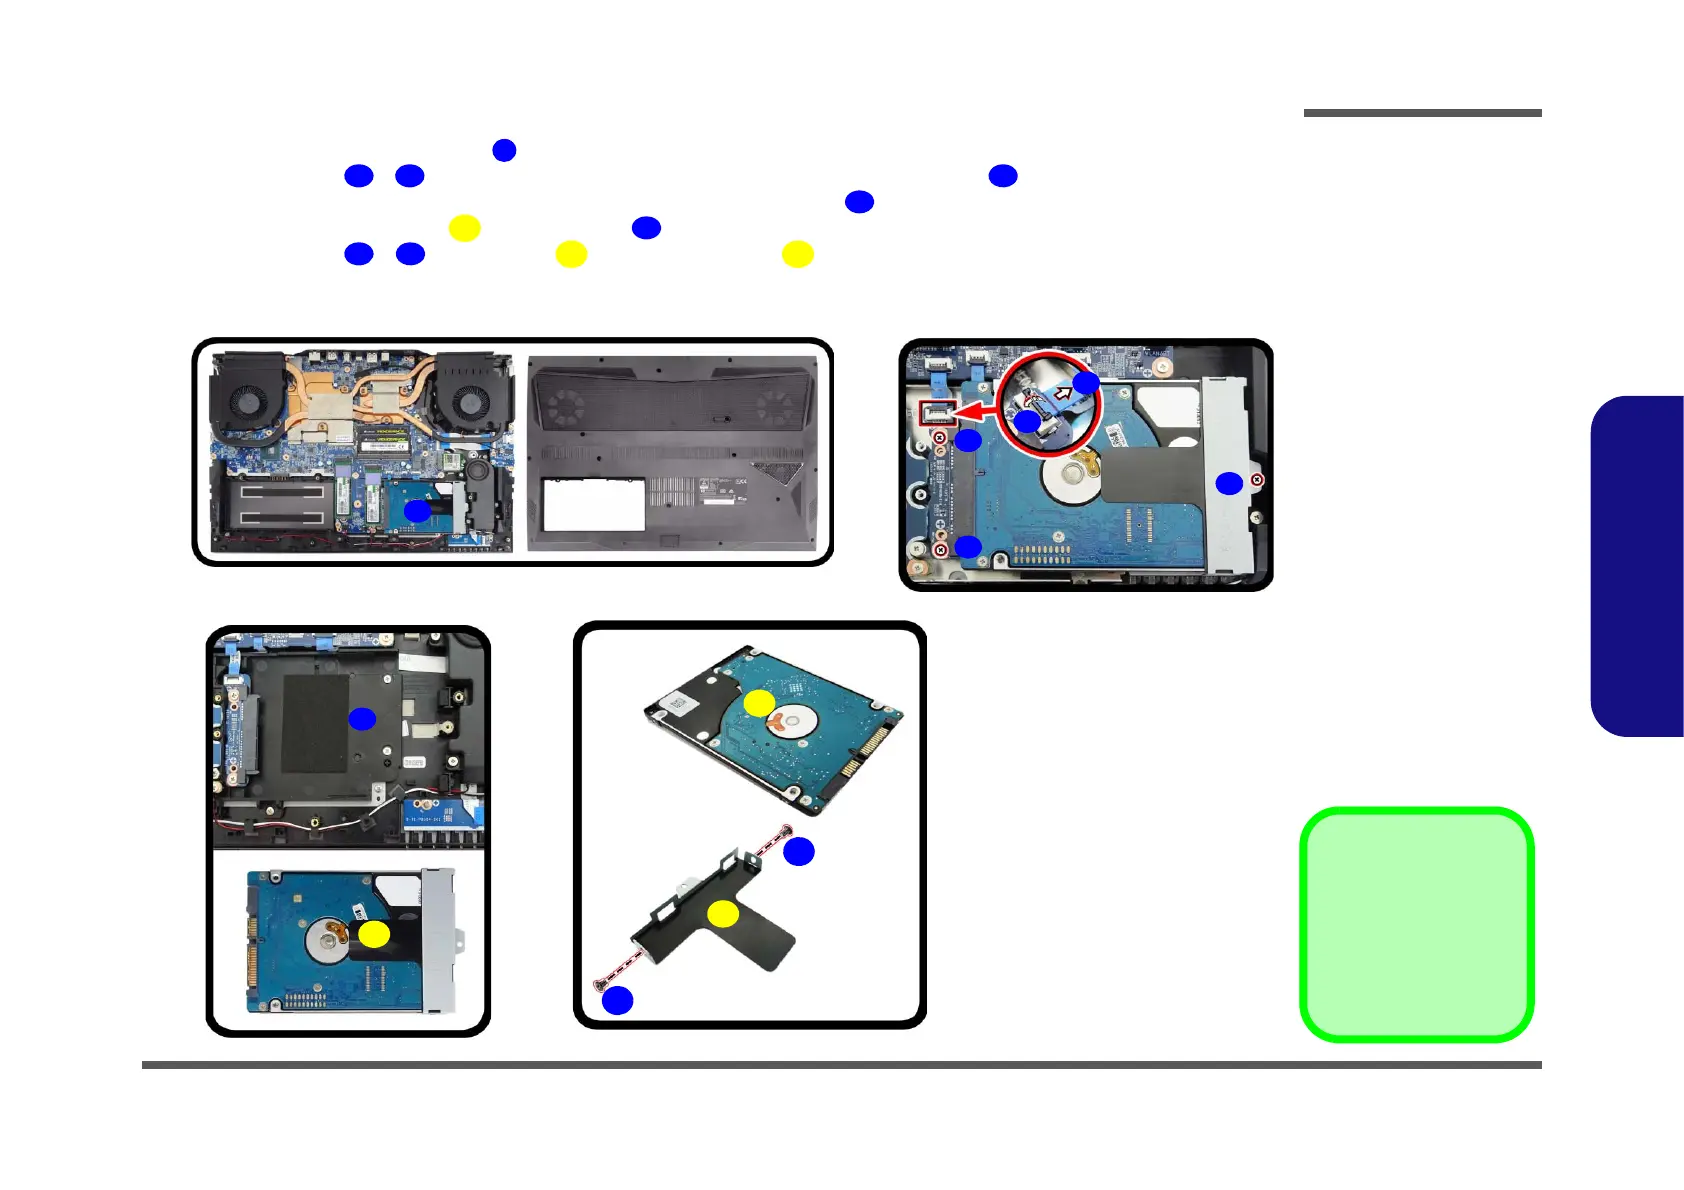
2.Disassembly
5. The HDD will be visible at point on the mainboard (Figure 5d).
6. Remove screws
- from the HDD assembly and disconnect the ribbon cable from the locking collar
socket by using a flat-head screwdriver to pry the locking collar pins
away from the base (Figure 5e).
7. Lift the hard disk assembly out of the bay (Figure 5f
).
8. Remove screws - and bracket from the hard disk (Figure 5g).
9. Reverse the process to install a new hard disk (do not forget to carefully reinsert the bottom case in reverse order
(see Figure 4c) and to replace the screws).
d.
e.
25
35
33
34
36
26
31
32
f.
g.
27
28
30
29
31. HDD Assembly
35. HDD Bracket
36. HDD
•5 Screws
Figure 5
HDD Assembly
Removal (cont’d.)
d. Locate the HDD.
e. Remove the screw.
f. Slide and pull the HDD
assembly out of the bay.
g. Remove the screws and
bracket from the HDD.