OPERATING MANUAL
800.749.2761 www.coachcomm.com
7
4. Set up the Wired Interface and Wired BeltPacks.
The procedures in this step should be performed with at least two people.
4a Place a Wired BeltPack at each coach’s position in the press box.
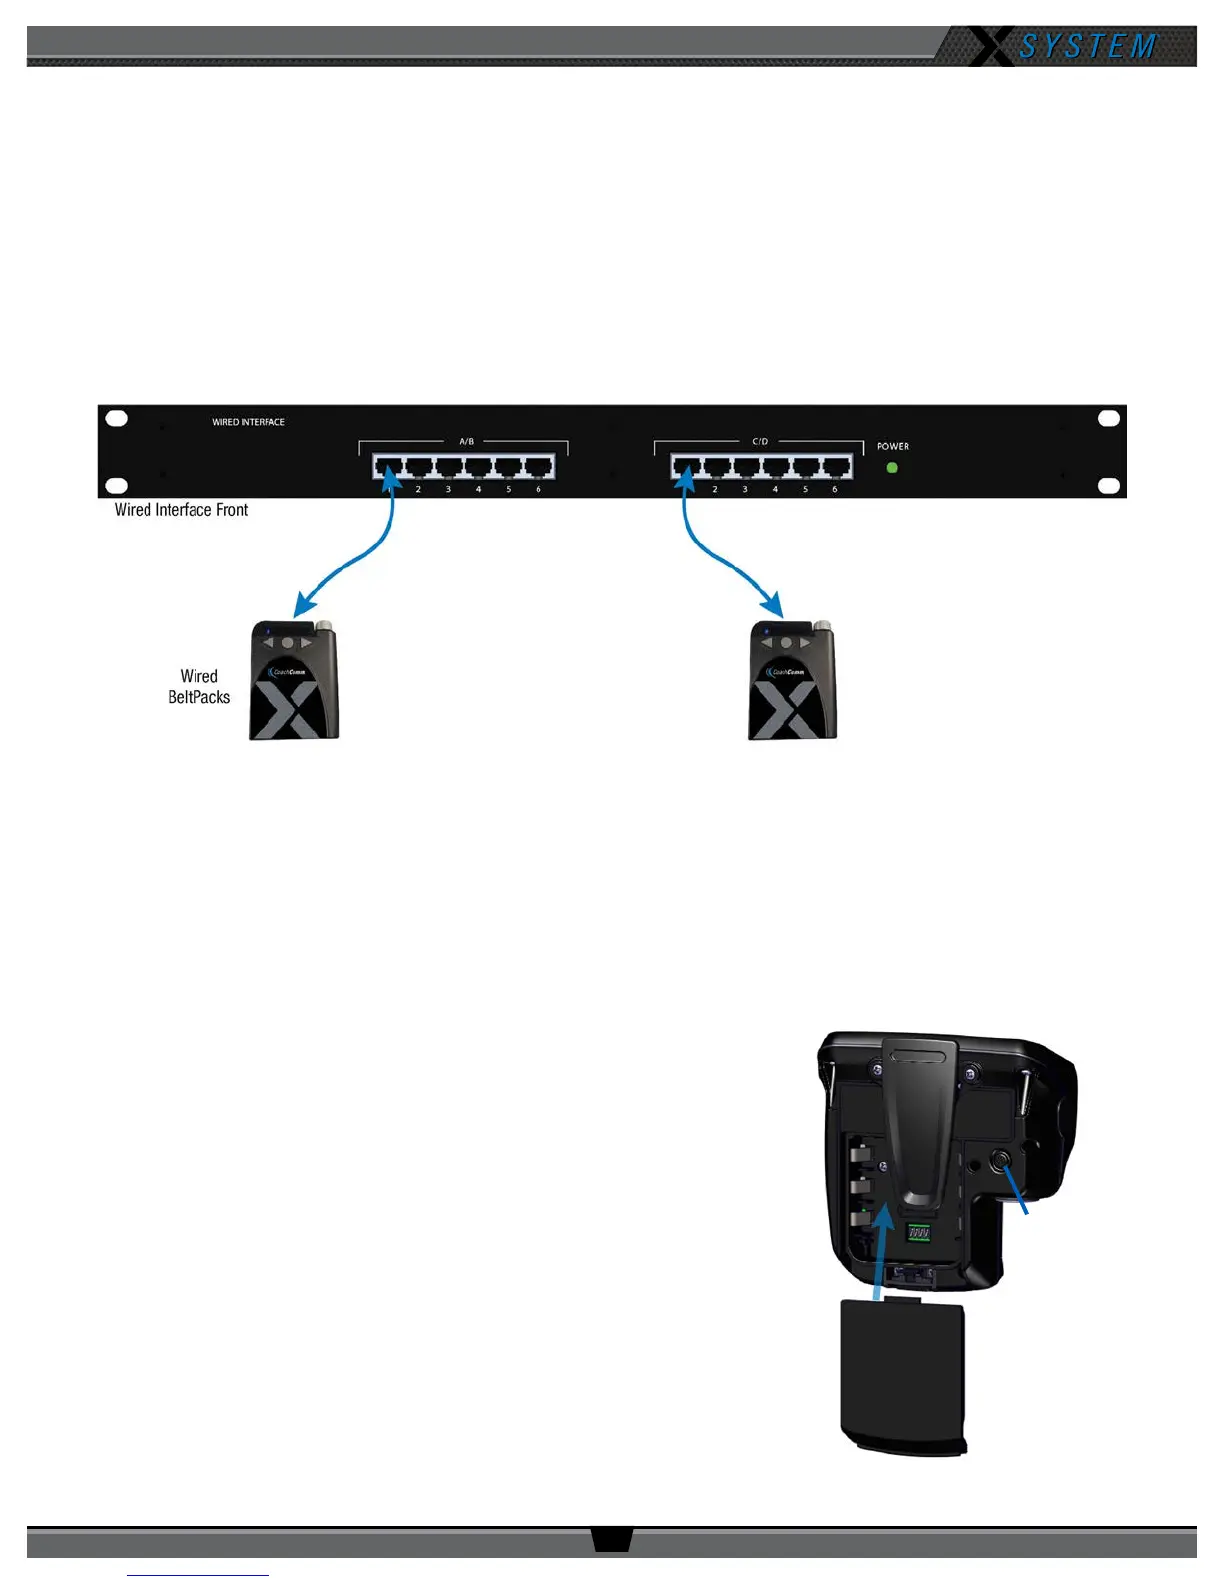
4b Connect the short end of the Cat 5 cable bundle to the desired channels on front of the Wired Interface (A/B or
C/D).
4c. Connect the opposite ends of the bundled cables to each Wired BeltPack.
Important: Keep cables out of the way of coaches and heavy foot trafc. Cables that are pinched,
snagged, or damaged will cause disrupted communication.
4d. Connect a headset to each Wired BeltPack.
4e. Power on each Wired BeltPack by turning the volume knob clockwise. The lights on the front of the BeltPack will
illuminate when powered on. Conrm that each Talk button is off.
4f. Put on one headset and press the Talk button on the Wired BeltPack and conrm that you can communicate with a
second Wired BeltPack on both channels with no crosstalk. Repeat the test for each Wired BeltPack.
5. Power on and walk test Radio Packs.
The procedures in this step should be performed with at least two people.
5a. On the sideline, unpack the sideline case and install one of the
provided, fully charged Lithium-Polymer rechargeable batteries or
three AA batteries in each Radio Pack (RP).
5b. Power on the rst two RPs by pressing and holding the Power
button on the back of the RP for 3 seconds.
Figure 6: Wired Interface Connection to Wired BeltPacks
Figure 7: Turn on by
holding Power button for 3
seconds.
Figure 8: RP Battery Installation and Power On