Chapter 4 Hardware Installation
12
Check that the Power LED at the front panel of Compex SXP2224WM has
lighted up.
5. The unit is now ready to use.
NOTE
Please allow at least 4 inches of clearance on the front and back of the switch
for proper ventilation. This is especially important for enclosed rack installation.
4.3 Installation of Expansion Module
A series of optional expansion modules are available for Compex SXP2224WM. You
need to install the modules before turning on Compex SXP2224WM. Please refer to
“Specifications” for the types of optional modules to be used.
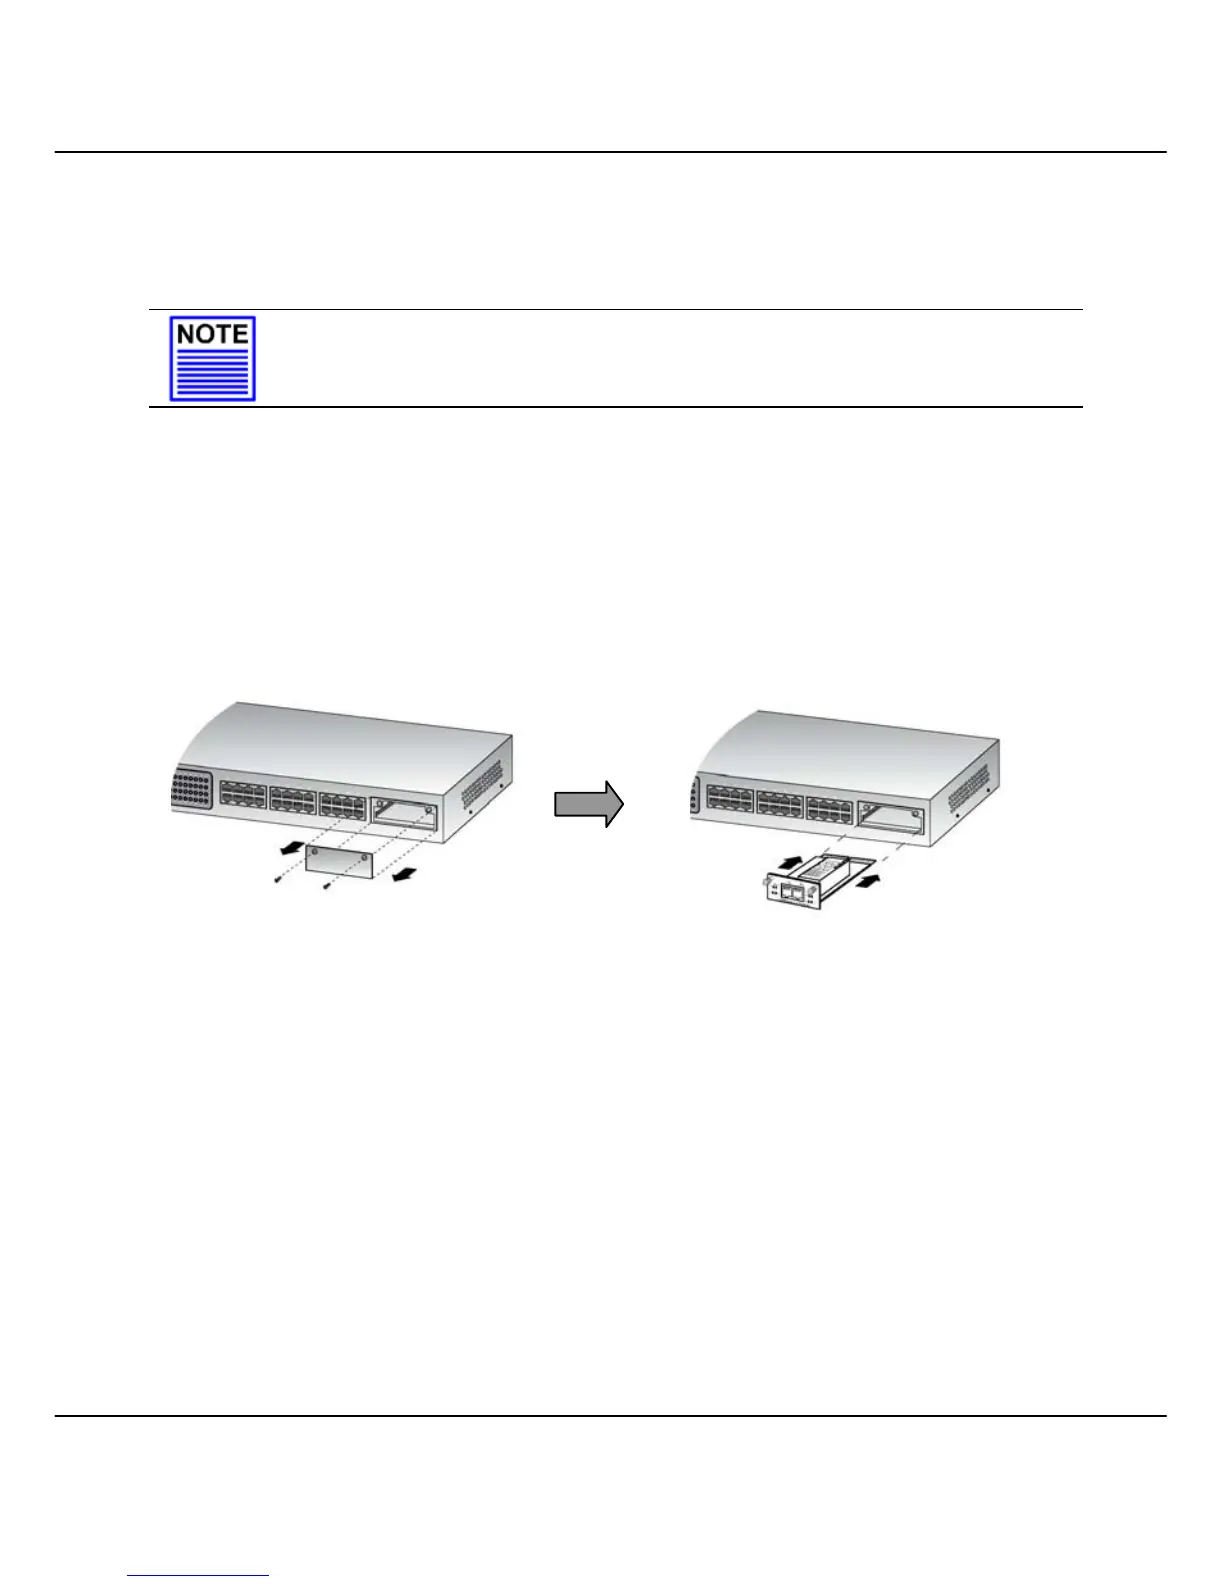
Figure 4.3a Installing expansion module
1. Power off Compex SXP2224WM.
2. Unscrew and remove the metal plate from the expansion slot.
3. Insert the module carefully into the expansion module window and push it along
the rail until it is firmly inserted into the connector of the PCB board of Compex
SXP2224WM.
4. Tighten the screws on the module.
Remove the metal plate fro