17
Installation
method
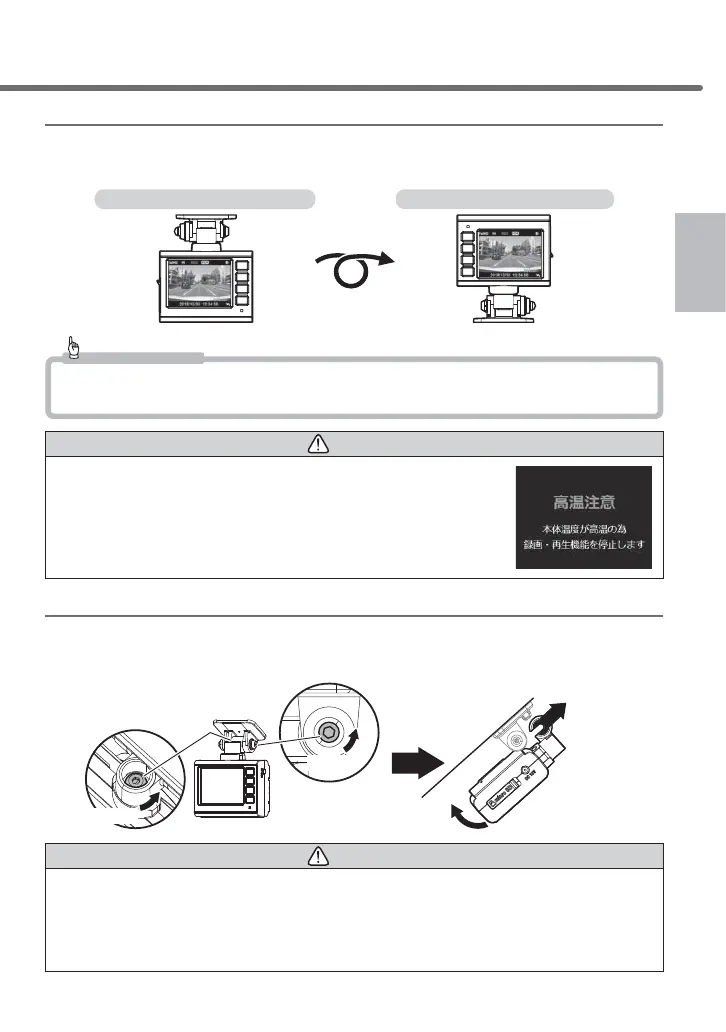
When installing on the dashboard
This product judges the up/down direction of the product automatically using
the built-in G sensor to inverse the LCD display.
Installing to a windshield Installing to a dashboard
Advice
The up/down direction of the screen is judged when the product is started up. Therefore, inverting the main unit
does not cause the screen to be inversed while being active. When the screen is inverted, restart the product.
Caution
Installing the product on the dashboard causes the product to heat up owing to heat trans-
ferring from the dashboard. Therefore, "High temperature caution: Recording is stopped
until the temperature of the main unit decreases." be displayed to call for attention. Install
-
ing the device to the windshield is recommended if the display above appears frequently.
* Recording stops while the attention screen is being displayed. Please wait until the tem
-
perature of the main unit decreases.
Removing the main unit
Loosen the angle adjusting screws at 2 locations with the attached hexagonal
wrench to pull it out and then remove the main unit.
Loosen the angle adjusting
screw at 2 locations
(1) Lean the main
unit forward
(2) Pull it out
Loosen
Loosen
Caution
• 0DNHVXUH\RXUHPRYHLWZLWKWKHDQJOHDGMXVWLQJVFUHZORRVHQHG)DLOXUHWRGRVRPD\FDXVHGDPDJH
• 0DNHVXUH\RXWLJKWHQWKHDQJOHDGMXVWLQJVFUHZZLWKWKHKH[DJRQDOZUHQFKDIWHUUHLQVWDOODWLRQ/RRVH
screws may be detached while the vehicle is running.
• %HDZDUHWKDWRYHUWLJKWHQHGVWD\DQJOHDGMXVWLQJVFUHZVPD\FDXVHGDPDJH
• Periodically check that there is no loosened screw.
Installation method