C o n t r o l Fun c ti o n D es c ri p ti o ns -
S t a n d Al o ne Co n f i g u r a t i o n ( c on t in u e d )
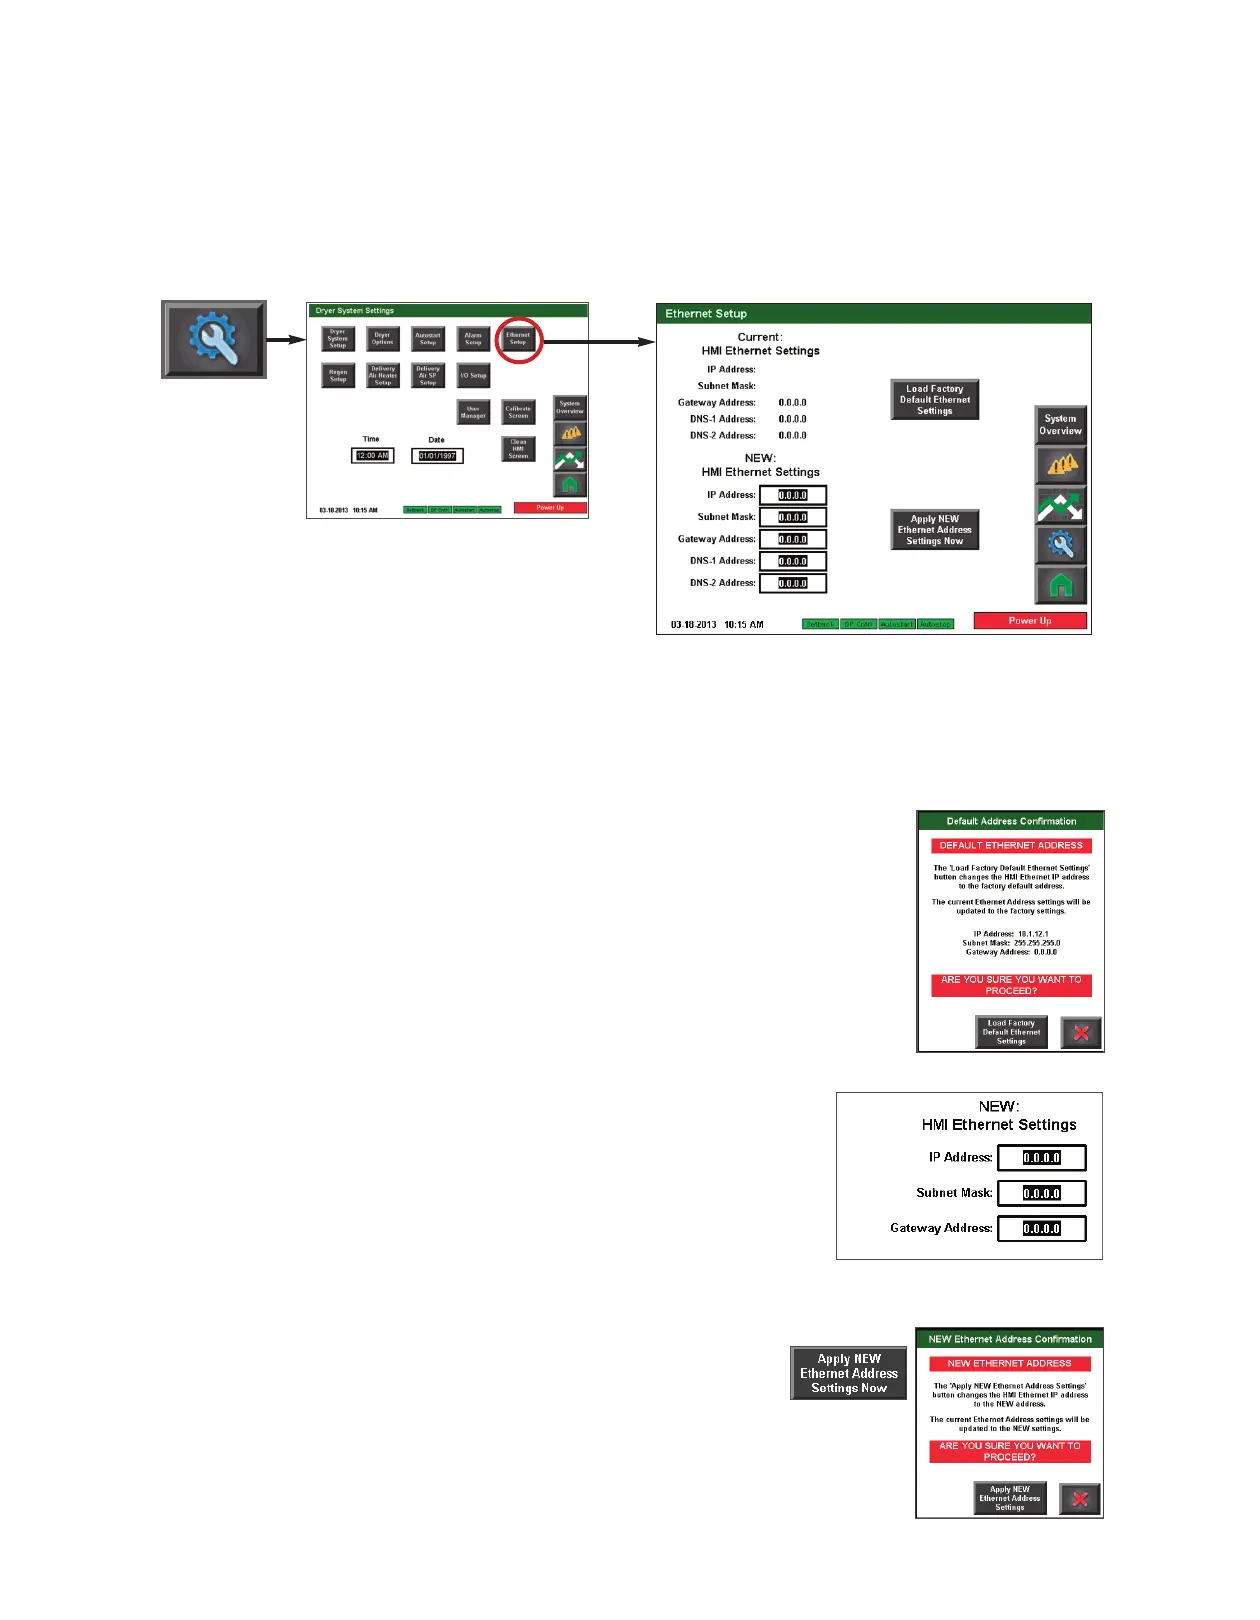
Ethernet Setup screen
To access the Ethernet Setup
screen:
1 Press the Settings button
from the Home screen.
2 Press the Ethernet Setup button.
The Ethernet Setup screen provides the user with the ability to view current HMI Ethernet
settings, load factory default Ethernet settings, or to change and apply new Ethernet set-
tings.
To load the factory default Ethernet settings:
1 Press the Load Factory Default Ethernet Settings button.
2 Press the button to confirm that you want to load the factory
default settings. Press the X button if you want to exit without
loading the default factory settings.
To apply new Ethernet settings:
1 Enter the new settings in the white boxes with thick
black borders. When you touch the setting inside the
box, a pop up number pad will appear.
2 Use the number pad to enter the new setting. Press
the enter button on the number pad to enter the new
setting.
3 Repeat steps 1 and 2 for each address setting.
4 Press the Apply NEW Ethernet Address
Settings Now button.
5 Press the button to confirm that you want to apply the new
settings. Press the X button if you want to exit without applying
the new settings.
NOTE: Proper login is required to
change these settings.
✐
4 - 7 4 l Op e ra ti o n
NOTE: Conair’s default IP address
setting for the DC-T control is
10.1.12.1 as shown in the graphic
to the right.
✐
 Loading...