MANUALP/4000_SERVICE_0712 July2012
58
2.4 Prepare the below items needed during CO
2
calibration:
a. Connect the CO
2
supply tank to the cabinet.
b. Connect a calibrated external CO
meter to the sampling port
(located at the right hand side of the cabinet).
c. Prepare the digital voltmeter. This will be used to measure the IR
constant value for reference.
d. Prepare the shorting jumper pins.
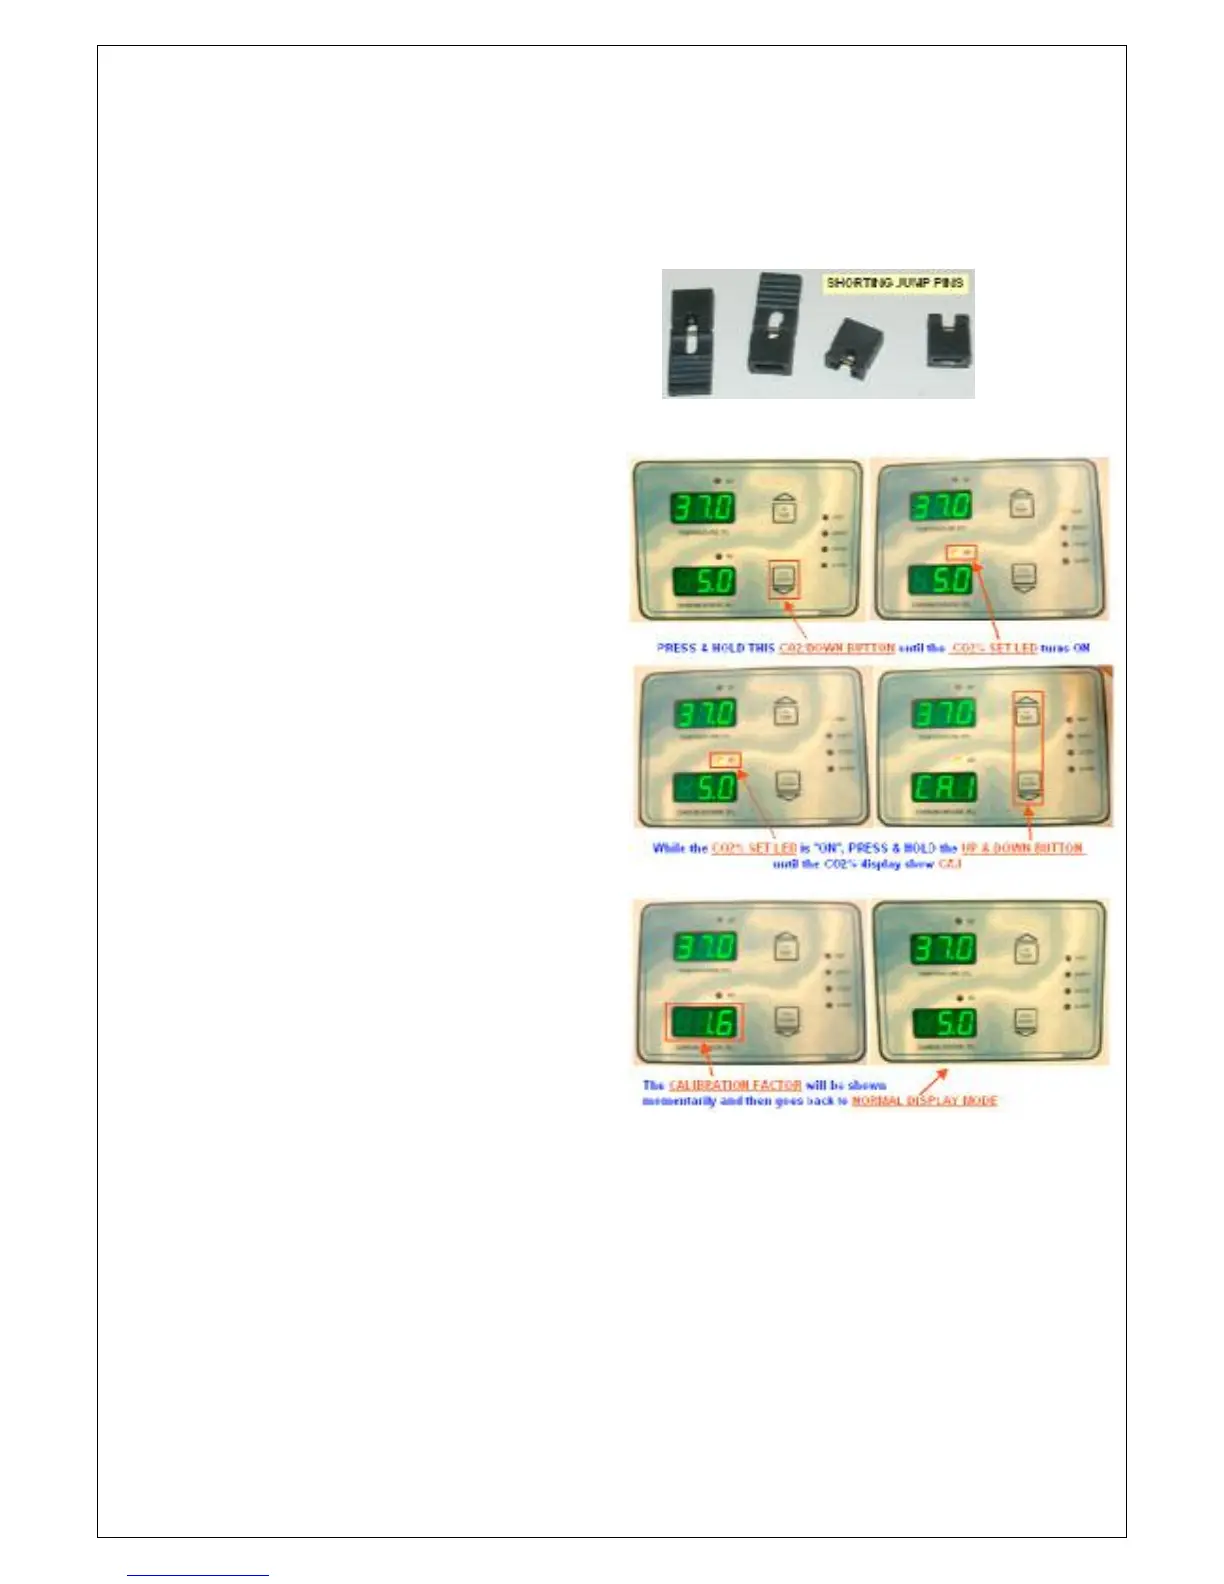
2.5 Set the CO
2
Calibration Factor to 1.6 via the front display panel buttons.
a. Press and hold the CO
button
until the display momentarily
blanks, this will access the
CO
SET POINT mode and
the SET LED above the CO
2
%
display will be turned “ON”.
b. While the SET LED above the
CO
% display is “ON”, press
both UP & DOWN buttons at
the same time. The CO
%
display will show [CA.l] for 2-3
seconds and then show the
current CO
2
reading.
c. Use the UP and DOWN
button to adjust the value
displayed. After adjustment,
the CO
2
% display will blank for
2-3 seconds and then show
the calibration factor before
returning to normal display
mode. Repeat steps 2.5a-2.5c
until a calibration factor of 1.6
is obtained. Note: 1.6 is the
mid-point of the calibration
range.
 Loading...