MiniWarden/PoolWarden + (PLUS) Operation Manual • www.poolwardentraining.com • 33
Connecting with WiFi
The plus version includes built in WIFI and the antenna is on board. An external antenna can’t be added.
When selecting the installation location verify that the controller will connect with WIFI before installing.
Setting Up Remote Access
Remote access allows a connection from off site to the controller. This will typically require the IP address
of the facility and will be provided by the IT department. If there are many controllers on the same IP
address or the IP address is also used for other connections a dedicated port should be selected for each
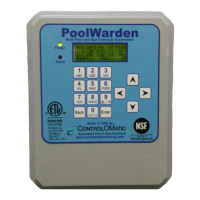
controller. The following shows port forwarding using the TP-Link 300M wireless N router for 5 controllers
all sharing the same outside IP address.
To Connect: Local IP address: 192.168.0.53:3000 or Remote IP address: 173.195.186.62:51860
These IP addresses can be entered in www.poolwarden.com to make connecting easier. Log in and select
“PW Config” and then select the appropriate unit and enter the addresses in the “Network Configuration”
area.
If entered, on the “PW Config” screen where all the models are listed in the columns “Local IP” and
“Remote IP” a “connect” link will be available to connect in a new window.
Setting a Static IP Address
If the network card supports MAC ID routing a static IP address may not
be required. The MAC ID for the WIFI and Ethernet are listed in the
Internet Menu under Information.
This is only required if you want to connect to the controller directly. The
IP address can change from time to time and when set to static it will
always be the same. The static IP address is usually assigned by the IT
department.
t Connect a monitor and keyboard to the PW-Plus communication
board.
t If the monitor doesn’t display properly, cycle power and the monitor
type should be detected at power up.
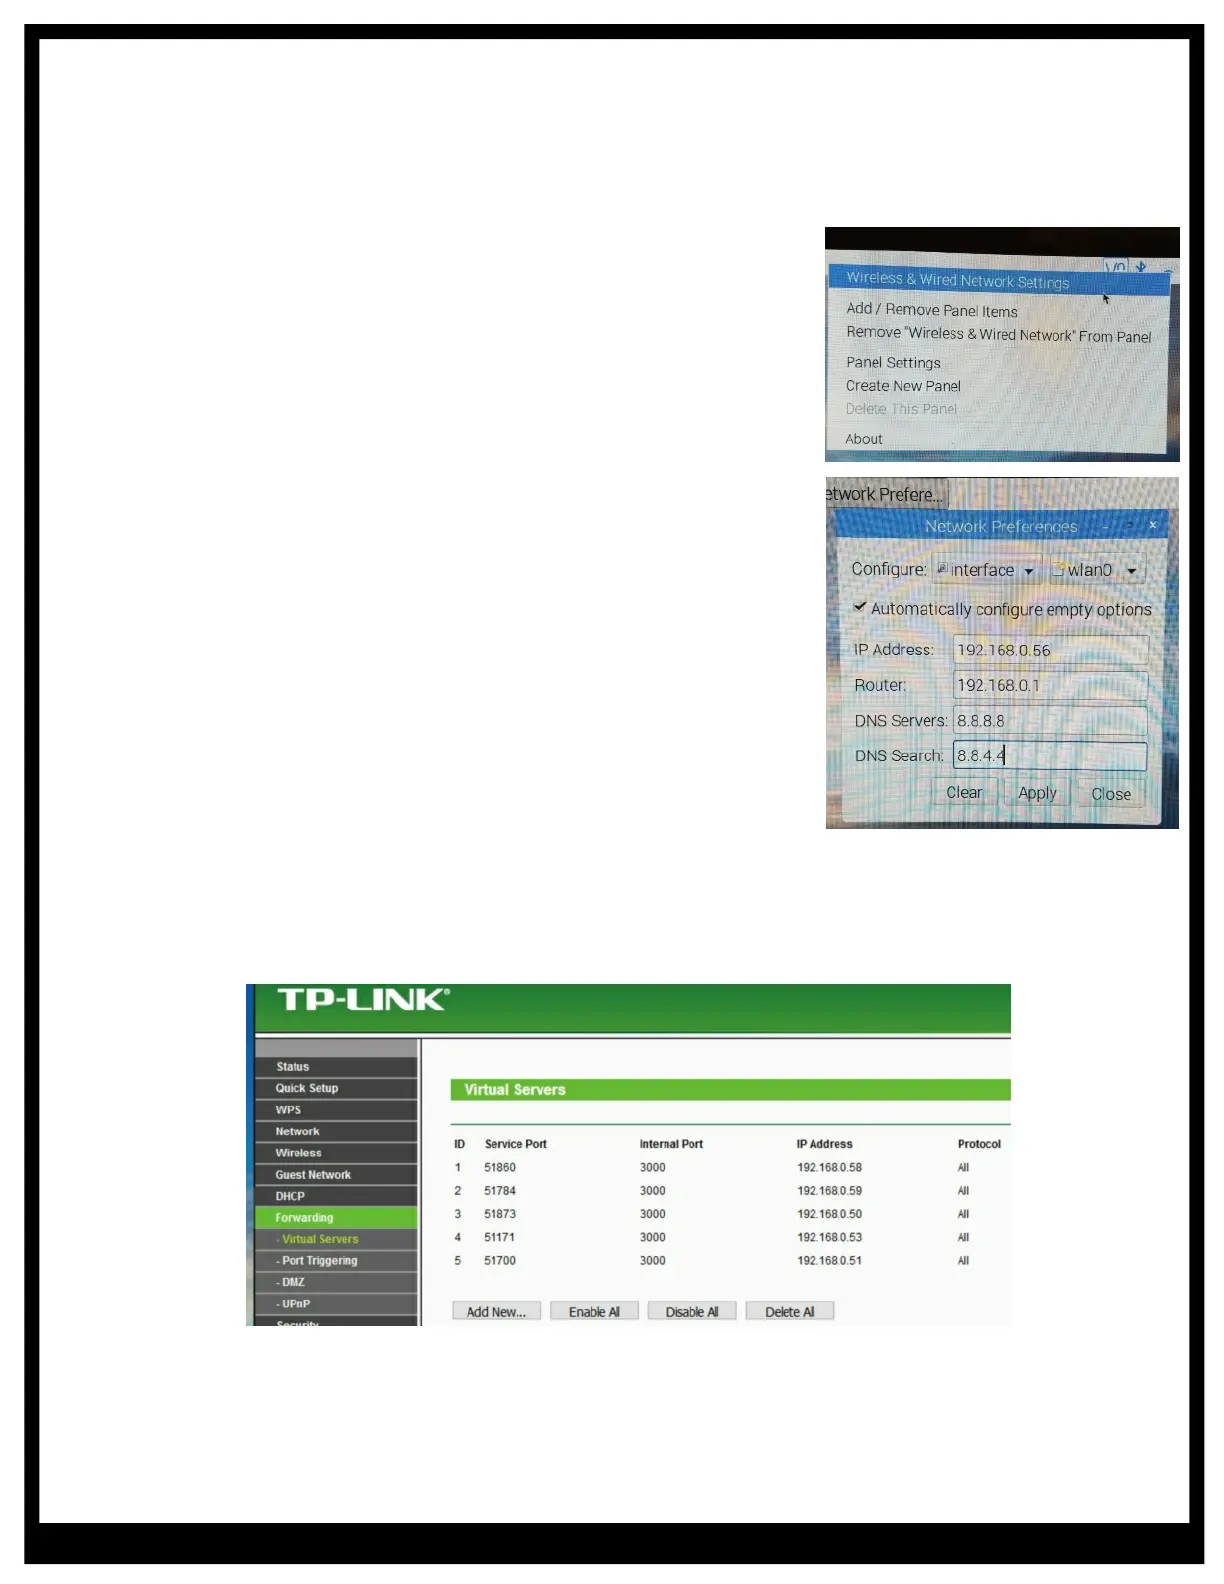
t Right click on the WiFi / Network icon in the upper right corner of the
screen.
t Select “Wireless & Wired Network Settings” from the menu.
t In the right select next to configure interface eth0 for Ethernet or
wlan0 for WiFi. There may be other choices as well.
t Enter the static IP address and the router’s IP address, the DNS
addresses can be left blank.
t Select Apply, if the static IP address is different than the current
address reboot the system.