36
MAINTENANCE (Cont’d)
REFRIGERANT CHANGE (continued)
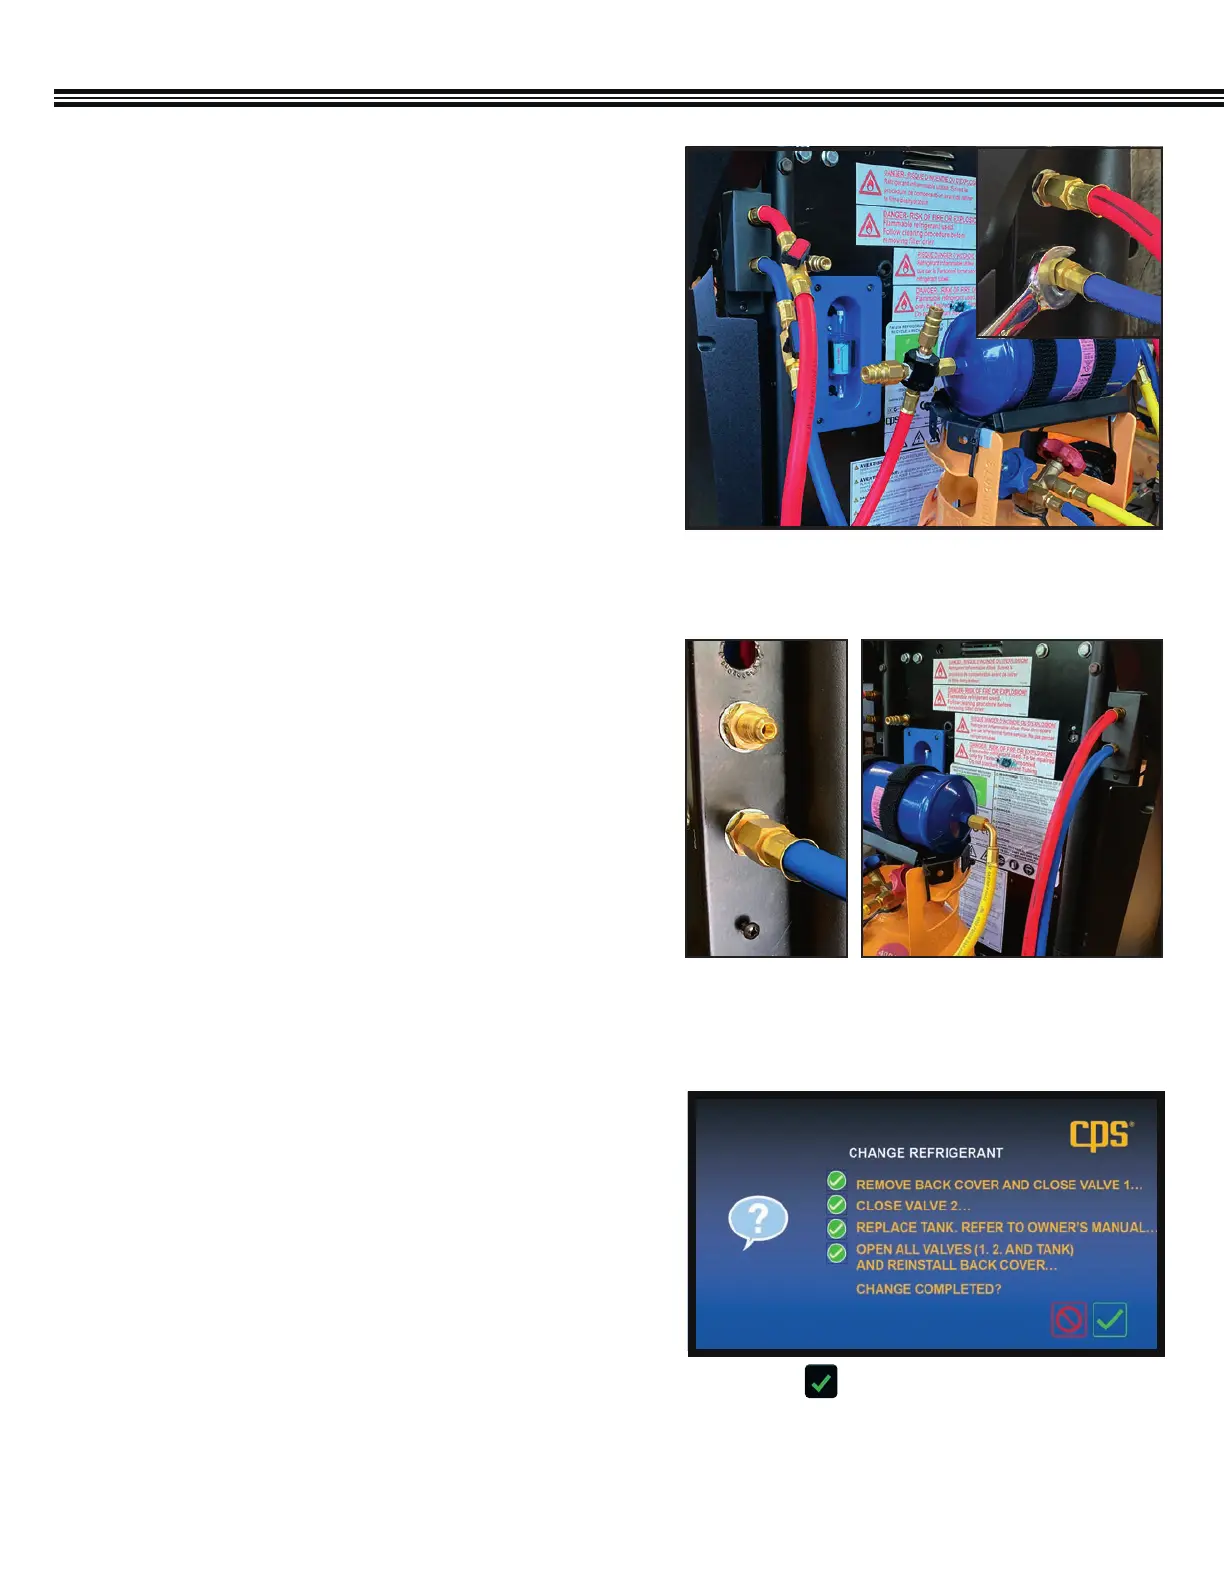
1. Disconnect Tank from the MX3030
Once the the refrigerant is purged, disconnect the tank
from the MX3030 unit:
1. Using a Philips head screwdriver, remove the hose
bracket cover (Figure 1) located on the left-side of
the back of the unit.
2. Then, using a
9
⁄16” wrench, disconnect both the tank’s
liquid feed hose (red) and the vapour return hose (blue)
from the unit. (Figure 1; inset)
2. Connect New Hoses to Unit and Tank Filter Bracket
After the old tank has been removed:
1. Using a
9
⁄16”wrench, connect the new hoses to the
¼” SAE Male brass fittings (Figure 2) located on the left
side of the unit (red hose on top, blue hose on bottom)
2. Then, attach the red hose to the filter bracket and the
blue hose to the new tank.
3. Open all valves to check for leaks.
CPS is not responsible for lost refrigerant.
3. Replace the Service Hoses
Service hoses are located on the right-side of the back of
the unit, again, red (top), blue (bottom). (Figure 3)
1. Using a Philips head screwdriver, remove the hose
bracket cover.
2. Disconnect the service hoses with a
9
⁄16” wrench and
attach the new service hoses.
3. Once attached, re-install the hose bracket cover.
4. Refer back to screen as the unit goes through the
Refrigerant Identification process to ensure proper
changeover. (Figure 4)
Fig 1: Disconnect hoses on the left side, back of
the MX3030 unit.
Fig 2: 1/4” SAE
Male fittings
Fig 3: Service hoses attached to
right-side, back of unit.
Change Refrigerant Confirmation Screen
Fig 4: Select to confirm that all steps have been
completed so that the unit can run through the
refrigerant identification process.
 Loading...