EasyManuals Logo
Home>Creality>3D Printers>CR-10 Smart

Creality CR-10 Smart User Manual

Creality CR-10 Smart
36 pages
To Next Page IconTo Next Page
To Previous Page IconTo Previous Page
Page #8 background imageLoading...
Page #8 background image
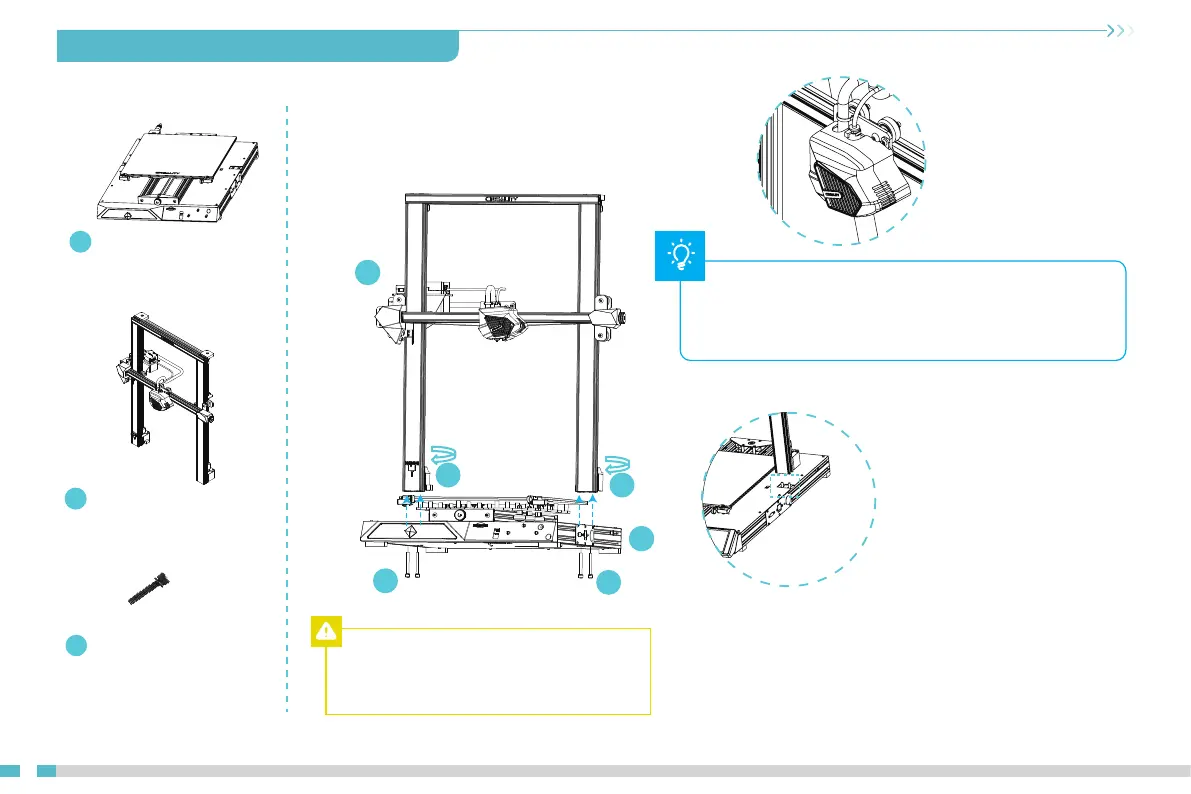
4. Install the Gantry Frame 安装龙门架
Twist the coupling to raise the X axis
to the position shown in Figure 16.
拧动联轴器使X轴上升到如图16所示位置。
Two Z-axis profiles, installed on the
inner step of the Y-axis bottom profile.
两根Z轴型材,靠Y轴底部型材内侧台阶安装。
9
M5x45 Sems Screw
M5x45组合螺丝
×4
x 1
Gantry Frame|龙门架
2
x 1
Base Frame|底座
1
Fix the lines on the nozzle kit with a black rolling belt as shown
in the figure and re-fix it if any re-assembly before operation.
喷头组件上的线使用黑色轧带和卡扣固定,如图。
若是拆装后使用前请重新固定。
9
9
16
16
2
1
04

Questions and Answers:

Question and Answer IconNeed help?

Do you have a question about the Creality CR-10 Smart and is the answer not in the manual?

Creality CR-10 Smart Specifications

General IconGeneral
BrandCreality
ModelCR-10 Smart
Category3D Printers
LanguageEnglish

Related product manuals