EasyManuals Logo

Creality CR-6 SE User Manual

Creality CR-6 SE
24 pages
To Next Page IconTo Next Page
To Previous Page IconTo Previous Page
Page #12 background imageLoading...
Page #12 background image
Power Adapter
电源线
x 1
5
5
Z1
Z2
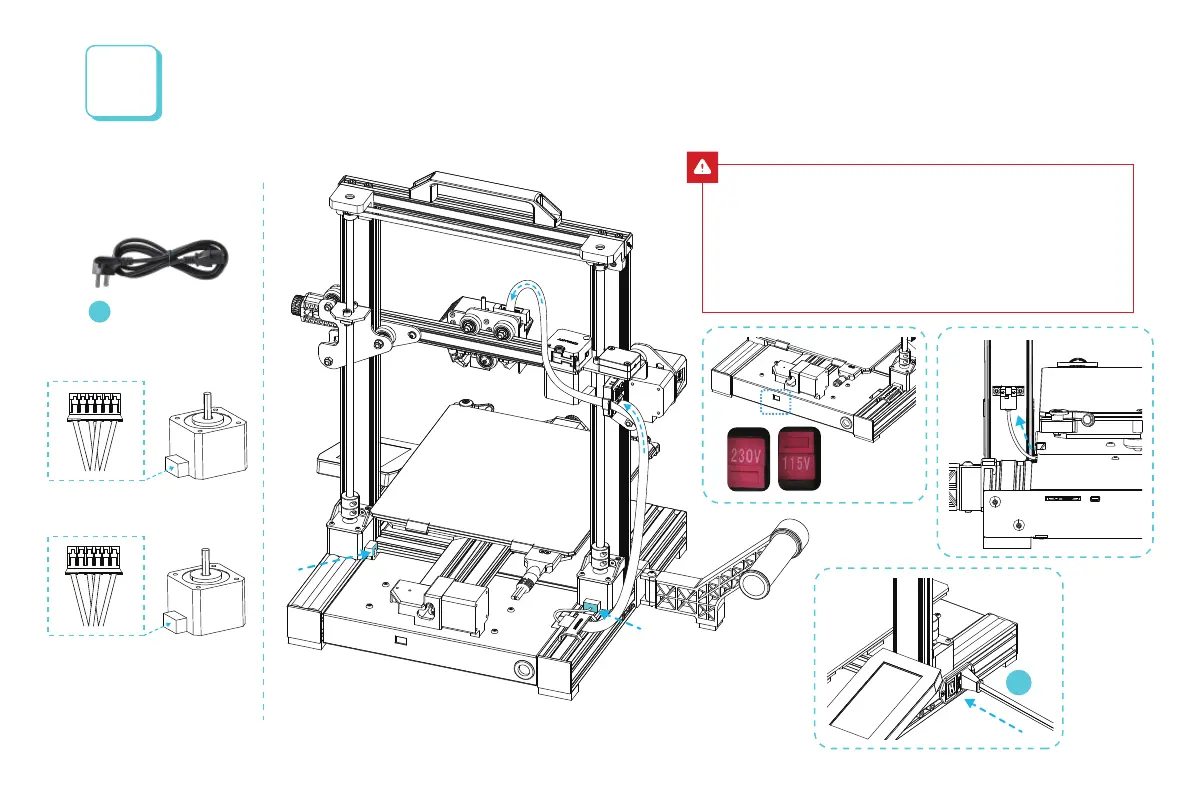
2 Connect the extruder adapter board with 14pin port as shown 按图示14pin端口连接挤出机转接板
3 Connect Z-axis motor cable 连接Z轴电机线 4 Connect the photoelectric switch wire 连接光电开关线 5 Connect the power cord 连接电源线
1 Connect the 16pin port to the nozzle adapter board as shown in the figure
按图示16pin端口连接喷头转接板
Cable Connection
设备接线
6
Caution
Select the correct input voltage to match your local mains (115/230V)
Damage can occur if voltage is set incorrectly.
Connect the power cord and turn the power switch to 1 to turn it on.
Do not connect or disconnect the cables when the machine is powered on.
选择正确的输入电压以匹配您的本地电源(115/230V)
如果电压设置不正确,可能会造成损坏。
连接电源线并将电源开关拨至1档即可开机
当机器通电时,请勿连接或断开连接线。
1
2
3
4
5
Z2
Z1

Questions and Answers:

Question and Answer IconNeed help?

Do you have a question about the Creality CR-6 SE and is the answer not in the manual?

Creality CR-6 SE Specifications

General IconGeneral
Build Volume235 x 235 x 250 mm
Layer Resolution0.1 - 0.4 mm
Printing Speed80 - 100 mm/s
Filament Diameter1.75 mm
Nozzle Diameter0.4 mm
ConnectivitySD card, USB
Supported MaterialsPLA, ABS, PETG, TPU
Frame MaterialAluminum
Display4.3-inch Color Touchscreen
Max Nozzle Temperature260°C
Max Bed Temperature110°C
Machine Dimensions442 x 462 x 540 mm
Resume Print FunctionYes
LevelingAutomatic

Related product manuals