- 8 -
- 9 -
Hardware Installation
1. Take out the feeder, pay attention to the order between left and right feeder.
2. Mount the feeder fixing hole on the back the chassis.
3. Tighten the screw nut firmly with a wrench.
4. Tighten the joint nut firmly on the feeder.
5. Plug in the motor cable to the socket.
6. Install spool's holders.
7. Install rack sleeve, you can download it from our website.
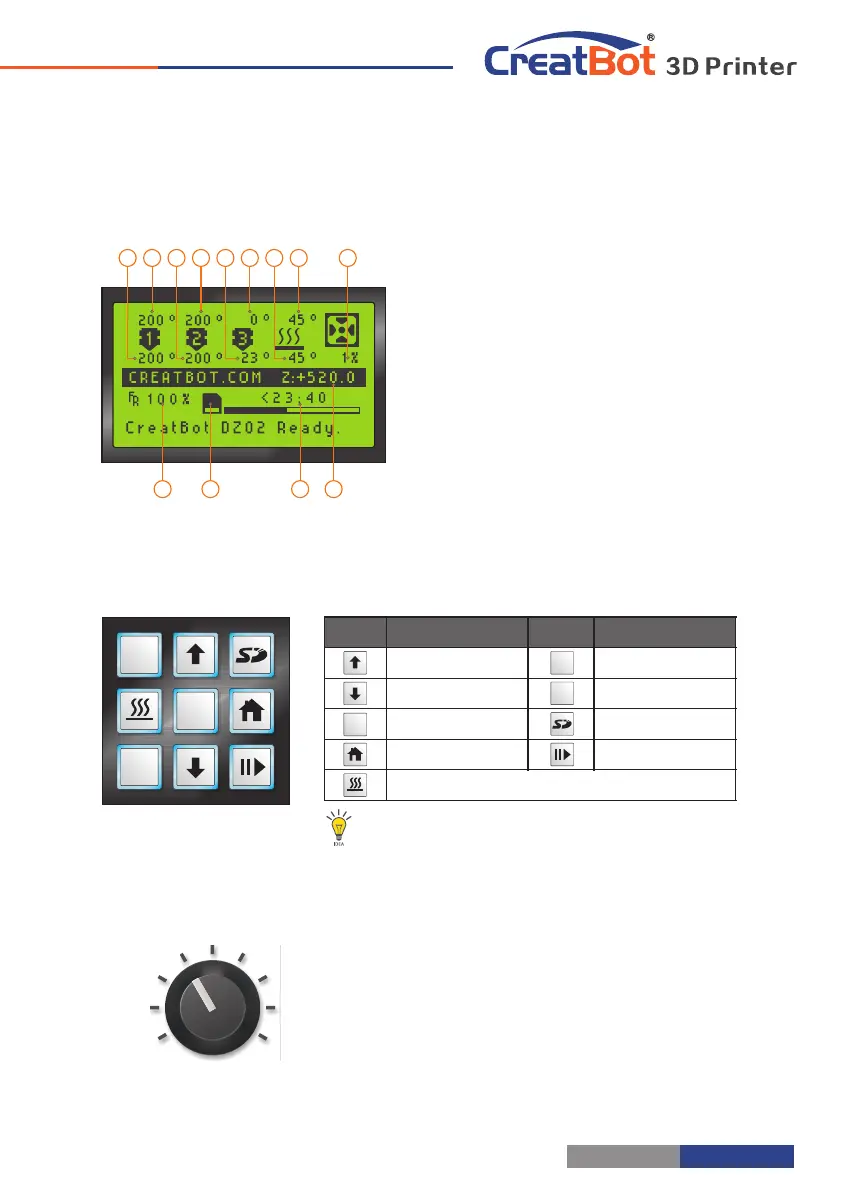
Install Feeder LCD Display
Notice: Feeder must same order to the nozzle.
1. Current temp. 1
2. Target temp. 1
3. Current temp. 2
4. Target temp. 2
5. Current temp. 3
6. Target temp. 3
7. Cur. hotbed temp.
8. Tar. hotbed temp.
9. Fan speed
10. Cur. Z position
11. Remaining time
12. SD card icon
13. printing speed
13 11 10
986421 3 5 7
12
Printer Operation
OK
+
Z
-
Z
Preheat nozzle/bed, and switch between them
OK
-
Z
+
Z
Keypad
PUSH
Knob
1. Push knob to confirm, rotate to move up down.
2. Ratate knob can change global print speed.
Notice: Up/ Down can change global print speed.
Fixed feeder
Connect joint
Install spool's holders
Plugin cable