Setting Up Your NOMAD Jukebox 2-3
Step 3: Install Software
1. At the Creative PlayCenter 2 setup screen,
the applications to be installed are selected
by default. Click the
OK
button to start the
installation.
The
Creative On-line Registration
dialog box appears.
2. Click the
Next
button to register so
Creative can keep you updated on the
latest developments for NOMAD
Jukebox.
3. Follow the instructions on the screen to
continue with the installation.
4. When prompted to restart your system,
leave the CD in the CD-ROM drive, select
the
Yes, I want to restart my computer
now
option and then click the
Finish
button.
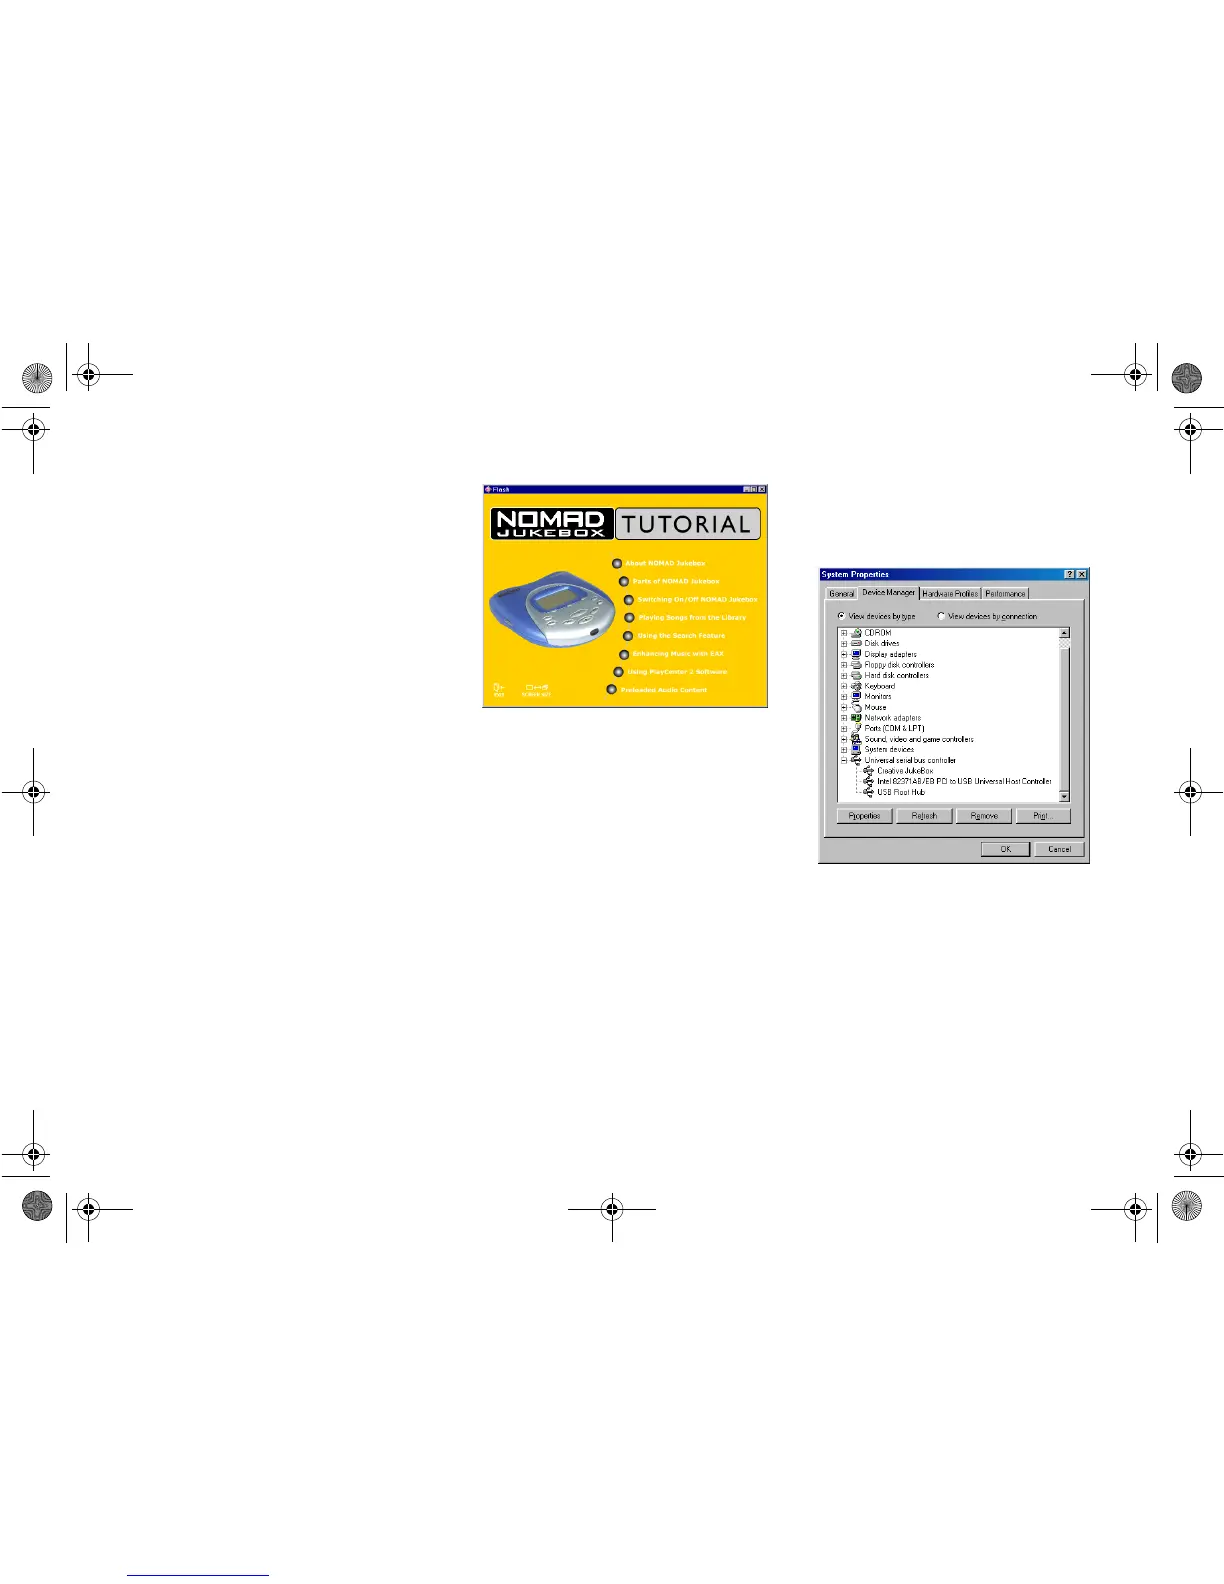
Step 4: Run Jukebox
Tutorial
1. After restarting your computer, you will
be prompted to run the NOMAD Jukebox
Tutorial.
2. Click the
Ye s
button to run it.
Step 5: Verify
NOMAD Jukebox
Driver Installation
1. Click
Start
->
Settings
->
Control Panel
.
2. In the
Control Panel
window,
double-click the
System
icon.
3. In the
System Properties
dialog box,
click the
Device Manager
tab.
4. In the
Device Manager
tabbed page,
double-click
Universal Serial Bus
controllers
, and then check that
Creative
NOMAD Jukebox
is present as shown in
Figure 2-4 below.
Figure 2-3: NOMAD Jukebox Tutorial.