Using Your NOMAD Jukebox 3-9
Creating and Saving an Audio Recording
A neat feature of NOMAD Jukebox is its ability to record hours of audio
using an attached microphone.
With the Jukebox, you can now easily
record your important lectures and interviews in digital format.
Noise may occur from the rear speakers while you are creating
a recording but it will NOT be captured in the recording.
Disconnect the rear speakers attached to Line Out Jack 2 from
your NOMAD Jukebox if noise occurs.
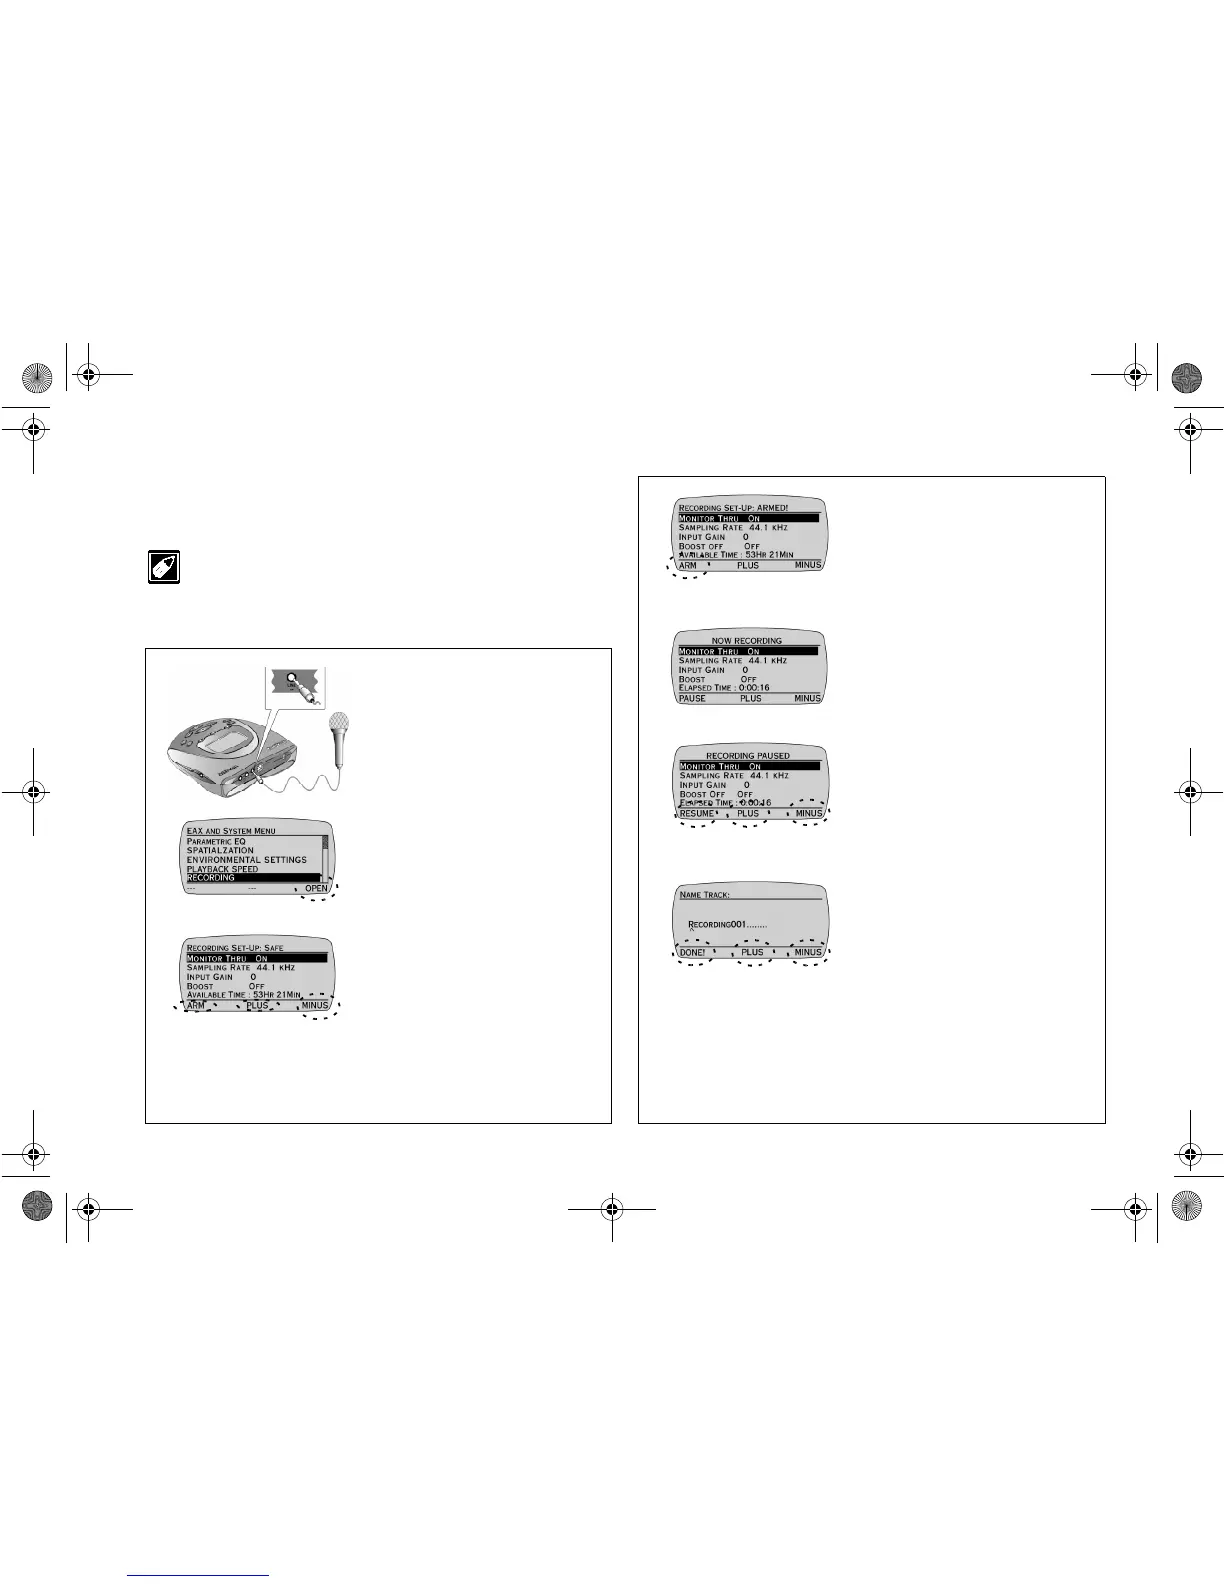
Ensure that you are in EAX AND SYSTEM MENU before proceeding.
1. Connect a pre-amplified
microphone or other sources
e.g. MD line-out to the
Jukebox’s LINE IN jack.
Note:
A pre-amplified microphone
must be used for recording.
2. Press the
SCROLL
UP
/
DOWN
buttons to select
RECORDING.
3. Press
OPEN
.
4. Press the
SCROLL
UP
/
DOWN
buttons to select a
setting for adjustment.
5. Press
PLUS
or
MINUS
to
adjust the setting.
6. Press
ARM
to go to recording
standby state.
Note:
To hear what you are
recording, set MONITOR THRU to
ON. To begin recording without
making any adjustments to recording
settings, skip Steps 5 and 6.
7. Press the
PLAY
button to begin
recording.
Note:
You can make real-time
adjustments to the record settings while
recording by following Steps 5 and 6.
8. Press the
STOP
button or
PAUSE
to pause recording.
9. Press
RESUME
to continue
recording or press
DISCARD
to delete the recording.
10. Press
SAVE
to save the
recording.
11. Press
PLUS
or
MINUS
to
change the letter and then press
the
SCROLL UP
/
DOWN
buttons to move the letter entry
position.
12. Press
DONE!
to save the
recording.
NJb.book Page 9 Friday, August 11, 2000 10:08 AM