STEERING-HYDROGEAR
73
To remove/ replace the front axles:
1. Lift and safely support the front of the tractor.
2. Remove the front wheel by following the proce-
dures the front wheel section of this chapter.
3. Remove the steering gear covers.
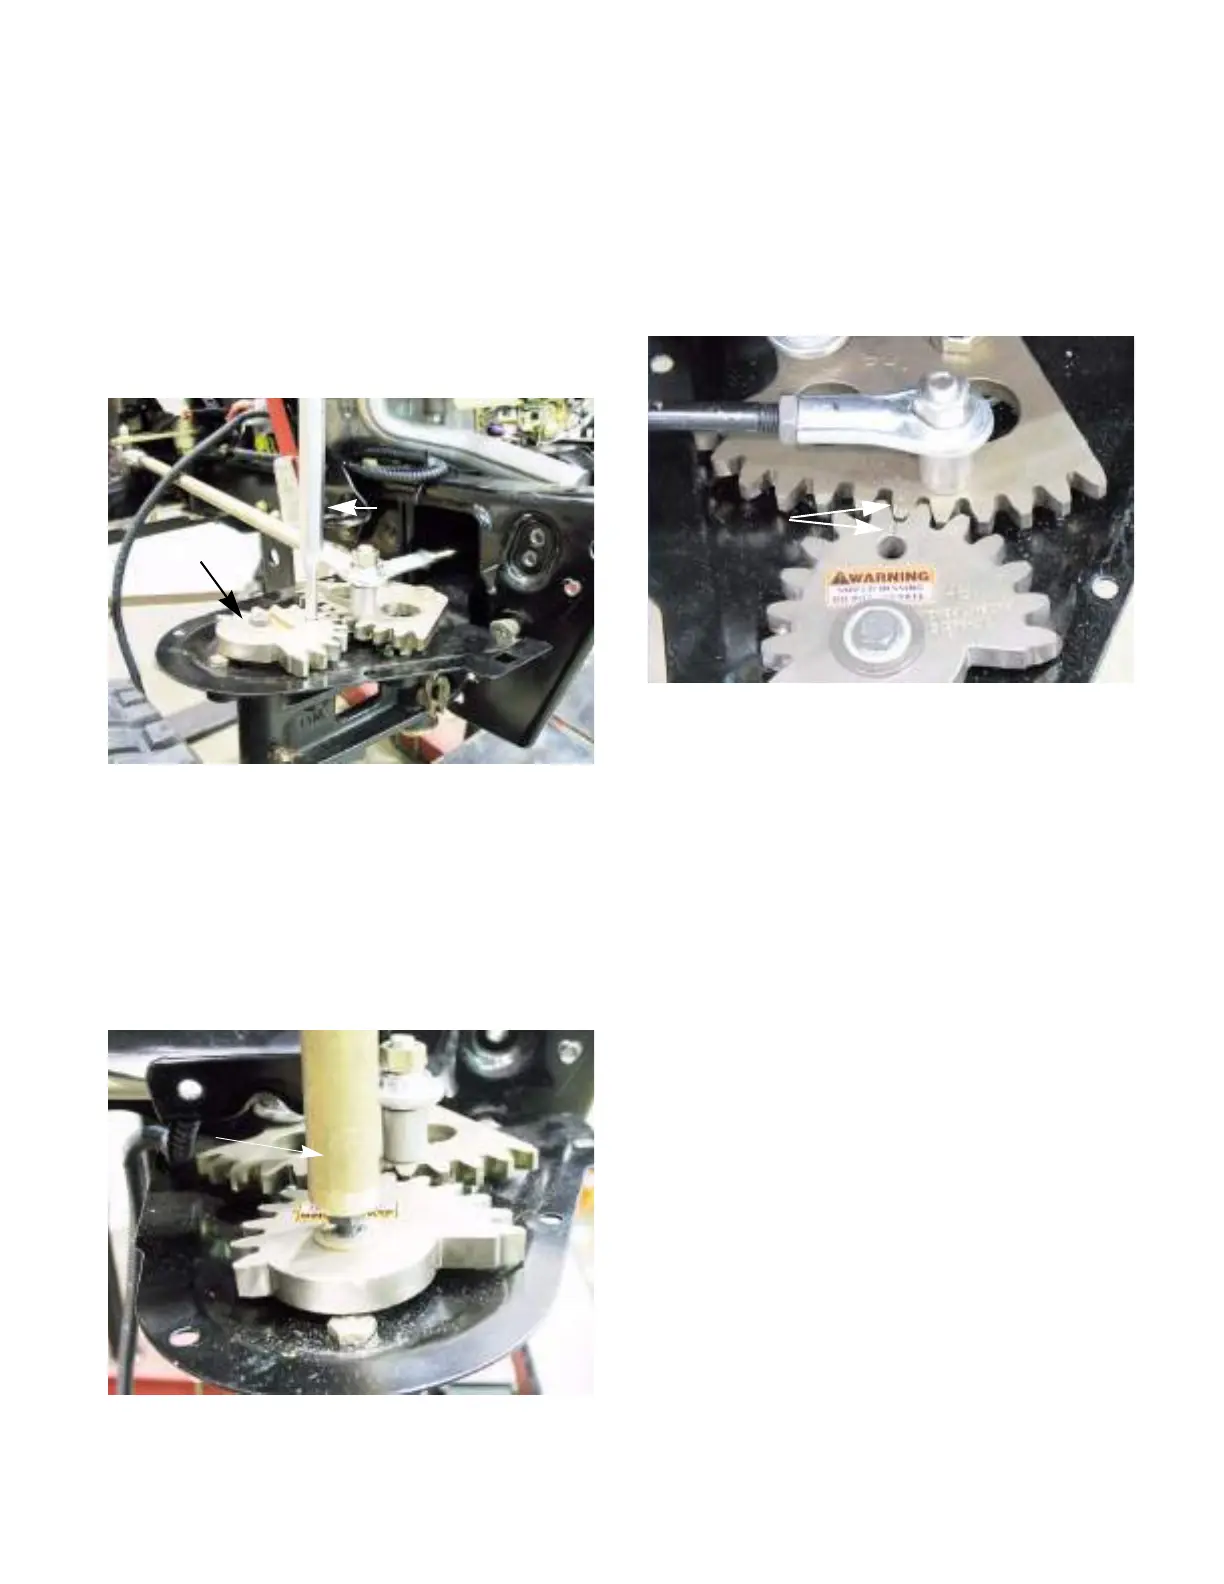
4. Insert a 5/16” pin punch into one of the align-
ment holes to lock the steering gears in place.
See Figure 6A.82.
5. Loosen the bolt that holds the outboard steering
gear to the axle. Back the bolt half way out.
NOTE: The axle had a tapered double-D shaft.
The steering gear will be very tight on the shaft.
6. Strike the bolt head, using a brass punch and a
hammer. This will loosen the axle from the out-
board steering gear. See Figure 6A.83.
Figure 6A.82
Pin punch
Steering gear
Figure 6A.83
Brass punch
7. Take the bolt all the way out.
NOTE: The axle should fall out at this point.
8. Install the axle by following the previous steps in
reverse order.
NOTE: Align the timing marks when installing
the outboard steering gear. See Figure 6A.84.
9. Test drive the tractor in a safe area before
returning it to service.
Figure 6A.84
Timing marks
 Loading...