92
93
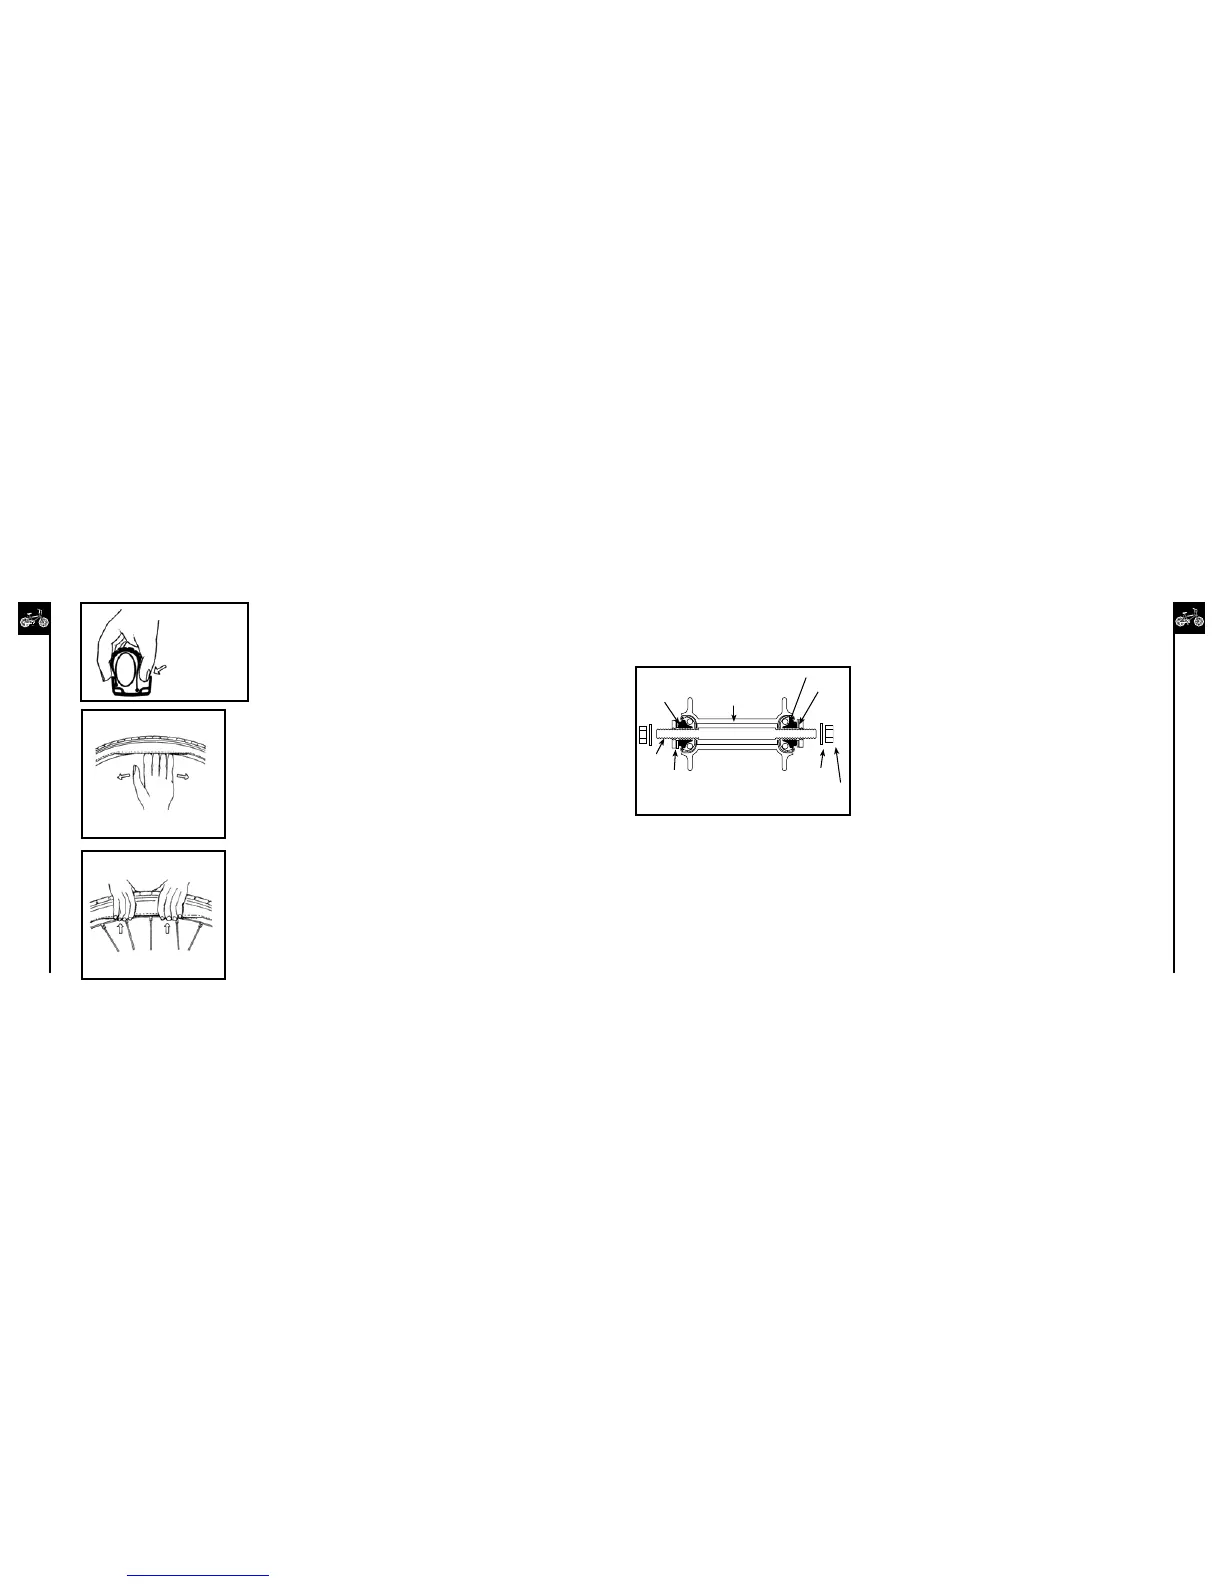
Remove tire bead from the rim.
Pull tire back onto the rim.
15. Using a hand pump, inflate the tube until the tire begins to take shape. Spin the wheel and watch the tire mold lines. They
should be evenly spaced from the edge of the rim all the way around the wheel. When properly seated, fully inflate the tire to
the pressure marked on the sidewall. Use a tire air pressure gauge to check
16. Replace the wheel into the frame checking that all gears, brakes and quick release levers are properly adjusted.
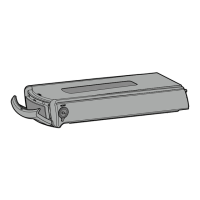
Hub Bearing Adjustment
When checked, the hub bearings of either wheel will require
adjustment if there is any more than slight side play.
1. Check to make sure neither locknut is loose.
2. To adjust, remove wheel from bicycle and loosen the locknut on
one side of the hub while holding the bearing cone on the same
side with a flat open end wrench.
3. Rotatetheadjustingconeasneededtoeliminatefreeplay.
4. Re-tightenthelocknutwhileholdingtheadjustingconeinposition.
5. Re-check that the wheel can turn freely without excessive side
play.
How To Fix a Flat Tire
If you need to repair a tire, follow these steps:
1. Remove the wheel from the bicycle.
2. Deflate the tire completely via the valve. Loosen the tire bead by
pushing it inward all the way around.
3. Pressonesideofthetirebeadupovertheedgeoftherim.Note:Use
plastic tire levers, not a screwdriver, otherwise you may damage the rim
and tire.
4. Removethetube,leavingthetireontherim.
5. Locate the leaks and patch using a tube repair kit, carefully following the
instructions, or replace the tube. Note: Ensure that the replacement tube
size matches the size stated on the tire sidewall and that the valve is
the correct type for your bicycle.
6. Match the position of the leak in the tube with the tire to locate the
possible cause and mark the location on the tire.
7. Remove the tire completely and inspect for a nail, glass, etc. and
remove if located. Also inspect the inside of the rim to ensure there are
no protruding spokes, rust or other potential causes. Replace the rim
tape which covers the spoke ends, if damaged.
8. Remount one side of the tire onto the rim.
9. Using a hand pump, inflate the tube just enough to give it some shape.
10. Place the valve stem through the hole in the rim and work the tube into
the tire. Note: Do not let it twist.
11. Using your hands only, remount the other side of the tire by pushing the
edge oward the center of the rim. Start from the opposite side of the
valve and work around the rim.
12. Before the tire is completely mounted, push the valve up into the rim to
make sure the tire can sit squarely in position.
13.Fittherestofthetire,rollingthelast,mostdifficultpartonusingyour
thumbs. Note: Avoid using tire levers as these can easily puncture the
tube or damage the tire.
14.Checkthatthetubeisnotcaughtbetweentherimandthetirebeadatany
point.
Lock
Washer
Axle
Lock Nut
Hub Body
Ball Bearings
Bearing
Cone
Washer
Axle Nut
Push tire bead
into the center
of the rim.