104
105
Standard Crank Replacement:
1. Replace the crank arm onto the axle.
2. Tap the crank arm lightly with a mallet.
3. Refitthewasherandtightenflangenutorboltsecurelytoa
torque of 27Nm.
4. Replacethedustcover
Adjustment After Use:
1. Remove dust cap.
2. Tap the crank arm lightly with a mallet.
3. Re-tightentheflangenuts,andrefitthedustcaps.
New cranks may become loose with initial use.
Perform the following task after several hours of
riding, and repeat it two or three times after further
use. Cranks should then remain tight.
Tighten the flange nut.
Replace the dust cap.
Position the crank on the axle.
Lightly tap the crank
onto the axle.
Screw in the removal tool.
Turn the screw bolt
clockwise.
!
Lubrication and Adjustment
To adjust the free play in a three piece type bottom bracket, loosen the
lockring on the left side by turning it counter-clockwise, then turn the
adjusting cup as required. Re-tighten the lockring taking care not to alter
the cup adjustment.
To disassemble:
1. Remove the cranks from the axle.
2. Remove the left side lockring by turning it counter-clockwise.
3. Removetheadjustingcupbyturningitcounter-clockwise.
4. Removetheleftballretainerandslidetheaxleoutoftheframe
to the left.
5. Remove the right side fixed cup by turning it counter-clockwise
and remove the right ball retainer. Clean and inspect all bearing
surfaces and ball retainers, and replace any damaged parts.
Pack the ball bearing retainers with grease, then re-assemble in
reverse of the above procedure.
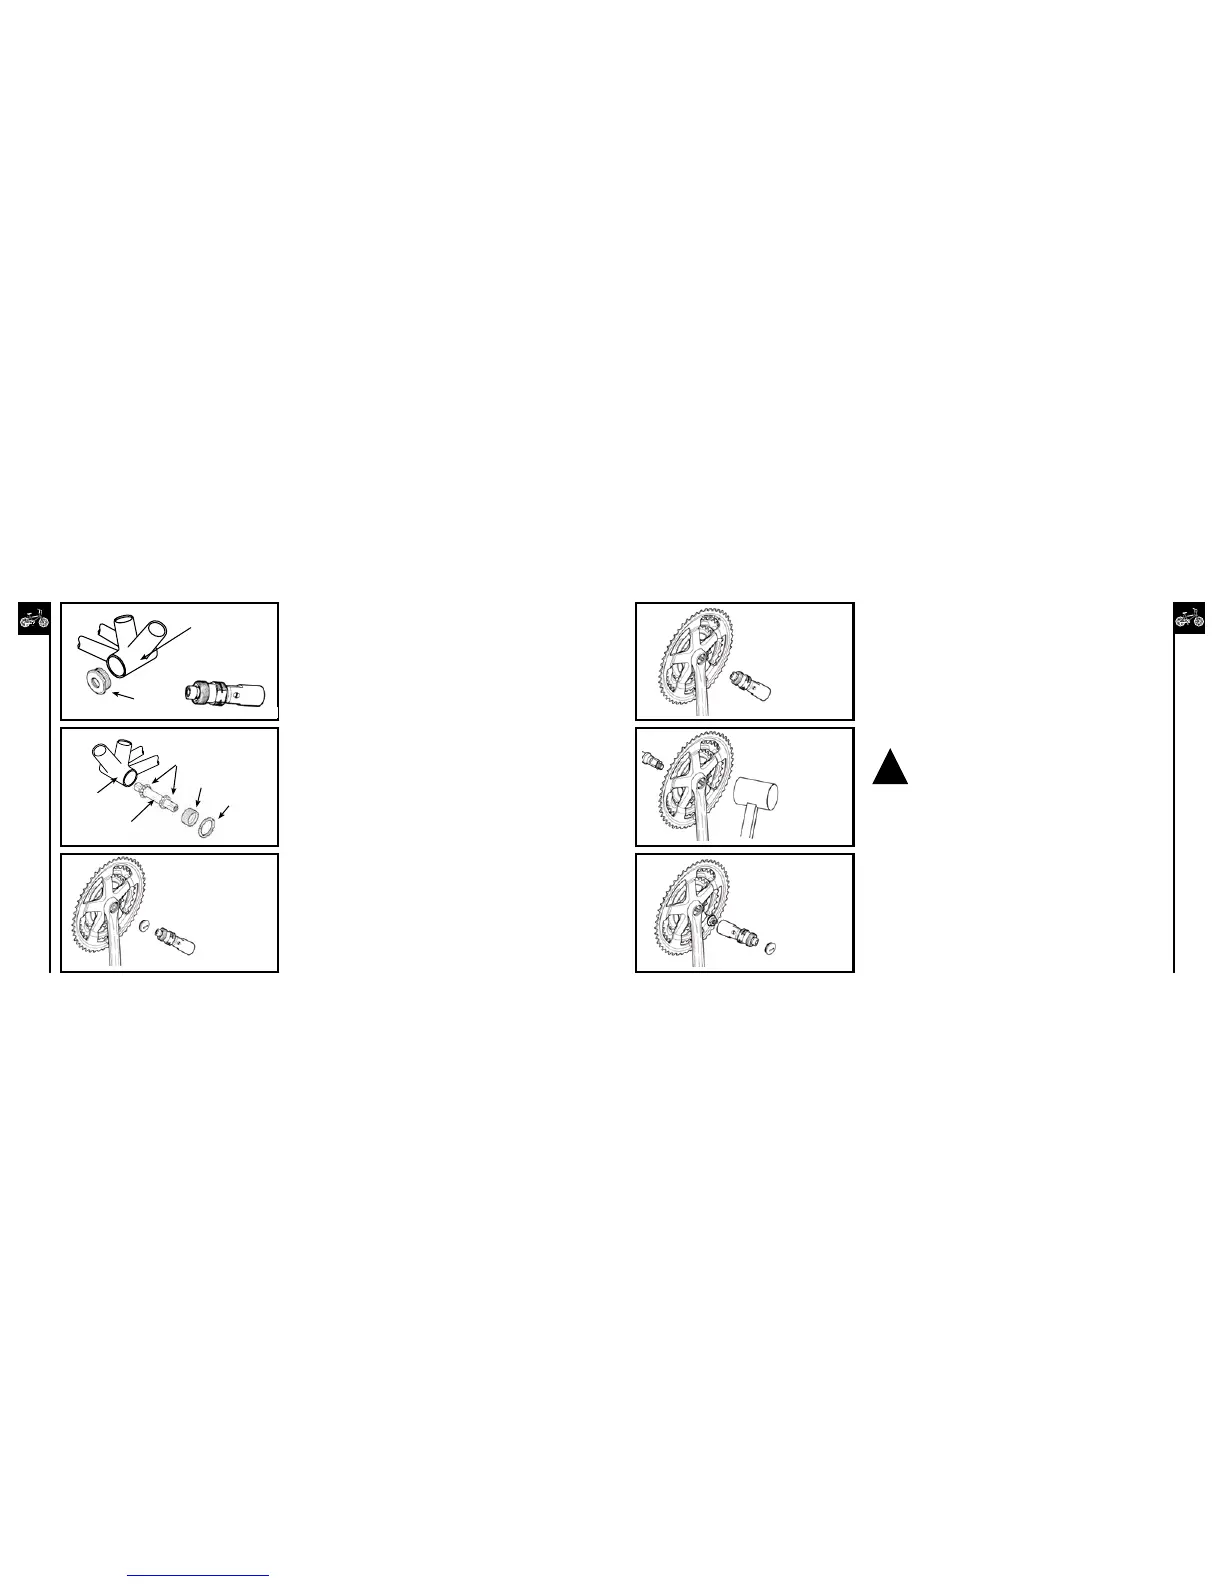
Standard Crank Removal
To remove cotterless cranks use the following procedure.
Note that a special tool will be required.
1. Remove the dust cap with a coin or screwdriver.
2. Loosen the flange nut or bolt and washer, and remove.
3. Screwtheremovingtoolintothecrankandtighten.
4. Turnthescrewboltdownuntilthecrankcomesawayfromthe
axle.
Remove the dust cap.
Loosen and remove
the flange nut.
Fixed Cup
Ball Retainer
Axle
Adjusting Cup
Lockring
Bottom Bracket
Shell
Bottom Bracket
Standard Crank removing tool