32
Curtis PMC 1204/1205 Manual
2. Use an ohmmeter to check the resistance between
the controller’s A2 and B+ terminals. You are testing
for the presence of a diode inside the controller, so
swap the two leads of the ohmmeter and look for a
low resistance one way and a much higher one the
other way. If your meter has a diode test function,
use it.
3. If you find the diode to be shorted, the controller is
defective.
4-H Put the A2 cable back on the controller and reconnect the battery.
4-I If the plug diode is okay, there is a short in the motor circuit. The
short could be in the forward/reverse switch, so look there first.
Because the resistance of the motor is so low, the motor must be
tested separately if it is suspected of having a shorted winding.
BENCH TESTING
First, before starting any bench testing, pick up the controller and shake
it. If anything rattles around inside, the unit should be returned.
Protect yourself during bench testing. Wear safety glasses and use
insulated tools.
Equipment Needed
The simple setup shown in Figure 20 is required for testing these
controllers on the bench. You will need:
1. a POWER SUPPLY with a voltage equal to the rating of the
controller you want to test. You can use either a string of batteries
or a regulated line-operated power supply. Because only low
power tests will be described, a 10 amp fuse should be wired in
series with the batteries to protect both operator and controller
against accidental shorts. A battery charger alone should not be
used as a power supply, because without a battery load its output
voltage may exceed the rating of the controller.
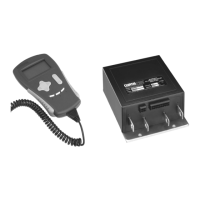
2. an ACCELERATOR POTBOX. For controllers with the
standard input configuration (a 5 kΩ pot wired as a two-terminal
rheostat), a Curtis PMC potbox or any 5 kΩ pot will work fine.
TROUBLESHOOTING & BENCH TESTING
☞
CAUTION
 Loading...