6.5
WARNING:
Before proceeding with the upgrade procedure, set
the “Service” value for the “Emulation” parameter (see
chapter 5).
During communication between PC and device for the
communication cable or to remove the power supply of
the devices not to endanger the proper functioning of
the machine.
NOTES:
of the web site www.custom.biz
Install on the PC used for device upgrading the UP-
GCEAERO software available in the download area of
the web site www.custom.biz.
Update via serial interface
Proceed as follows:
1. Write down the product code (14 digits) printed on the
product label (see par.2.5).
2. Go to the web site www.custom.biz and download the
area.
3. Print the SETUP report (see chapter 5).
4. Switch OFF the device.
5. Connect the device to the PC using a serial cable (see
par.3.3).
6. Switch ON the device.
7. Launch the software UPGCEAERO.
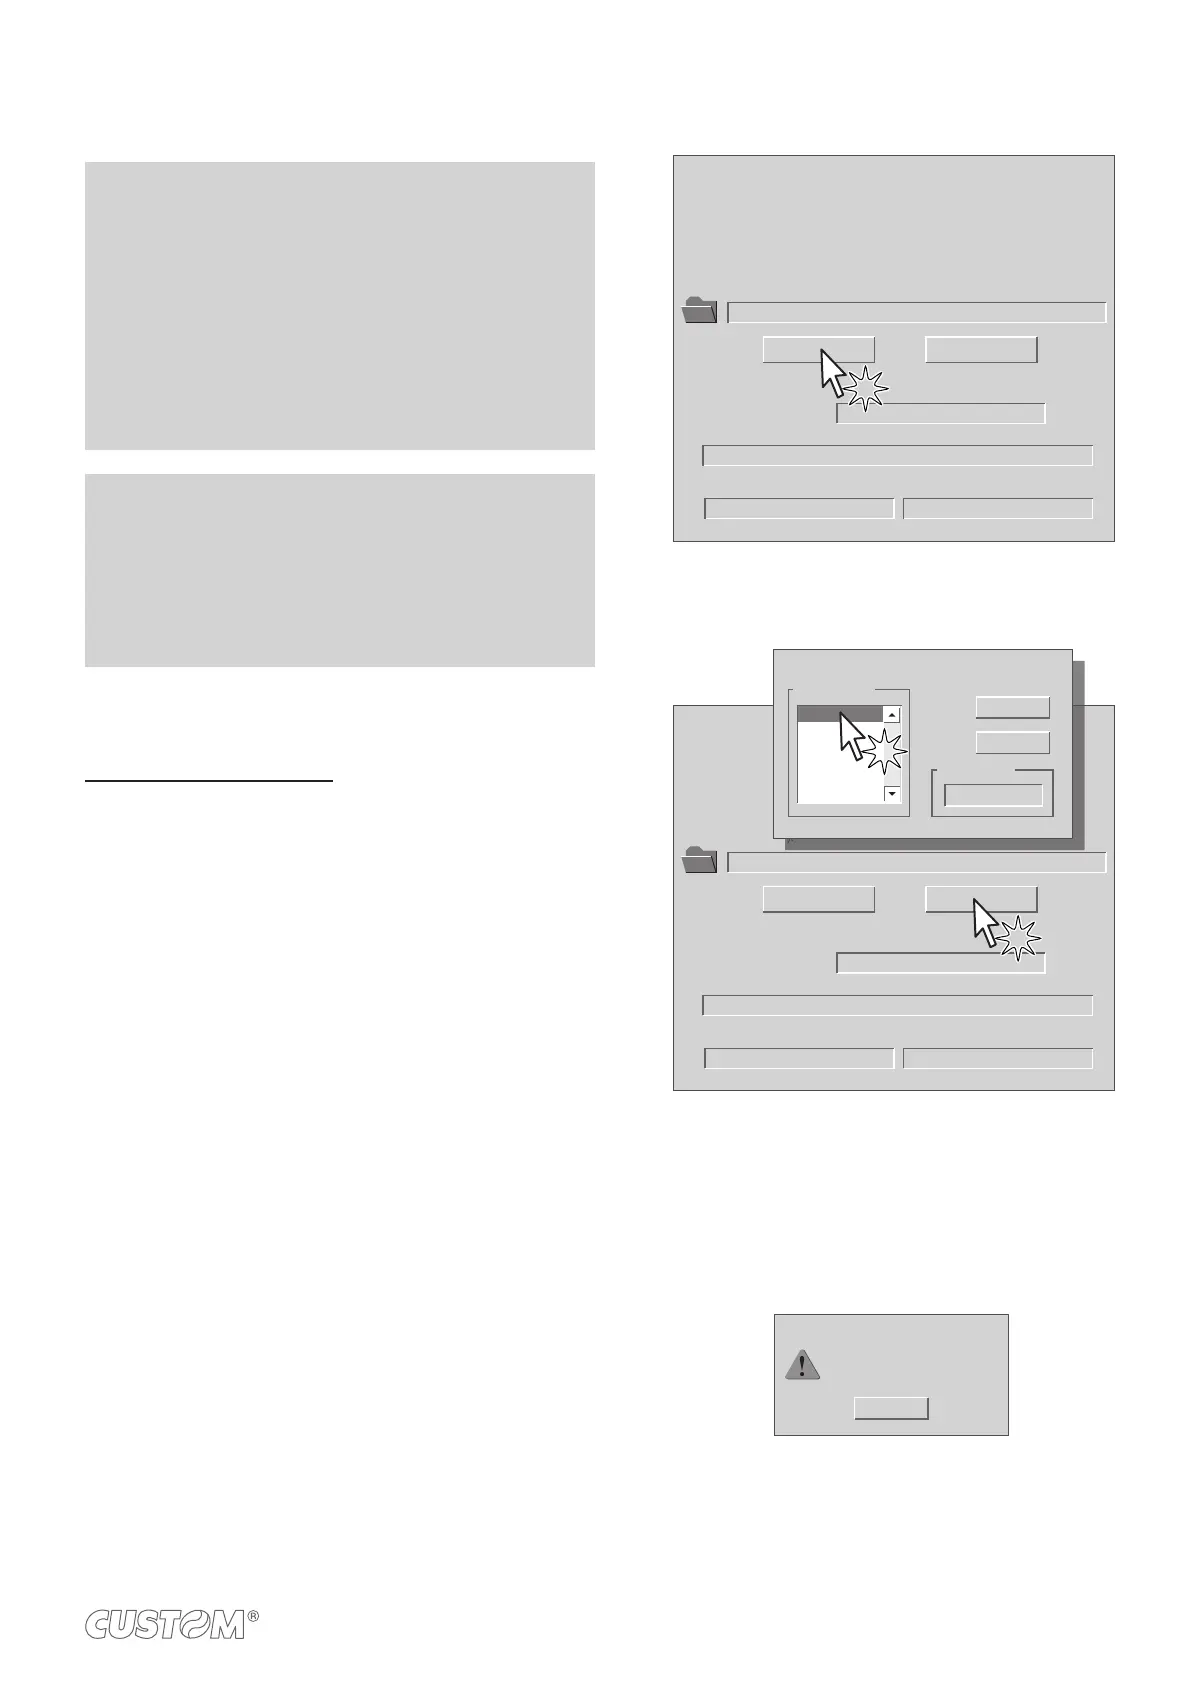
8. Select the up
Data flush status...
Upgrade status:
No upgrade thread active...
Port config:
Communication port not init
Firmware rel.:
Hardware rel.:
PSW Version :
File [*.cfg] :
Printer type:
Select port:
None
None
None
None
None
None
File (*.psw):
Select (*.psw): Begin upgrade
9. Select the serial communication port (e.g. COM1):
Data flush status...
Upgrade status:
No upgrade thread active...
Port config:
Communication port not init
Firmware rel.:
Hardware rel.:
PSW Version :
File [*.cfg] :
Printer type:
Select port:
None
None
None
None
None
None
File (*.psw):
C:\<device>.PSW
Select (*.psw): Begin upgrade
COM1
COM2
COM3
COM4
COM5
COM6
Select the system communication port
Available port
Selected port
COM1
OK
Cancel
10. Detecting and setting of the parameters necessary for
serial communication are performed automatically and
then updating begins.
11. After a few minutes a message on the screen warns
that the update is completed.
Upgrade OK
OK
Upgrade succesfully completed.
12.
release (see chapter 5).
77