5. After use, remove the e-stop key from the treadmill.
The e-stop key can be removed to help prevent unauthorized use. Refer to the Stopping the Treadmill
section in the Operation chapter for more information about the e-stop key.
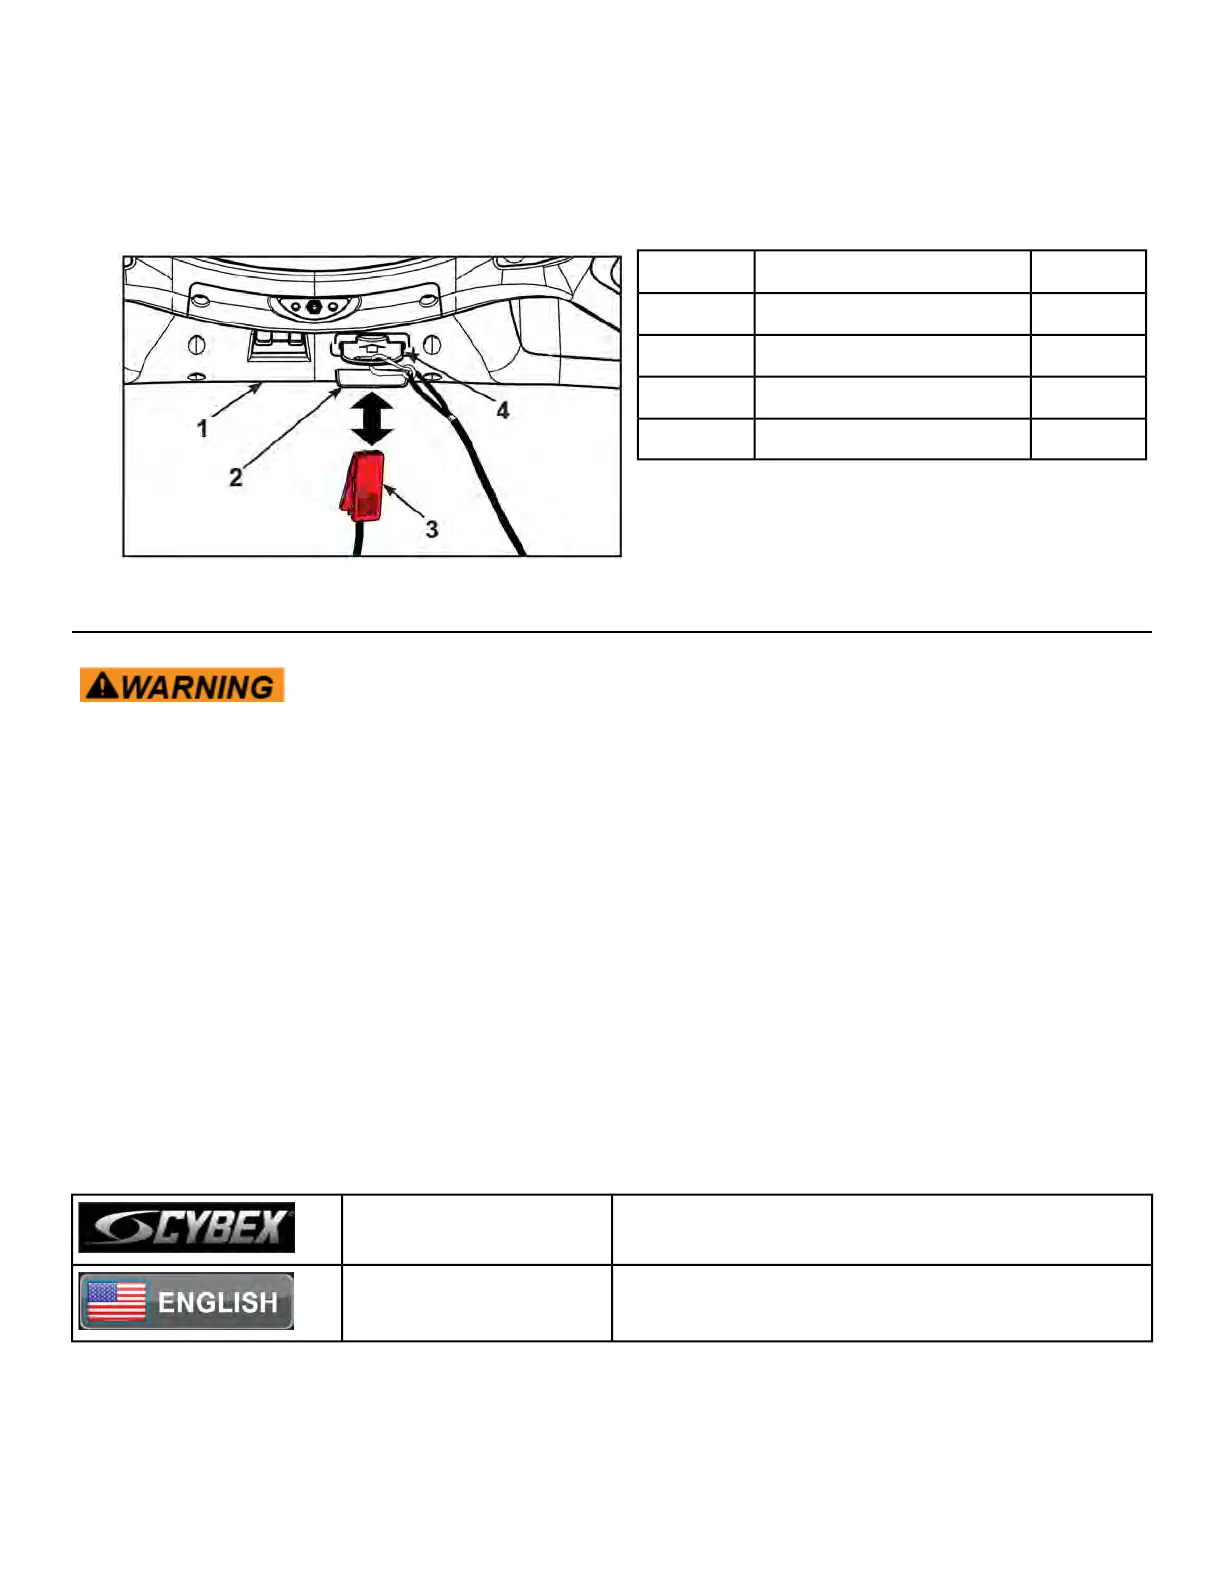
When not in use store the e-stop clip on the storage tab located on the lower cover.
Qty.DescriptionItem
1Lower cover1
1Storage tab2
1E-Stop clip3
1E-Stop4
Setup
Use the following instructions to setup the unit.
Falling hazard. When starting unit
• Stand on two top steps.
• Do not stand on belt.
Cybex recommends that the treadmill be unplugged or the on/off (I/O) power switch turned off (O) when
it is not in use.
1. Without anyone on the treadmill, plug the power cord into a power outlet from a grounded, dedicated
circuit.
Ensure the power cord is not being pinched under the front of the treadmill.
2. Toggle the on/off (I/O) power switch to the on (I) position. The on/off (I/O) power switch is located
under the front end of the unit, or on the front right side panel.
3. The control panel will light up.
Initial setup
Initial setup only occurs during the installation of the unit. Once complete, refer to Setup Options below.
Press and hold Cybex logo for 6 seconds to access
Screen Lock and Toolbox.
CYBEX LOGO
Press and hold language logo for 6 seconds to ac-
cess Screen Lock and Toolbox.
LANGUAGE ICON
1. Tap the Access Toolbox icon to display the Access to Toolbox login screen.
Page 33 of 261
Cybex 770T/790T Treadmill Part Number

 Loading...


