Cybex Pro+ Treadmill Service Manual
Preventive
Maintenance
Page 2-4
2. Center the belt.
NOTE: While centering the belt choose one bolt to adjust. Do not adjust both bolts.
With the treadmill running at 5 mph (8 kph) observe the running belt. If the belt tracks off center to A.
the right or left the deck will become exposed. Use a 3/4” socket wrench to tighten the rear roller
bolt on the side of the treadmill toward which the belt is moving. For example: If the belt moves to
the right and the deck becomes exposed on the left, tighten the bolt on the right side of the frame,
tighten about 1/2 of a turn (clockwise) and wait 30 seconds. If the belt does not move back to the
center of the treadmill, make another adjustment to the same bolt. Once the running belt has
been adjusted closer to the center of the treadmill use about 1/4 of a turn until the belt has been
stabilized.
After the belt has been centered, check the belt tension again. Make sure the running belt tension B.
is tight enough so that the belt does not slip or hesitate when stepped on. Refer to step 1E.
Checking the Belt and Deck Surfaces – The running belt and deck should be checked periodically for
any excessive wear. In an effort to make sure that the running belt operates properly, visually inspect the
belt often to make sure that there are no tears or fraying in the belt material.
Inspect the edges of the belt as described below. NOTE: It is necessary to remove the motor cover and
plastic side panels.
Tools Required
Phillips screwdriver•
Dry towel•
1. Disconnect the external power source.
Turn the main power switch on the left side to the off (O) position.A.
Unplug the treadmill from the power outlet.B.
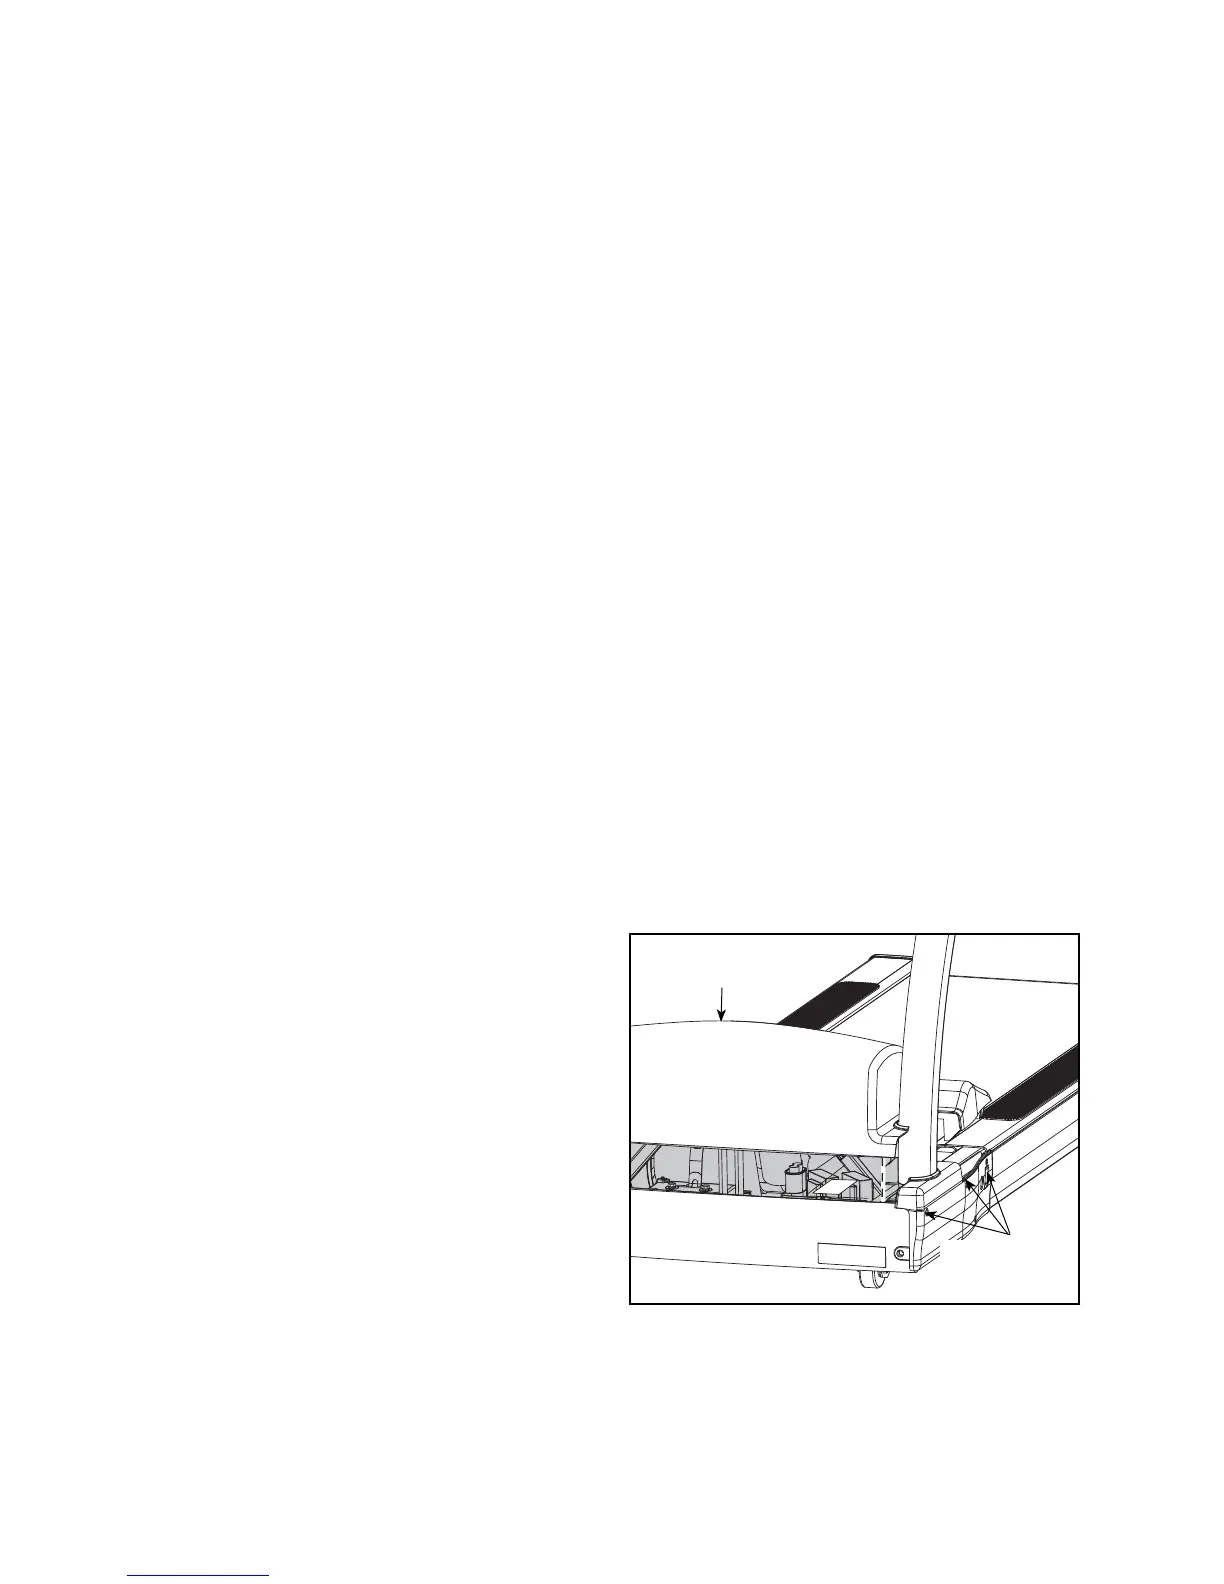
2. Remove the motor cover.
Using a Phillips screwdriver, loosen three A.
screws on each motor cover side (left and
right). See Figure 2.
Lift the motor cover up and off the treadmill. B.
The screws will stay in place. See Figure 2.
3. Remove the end caps.
Using a Phillips screwdriver, remove the A.
screw that holds each end cap in place. See
Figure 3.
Motor
Cover
Screws
(3 Each Side)
Figure 2