Cybex Pro+ Treadmill Service Manual
Service
Page 4-30
7. Secure the console back.
While being sure not to pinch any cables, use a Phillips screwdriver to secure the A.
nine screws that hold the back cover to the console front.
8. Calibrate speed.
Follow the A. Speed Calibration procedure located in this chapter.
Contact Heart Rate Board
NOTE: This procedure will cover the contact heart rate board, grips and cable.
Tools Required
Phillips screwdriver•
ESD (Electro Static Discharge) grounding strap•
1. Disconnect the external power source.
Turn the main power switch on the left side to the off (O) position.A.
Unplug the treadmill from the power outlet.B.
NOTE: Wear an ESD strap for the rest of this procedure.
2. Remove the console back.
NOTE: If you have a cable plugged into the RJ-45 port disconnect it.
Using a Phillips screwdriver, remove the nine screws that hold the console back to the console A.
front.
Gently pull off the console back. B.
3. Remove the heart rate board.
Using a Phillips screwdriver, remove the three screws from the heart rate board.A.
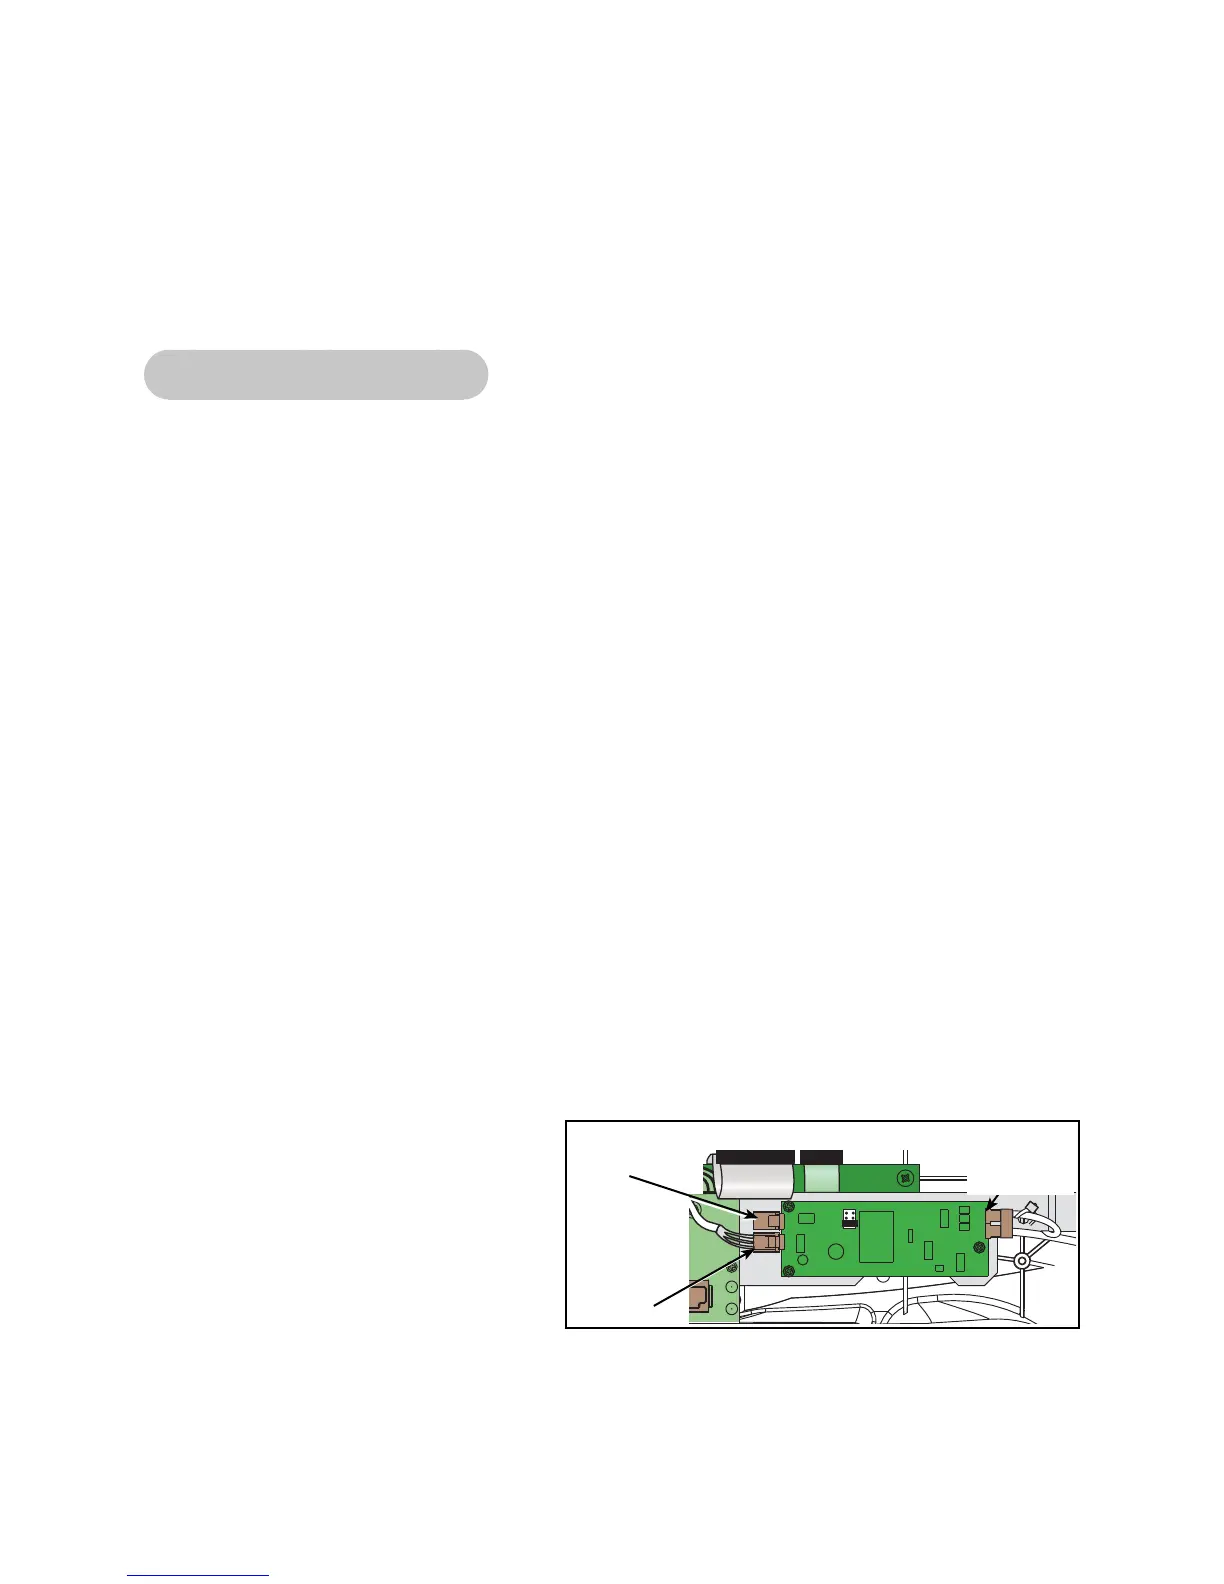
If you’re not replacing the cable, disconnect the two cables and one molex placeholder from the B.
heart rate board. (You will re-attach the molex connector in step 4A). See Figure 24.
4. Attach the new heart rate board.
Locate the side of the heart rate A.
board with the two holes and place
the molex placeholder over the top
three pins. See Figure 24.
Viewing from the front of the unit, B.
place the heart rate board in position
with the two holes to the left and,
using a Phillips screwdriver, attach the
heart rate board with the three screws
removed in step 3A.
NOTE: If you are replacing the grips and cable follow steps 5 to 8. If not skip to step 9.
Figure 24
Molex
Placeholder
(Top)
Heart Rate
to Display
Board
Connector
(Bottom)
Double
Connector
(Right)