Cybex Pro+ Treadmill Service Manual
Service
Page 4-11
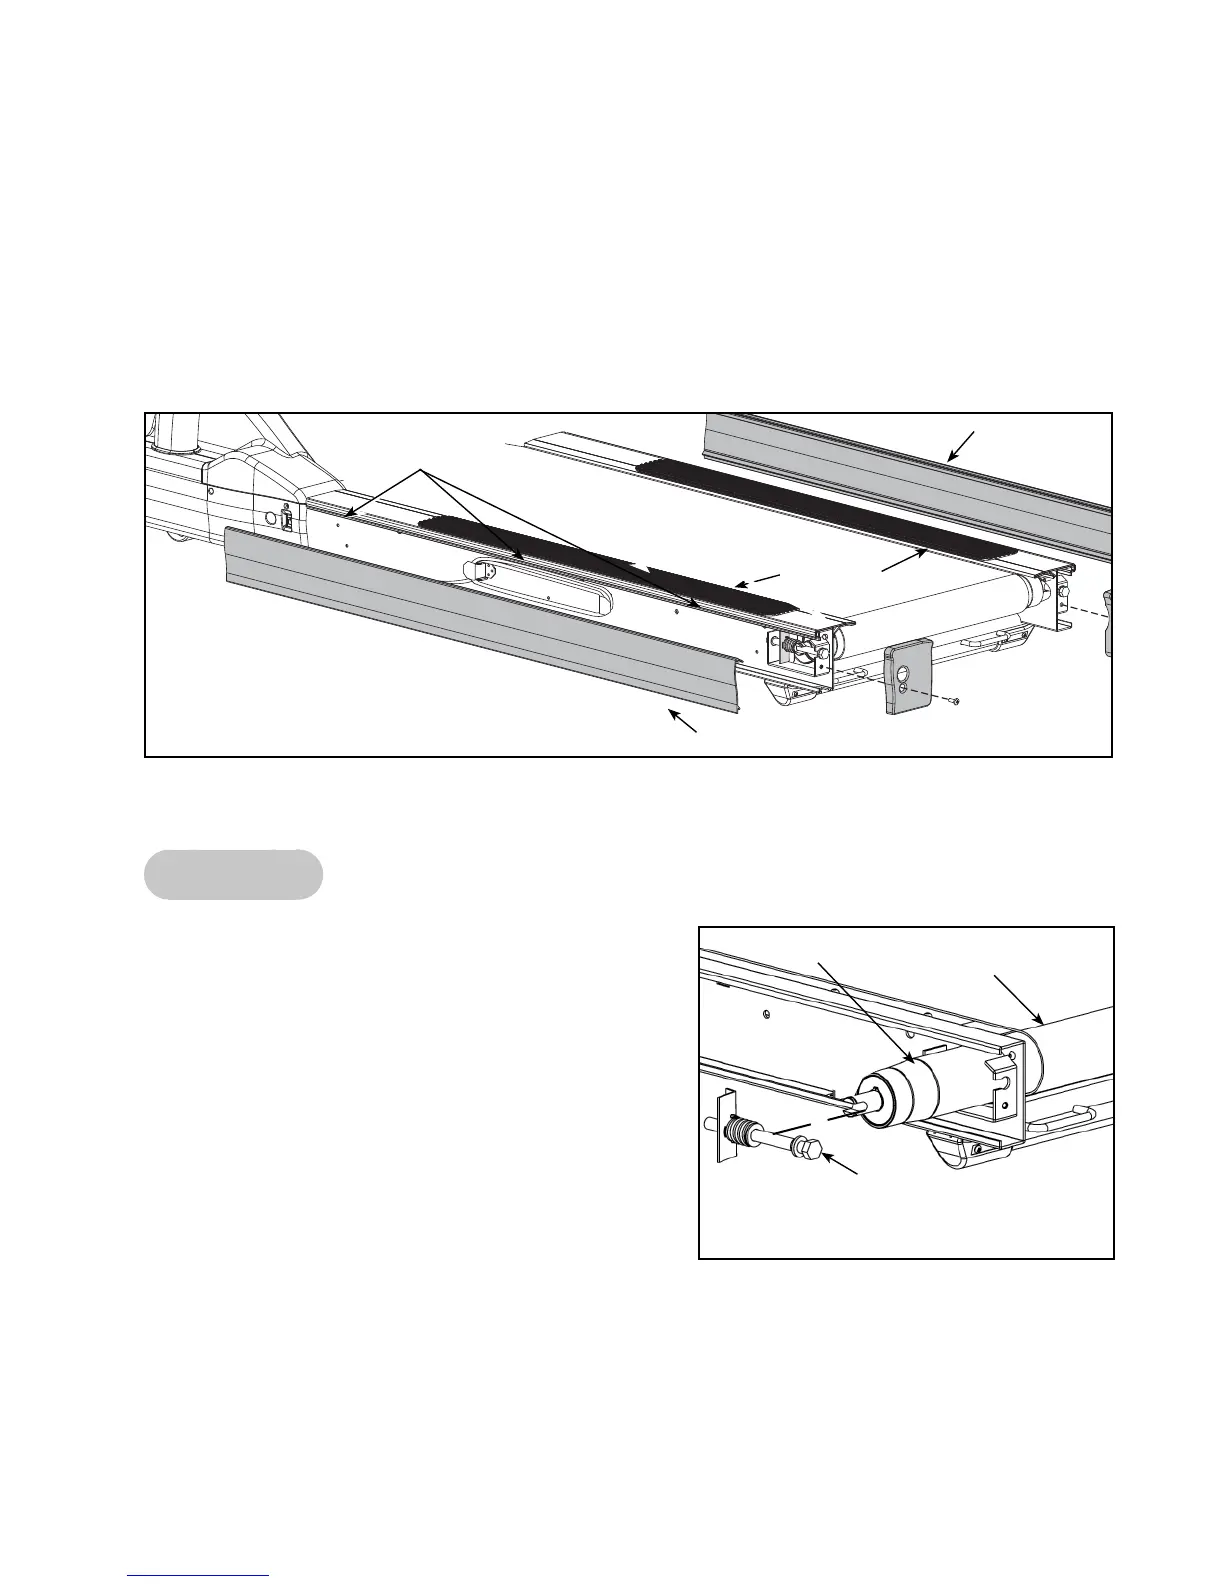
Figure 6
Rear Roller Bolt, Washers,
Spring and Nut Holder
NOTE: Keep the Hardware Together
Rear Roller
Side Panel
Figure 5
Side Panel
Top Steps
Running Belt
Screws (3 Under
Each Top Step)
4. Remove the side panels.
Pull each side panel out and off the treadmill. See Figure 5.A.
5. Remove the top steps.
Using a Phillips screwdriver, remove the three screws that hold one of the top steps A.
in place. Repeat this step for the other side. See Figure 5.
Grasp each top step and slide it out and off the treadmill. See Figure 5.B.
Rear Roller
6. Remove the rear roller.
Using a 3/4” open end or socket wrench, loosen A.
the two rear roller bolts (one roller bolt on each
side). NOTE: Loosen each bolt evenly, making
sure not to loosen either bolt too many turns
before moving to the other bolt. See Figure 6.
While holding the rear roller, remove the hardware B.
from each side. NOTE: Pivot the bolt, washers,
spring and nut holder out together. See Figure 6.
Lift one side of the rear roller and slide the roller C.
out of the running belt. See Figure 6.