Cybex Pro+ Treadmill Service Manual
Service
Page 4-26
Lift the motor cover center up and off the treadmill. The screws will stay in place. See Figure 2.B.
Remove the left plastic side cover.C.
3. Remove the left end cap.
Using a Phillips screwdriver, remove the screw that holds the left end cap in place. A.
See Figure 4.
4. Remove the left side panel.
Pull the left side panel out and off the treadmill. A.
Power Switch
5. Remove the power switch.
Observe the “armature LED” on the lower board (labeled ILT4). A.
After the armature LED goes off proceed to step 3C. B.
Using a Phillips screwdriver, remove the two screws that hold the switch and its plate C.
to the treadmill.
Disconnect the four fast-on connectors that go into the power switch. D.
Using a 3/8” nutdriver, remove the one nut and one washer from the ground wire on the E.
lower control bracket.
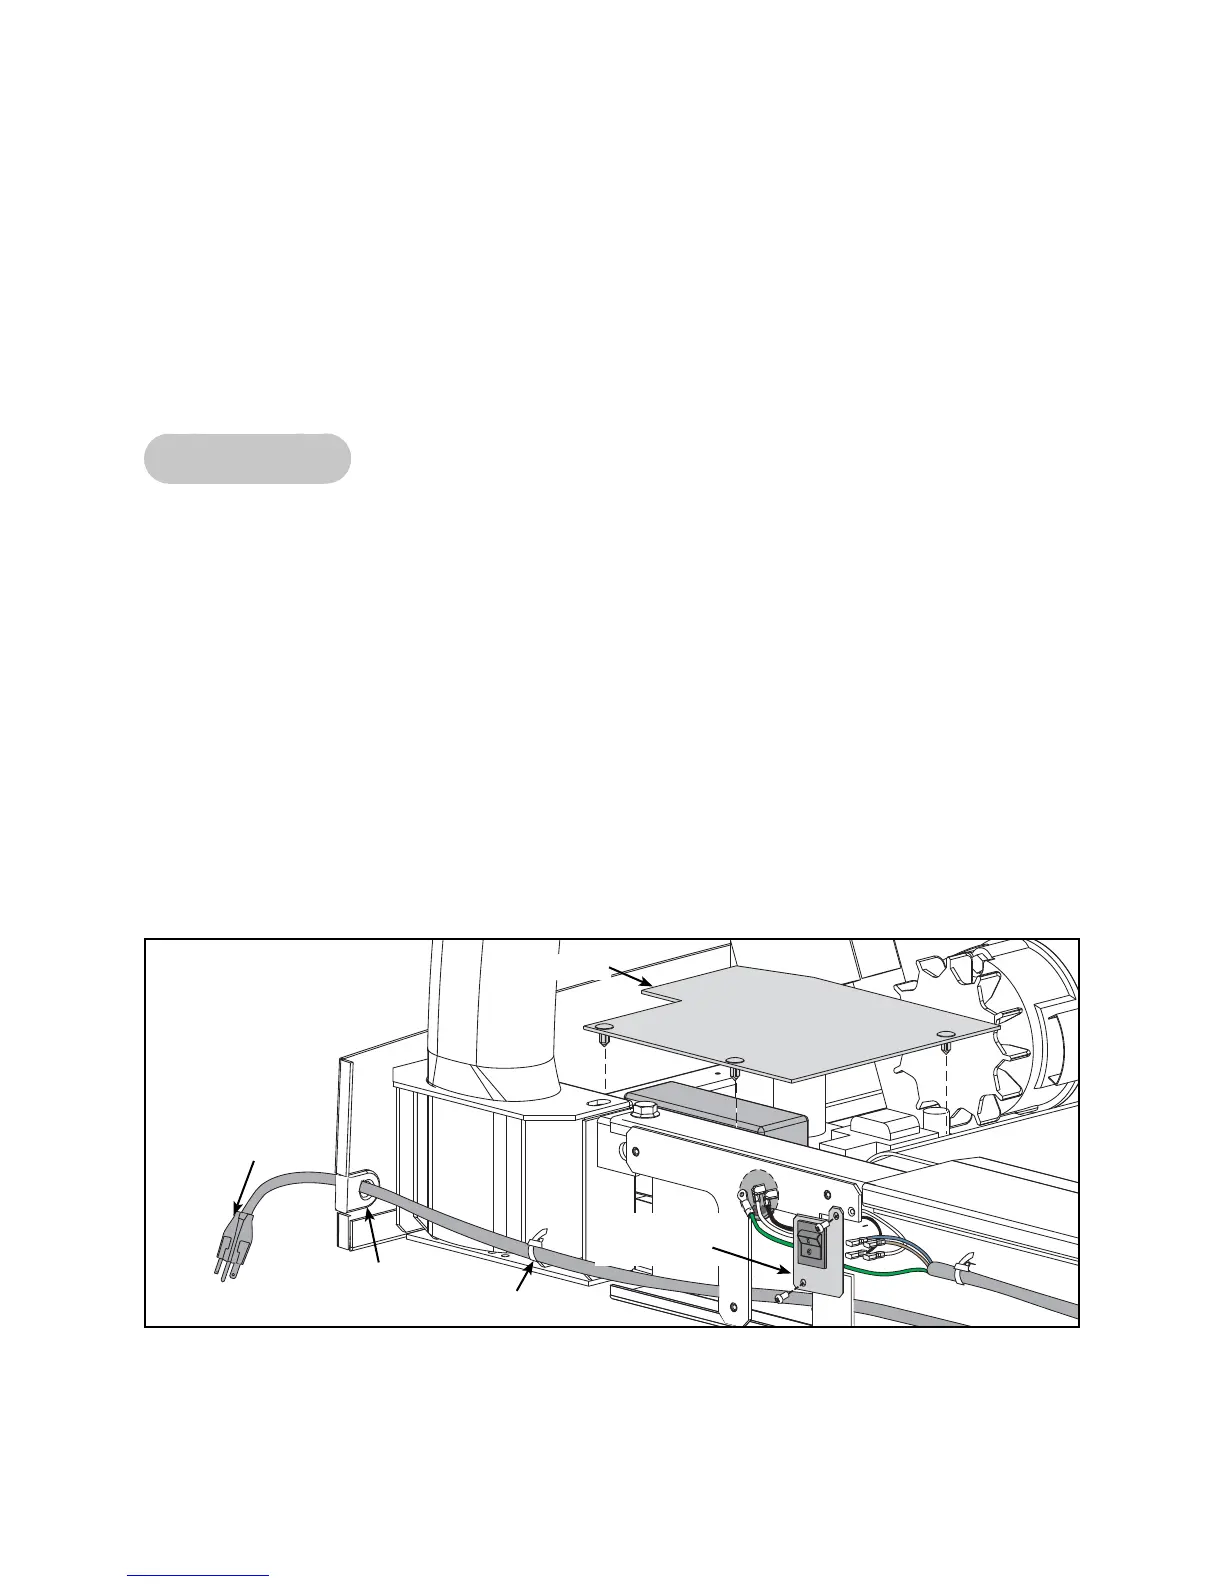
6. Remove the power cord.
Remove the old power cord and discard the power cord (and power switch if applicable). A.
See Figure 21.
Figure 21
Shield
Grommet
Power Cord
Power Switch
Plate
Wire Tie