Cybex Pro+ Treadmill Service Manual
Service
Page 4-13
Using a Phillips screwdriver, remove the fl at head screw securing each deck stiffener to the deck B.
bushing. See fi gure 8.
9. Inspect the deck bushings.
Inspect the deck bushings under the deck stiffeners for cracks or wear.A. NOTE: Replace the
rubber mounts if the rubber is cracked or worn.
Using a Phillips screwdriver, secure each deck stiffener with the fl at head screws removed in step B.
8B.
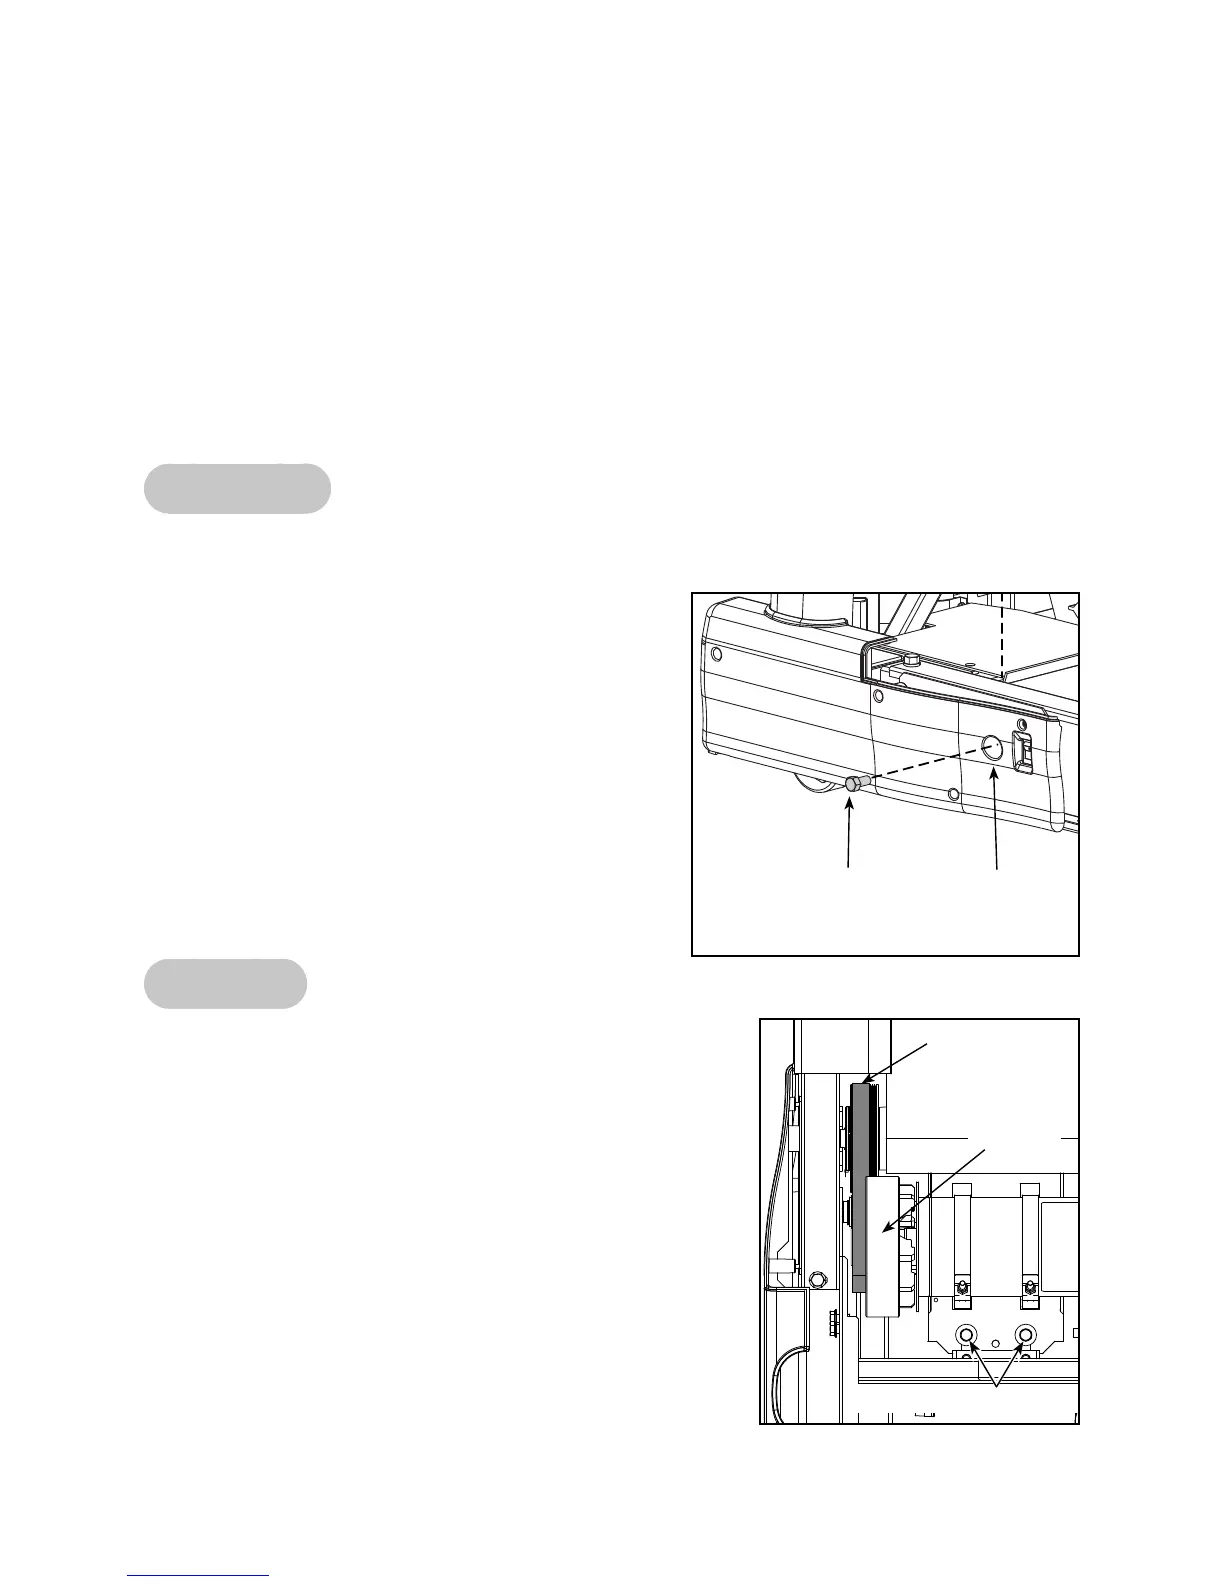
Using a 1/2” Socket wrench, install the two whiz-lock screws that secure the deck pivot shaft to C.
the frame. See Figure 8.
Front Roller
10. Remove the front roller.
Place a 9/16” socket wrench with a 3” extension in A.
the left front roller access hole. Remove the left front
roller screw. See Figure 9.
Place a 9/16” socket wrench with a 3” extension in B.
the right front roller access hole. Remove the right
front roller screw.
Slide the drive belt off of the front roller and remove C.
the front roller.
11. Remove the running deck and running belt.
Lift one side of the deck and slide it out of the A.
running belt.
Drive Belt
NOTE: If you are replacing the drive belt follow steps 12-13 and
15. If not, skip to step 14. See the Drive Motor procedure
for an alternative way to change the drive belt.
12. Release the drive belt tension.
Using a 1/2” socket wrench, loosen but do not remove A.
the two screws on the motor saddle. See Figure 10.
13. Remove the drive belt.
If you are changing the drive belt, slip the drive belt A.
around the fl ywheel pulley and off the motor. See Figure
10.
Slide the new drive belt around the fl ywheel pulley. B.
NOTE: There will be some slack in the drive belt until
step 15 is complete.
Figure 10
Motor Saddle Screws
Drive
Belt
Flywheel
Pulley
Figure 9
Screw
Front Roller
Access Hole