Cybex Pro+ Treadmill Service Manual
Service
Page 4-7
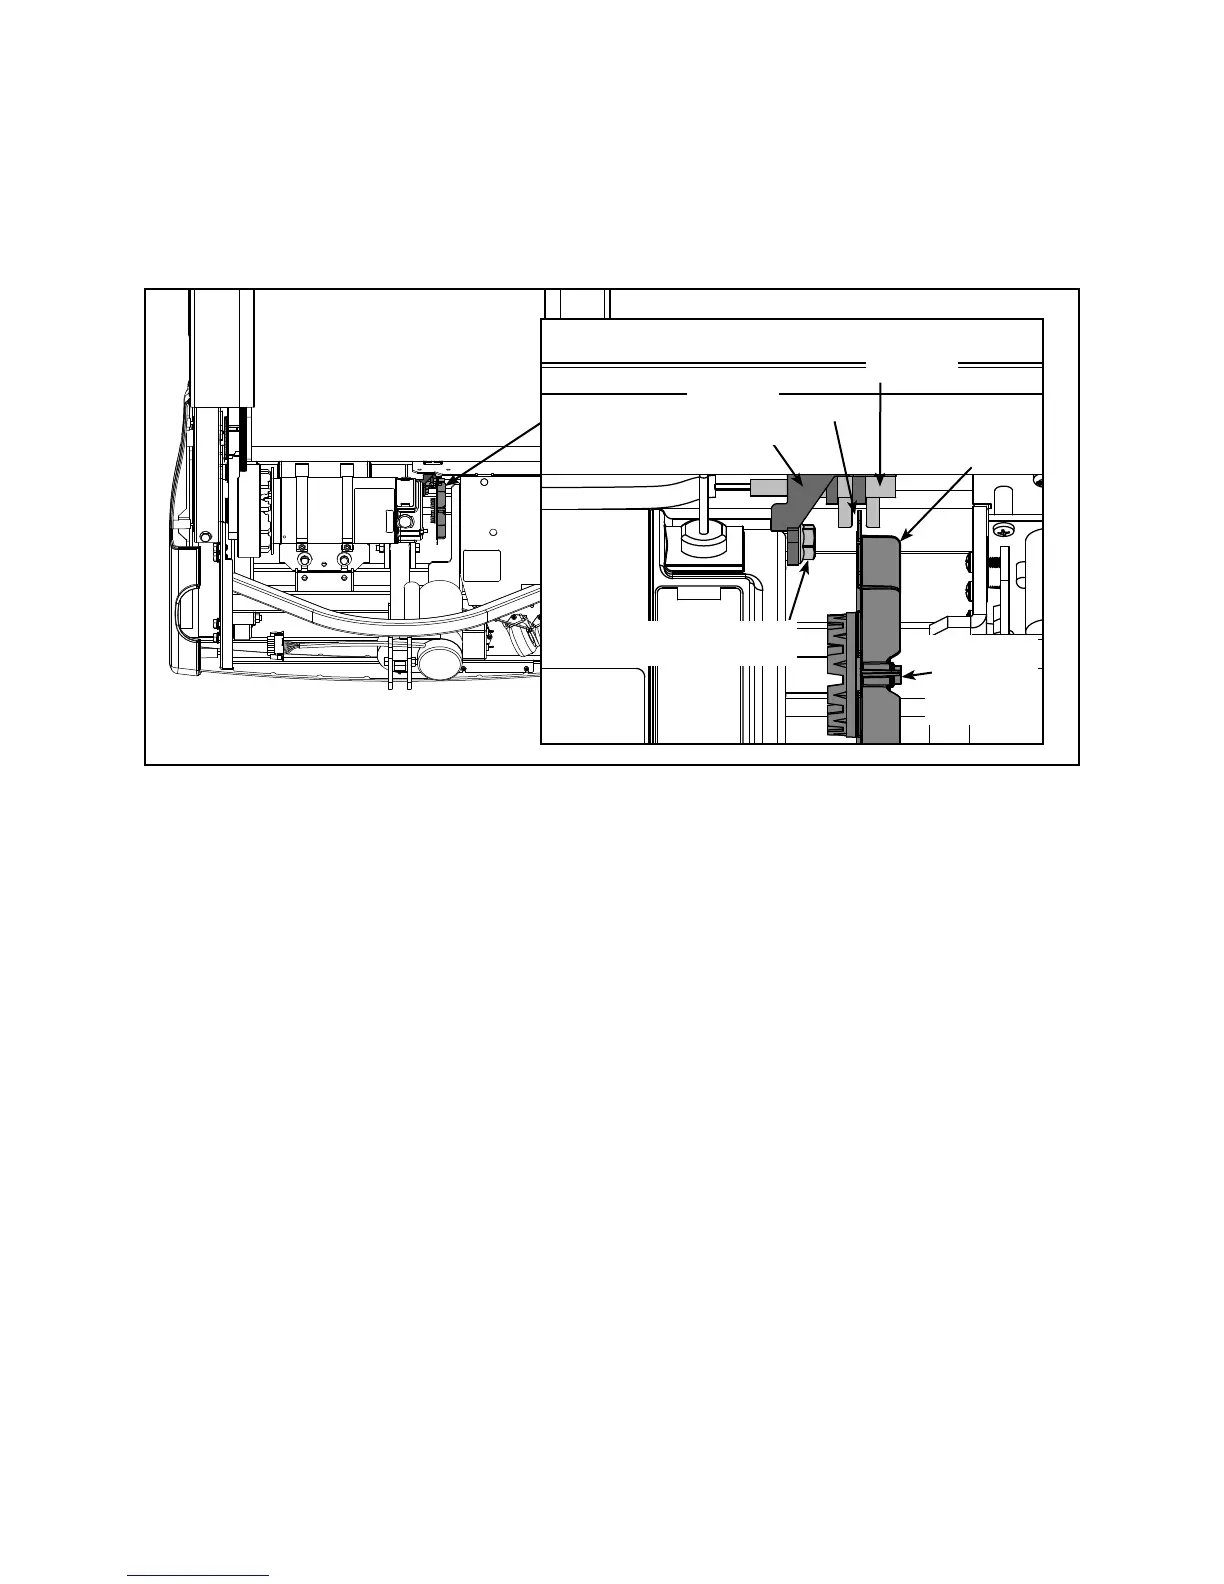
Using a 7/16” Open end wrench, tighten the mounting nut that attaches the speed sensor bracket to B.
the drive motor. See Figure 3.
Ensure that the gap between the speed sensor and drive motor fan is even on both sides. See C.
Figure 3.
5. Test for speed errors.
Connect the power cord to a power outlet.A.
Enter B. Test Mode.
Bring the speed of the treadmill up to maximum speed, 12.4 mph (20 kph). C.
After reaching maximum speed take note of the actual speed that is displayed in the lower left D.
window. If it fl uctuates in over 0.5 mph increments then your speed sensor gap needs to be inspected.
Slowly adjust the speed down to 1.0 MPH (1.0 KPH).E.
Press F. Stop and turn the power switch to the off (O) position.
Enter G. Test Mode again and check the error log for Error 3. If Error 3 occurred readjust the speed
sensor and test again. NOTE: If you are unsure whether an error is new you can clear the error
log by pressing the Scan key and then repeat steps 4A through 5F.
Exit H. Test Mode by pressing Stop.
6. Attach the motor cover.
Lower the motor cover center into position. See Figure 2.A.
Using a Phillips screwdriver, tighten the three screws on each side.B.
Gap
Speed
Sensor
Drive
Motor
Fan
Figure 3
Sensor Bracket
Mounting Nut
Speed
Sensor
Bracket
Drive
Motor Fan
Mounting
Nut