Cybex Pro+ Treadmill Service Manual
Service
Page 4-20
17. Align the drive belt.
Confi rm that the drive belt fi lls all grooves in the drive motor fl ywheel pulley and there are open A.
grooves on the inside of the front roller. See Figure 11. NOTE: Failure to align the drive belt could
cause squeaking.
18. Connect the motor cables.
Connect the motor cable to the lower board as shown in Figure 14 (red to A1, black to A2, yellow A.
to BW).
Using a 1/2” socket wrench, tighten both screws on the motor saddle. B.
Using wire ties, tie the motor C.
cable to the base so that no
wires get pinched. See Figure
17. NOTE: Be sure that the
wires are tied away from the
fan and running belt. For
internationally installed treadmills
only, place the ferrite (shown in
Figure 17) in between the wire
ties.
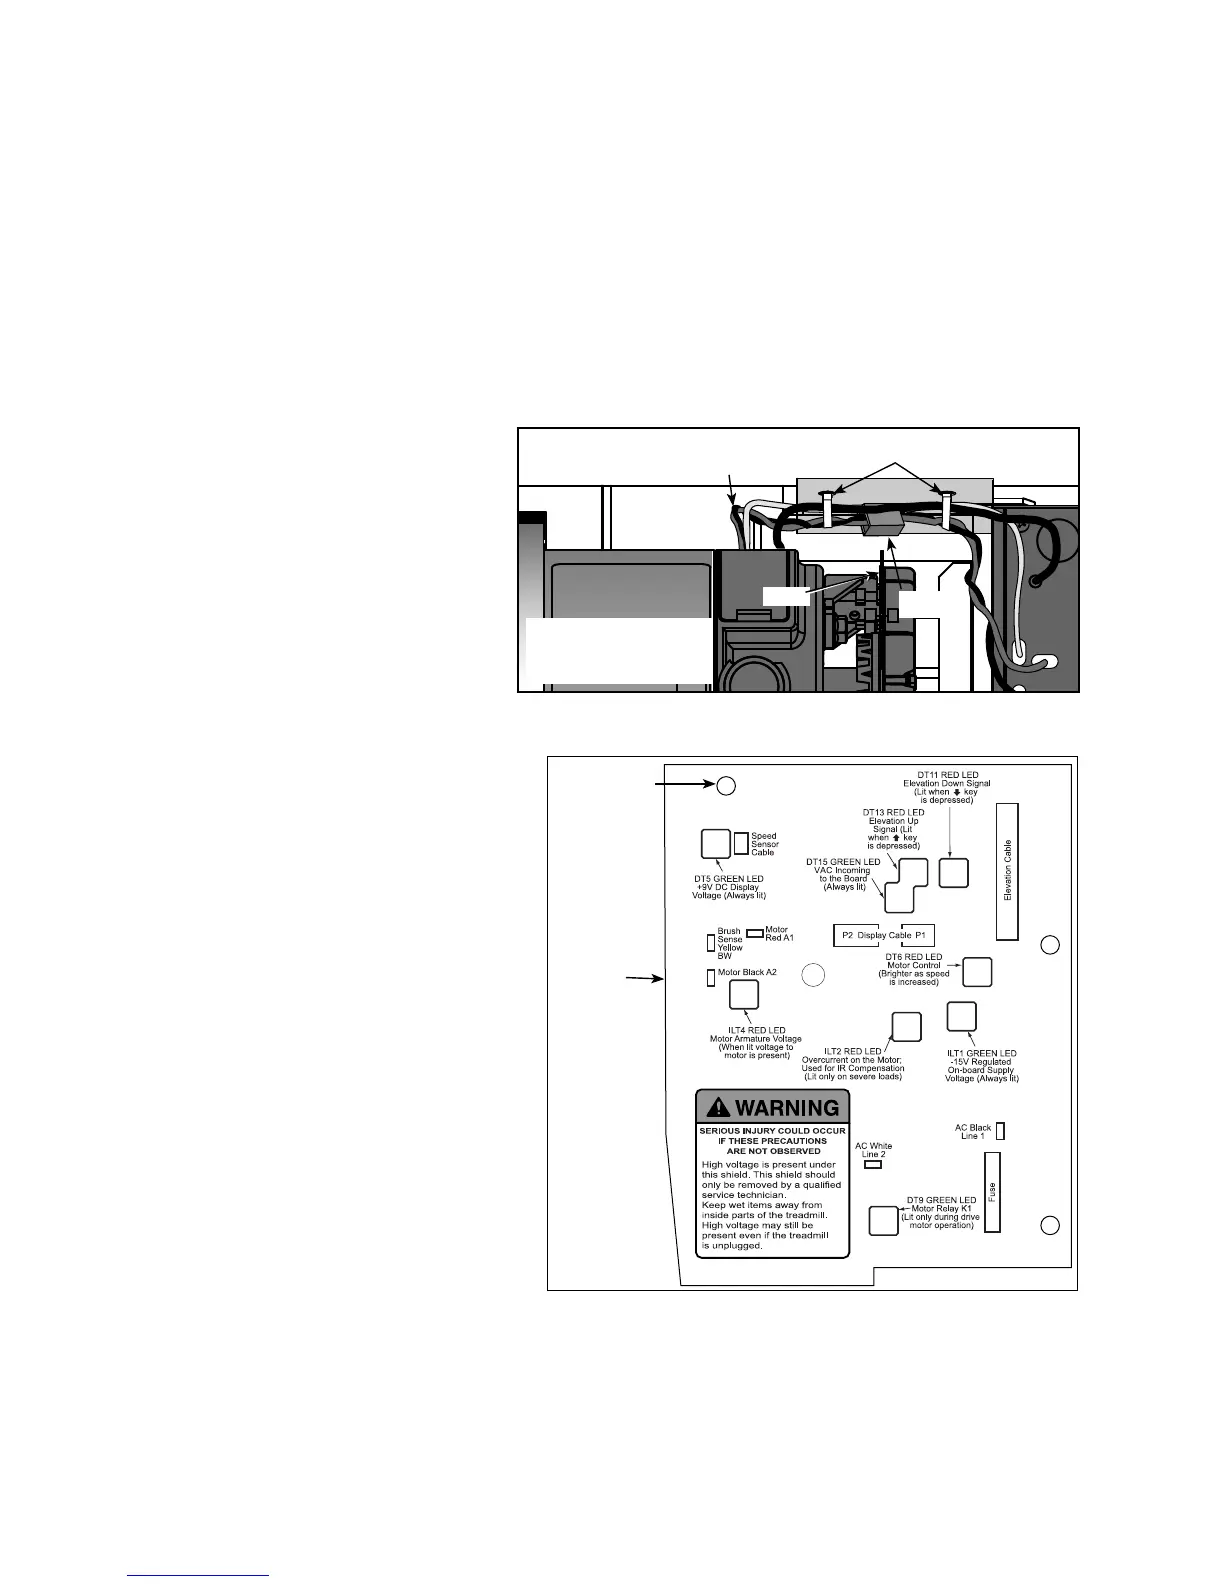
Refer to the lower board shield D.
to confi rm the locations for the
connectors and check to see that
all of the cables are connected
fi rmly. See Figure 18.
Place the lower board shield in E.
position and push the clips down.
NOTE: The clips will snap in.
See Figure 18.
Figure 17
Tie Cables Away
from Fan
Fan
Wire Ties
NOTE: The ferrite is
for internationally
installed motors.
Ferrite
Figure 18
Lower
Board
Shield
Clips (3)