Cybex Pro+ Treadmill Service Manual
Service
Page 4-22
4. Disconnect the elevation motor cable.
! WARNING: Do not touch components on the lower board. A charge can remain after unplugging
the power cord and turning off the treadmill.
Pull up on the lower board shield. It will snap out.A.
Disconnect the elevation motor cable from the lower board and remove it from the wire tie. B.
5. Remove the elevation motor.
Using a 9/16” open end wrench and a 9/16” socket wrench, remove the two bolts on the A.
elevation motor (one at the top and one at the bottom). NOTE: Hold the motor while you
remove the second bolt so that it doesn’t fall.
Carefully lift and remove the elevation motor from the treadmill.B.
6. Secure and Calibrate the elevation motor.
Carefully place the elevation motor in A.
position on the treadmill. See Figure 19.
Slide the upper bolt into the frame and B.
elevation motor and thread the nut onto
the top bolt. See Figure 19. NOTE: When
viewing from the front of the unit the top bolt
goes from the right to the left.
Using a 9/16” open end wrench and a 9/16” C.
socket wrench, securely tighten the top
mounting bolt and nut.
Connect the elevation motor cable to the D.
lower board. NOTE: The board is labeled P3
at the elevation port. The connector can only
fit in one direction.
Connect the main power cord into the E.
power outlet and turn the power switch on
(I). NOTE: Wait for the elevation tube to
turn and fi nd the zero switch.
Once the motor stops, turn the tube with your F.
fi ngers until it measures 12.517” (31.8 cm) from the center of the top hole to the center of the
bottom hole. See Figure 19.
Slide the bottom mounting bolt into the frame and elevation tube. G. See Figure 19. NOTE: When
viewing from the front of the unit the bottom bolt goes from the left to the right.
Using a 9/16” open end wrench and a 9/16” socket wrench, securely tighten the lower mounting H.
nut and bolt.
Place the lower board shield in position and push the clips down. I. NOTE: The clips will snap in.
Tie the elevation cable with the tie from step 4B so that it is clear of the motor fan. Be sure no wires J.
get pinched.
7. Test the elevation motor.
Start the treadmill in A. Manual Mode and raise the elevation to 6%.
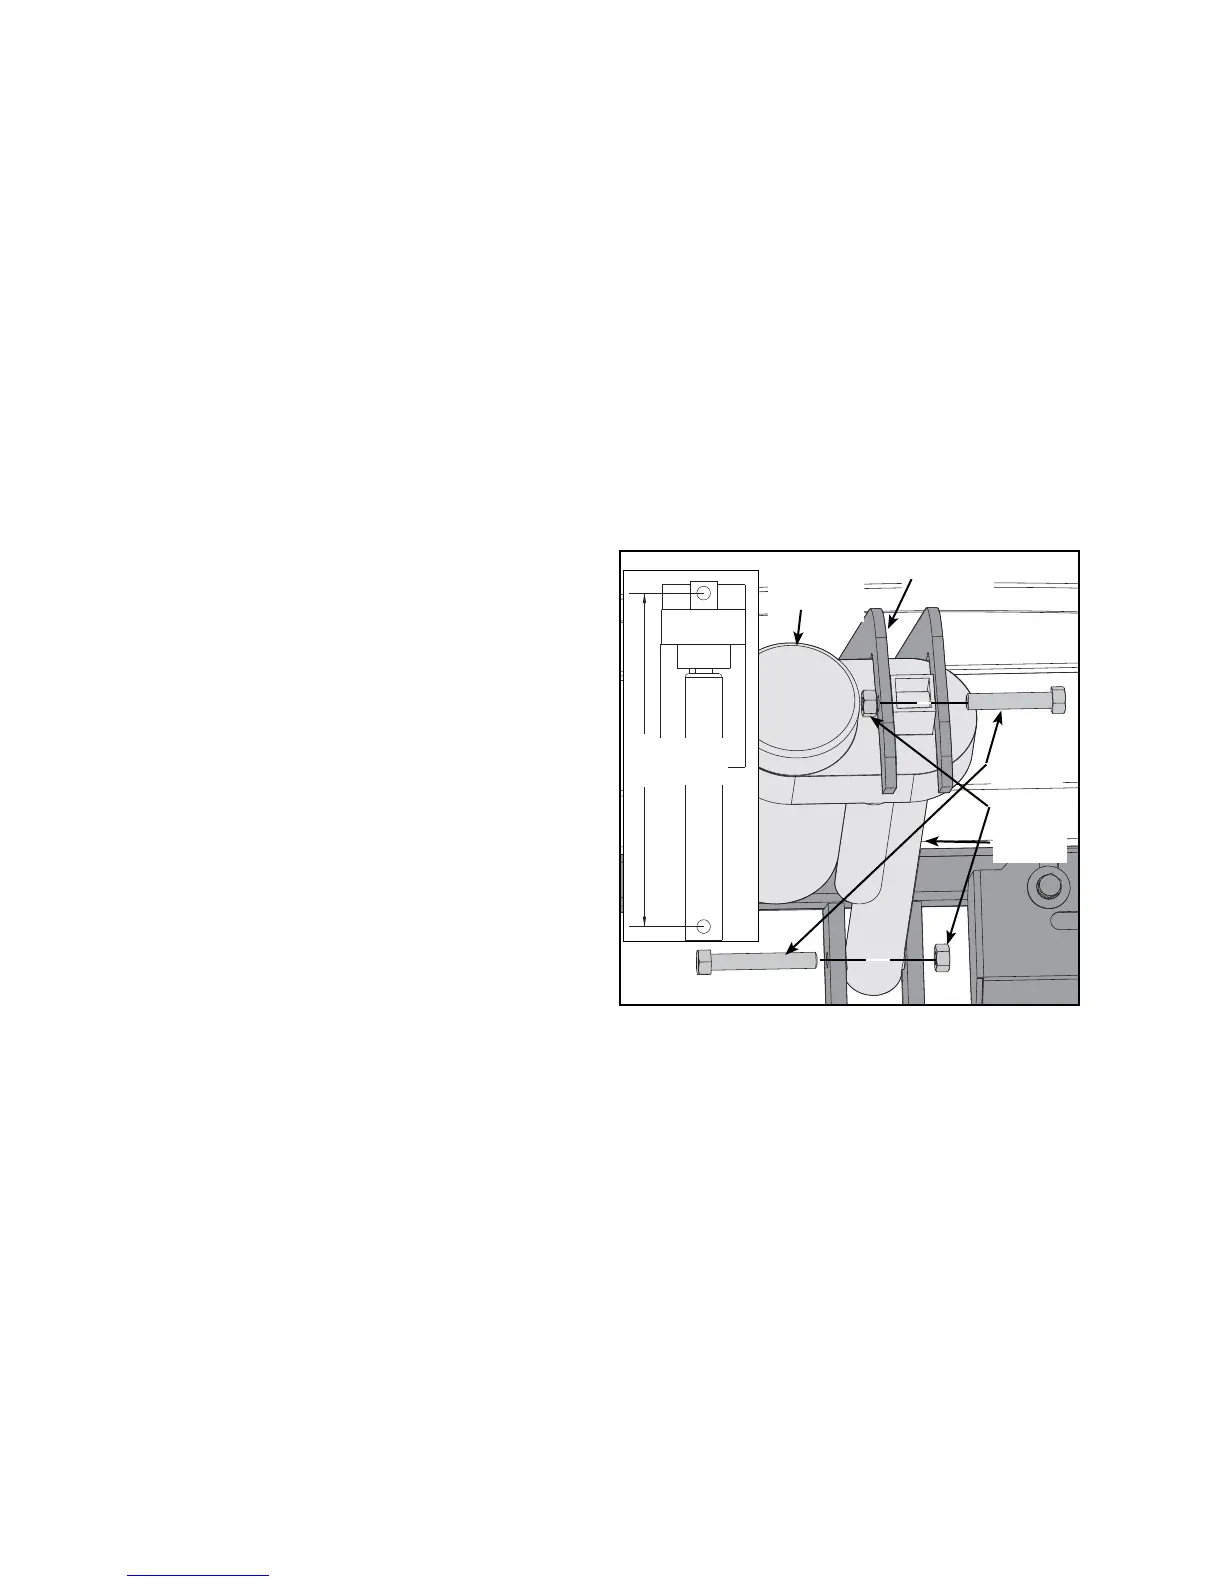
Figure 19
Bolts
Nuts
12.517”
(31.8 cm)
Tube
Frame
Elevation
Motor