Nuclias Connect Software User Manual Appendix
Page 106
Nuclias Connect App
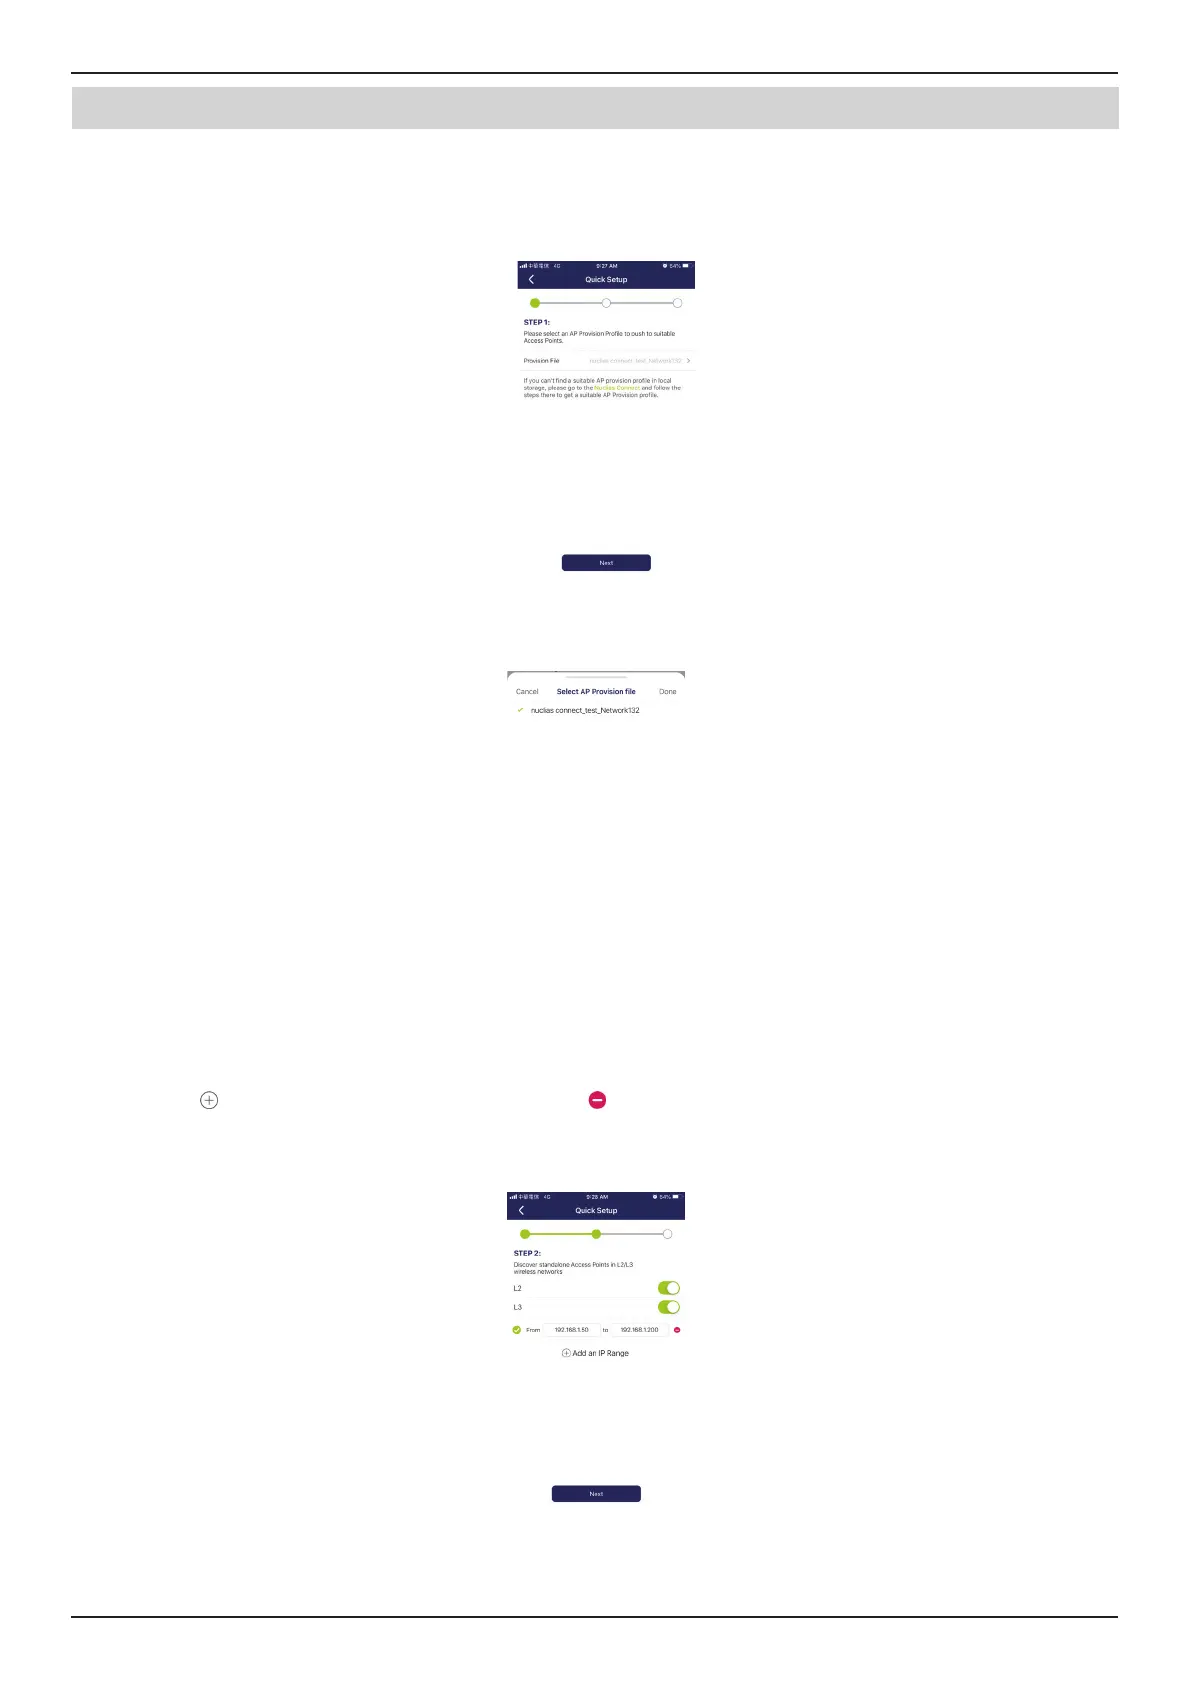
Once a Nuclias Connect controller connection is established, you will see it listed next to the eld Provision File.
Tap Provision File to select a local AP provision prole. In the following gure, the entry Nuclias_connect_test_Network132
is available.
After the Select AP Provision le window appears, select an available provision le from local storage and tap Done to
continue.
The process will continue and the App will return to the previous screen. From the Step 1 page, tap Next to continue.
From this page, you can discover standalone APs connected to the L2/L3 wireless network.
Tap the button on the L2 eld to enable discovery on the L2 network.
Tap the button on the L3 eld to enable discovery on the L3 network. Then enter an IP range in the provided From and To
elds. Tap add (
) to create a new IP range entry. Tap remove ( ) to delete any dened range entries.
In the IP range elds, specify the starting and ending IP addresses.. Once the range is dened, tap Next to initiate the
discovery process.
 Loading...