Nuclias Connect Software User Manual Appendix
Page 107
Nuclias Connect App
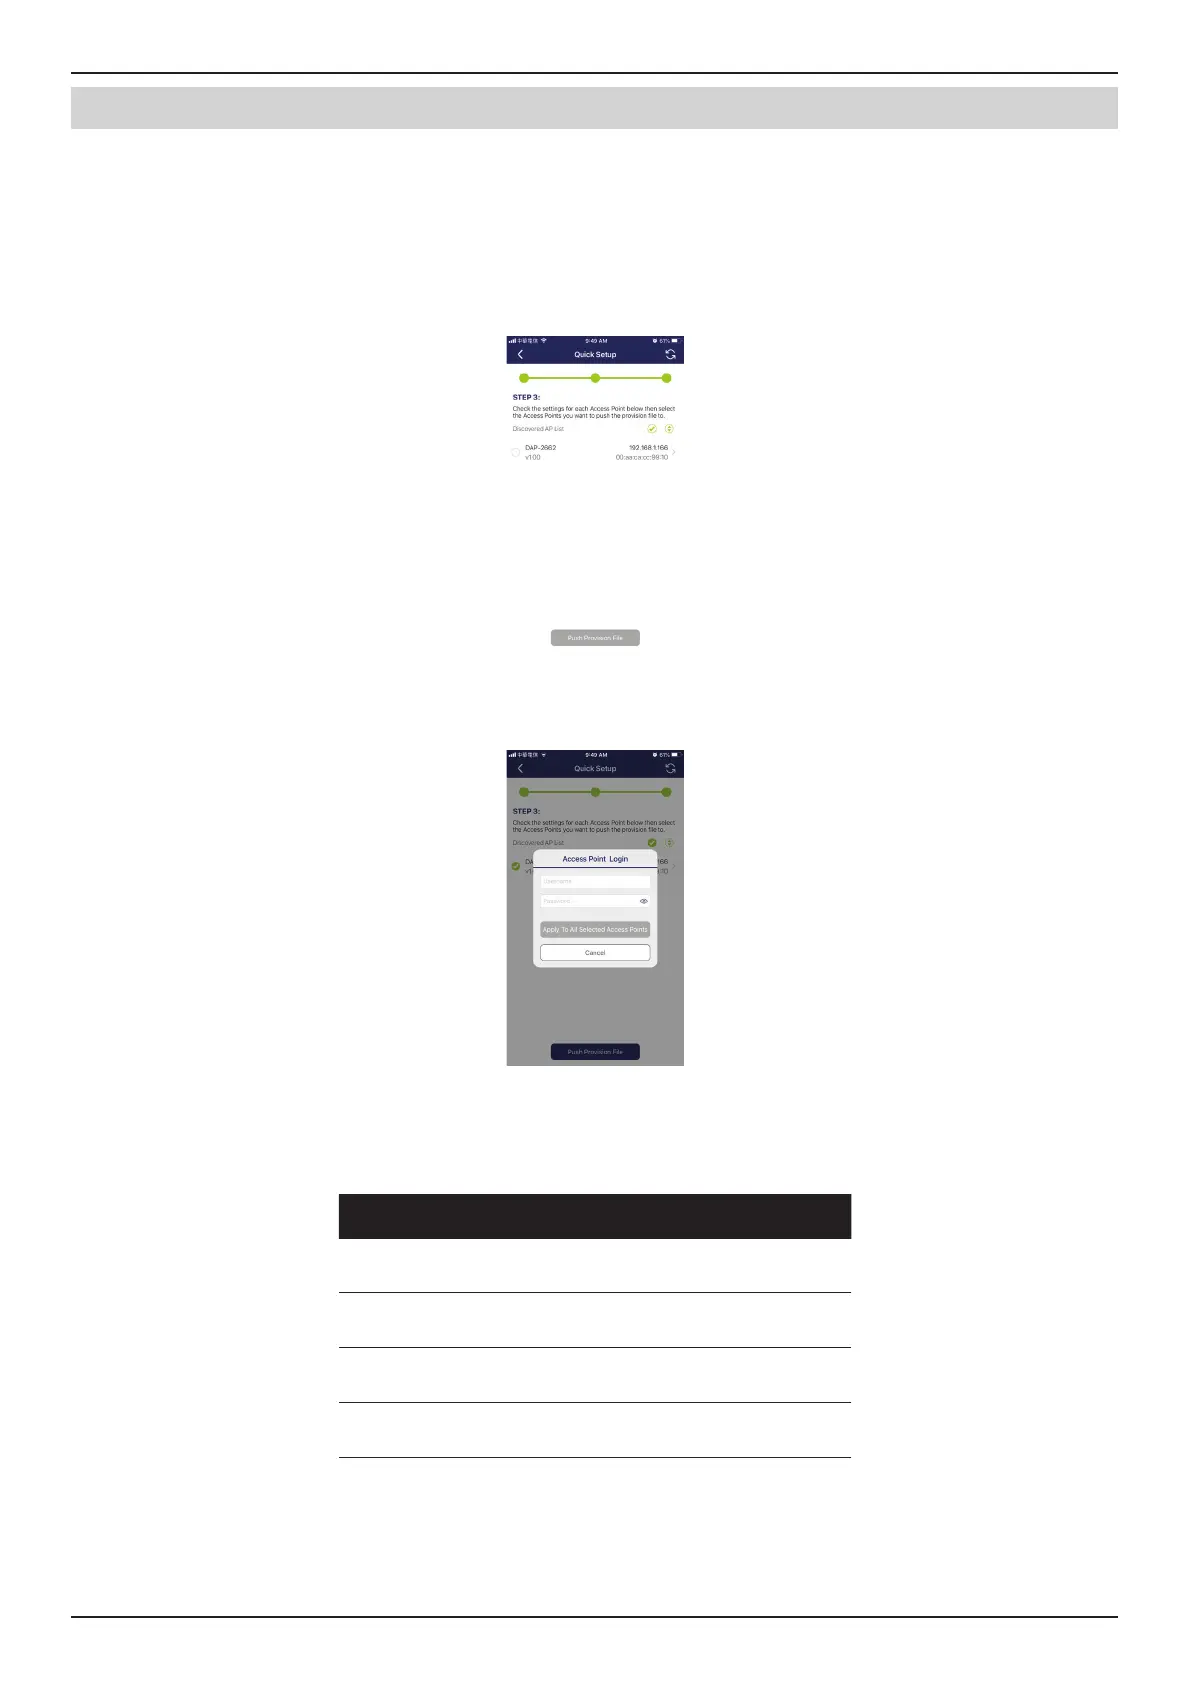
After the scanning the network range, the Step 3 page will list any detected access points.
Tap the radio button next to the AP to select it. The local provision le that you previously selected will be pushed to the
selected AP.
Tap Push Provision File to continue.
The AP login pop-up window displays. The listed IP and MAC address are shown at the top of the window. Conrm the
selection and enter the user name and password with authorization to access the selected AP.
Tap Apply to continue the login process. The Modify IP Information page will appear. Any listed information can be modied;
see the following gure for further information.
Parameter Description
Cancel Tap to discard any changes and continue
the process.
Done Tap to accept any changes and continue
the process.
Model Name Displays the model name for the listed
DAP device.
MAC Displays the MAC address of the listed
DAP device.
 Loading...