Do you have a question about the D-Link SECURICAM Network DCS-900W and is the answer not in the manual?
Details the hardware and software needed to use the DCS-900W camera.
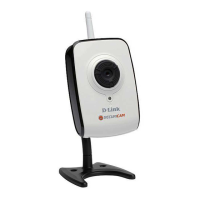
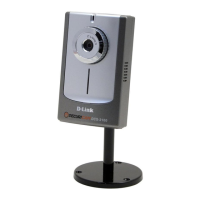
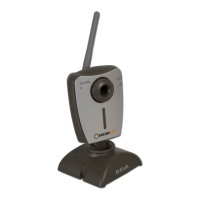
Outlines the key features and advantages of the DCS-900W Internet Camera.
Explains how to configure and manage the camera using a web browser.
Describes the IPView Lite application for remote monitoring and management.
Discusses various scenarios and environments where the Internet Camera can be deployed.
Details the wireless antenna connection for the DCS-900W.
Explains the RJ-45 connector for Ethernet network connectivity.
Describes the DC power input socket for the camera.
Explains the function of the reset button for factory reset and normal reset.
Illustrates the bottom panel and its stand mount connection.
Describes the function and status indications of the Power LED.
Explains the function and status indications of the LAN LED.
Instructions on how to attach the 802.11b antenna to the camera.
Instructions on how to attach the swivel stand to the camera.
Steps for connecting the Ethernet cable to the camera and network.
Instructions on connecting the external power adapter to the camera.
Recommends setting Admin ID and Password for first-time use to secure the camera.
Guides the user to start the software installation from the CD-ROM.
Instructs the user to select the 'Install Wizard' option from the CD-ROM menu.
Directs the user to proceed to the next step in the InstallShield Wizard.
Instructs the user to accept the license agreement to proceed with installation.
Guides the user to select the destination folder for the wizard.
Instructs the user to click 'Finish' to complete the wizard installation.
Guides the user to launch the setup wizard application.
Explains how to set the Admin ID and Password for camera security.
Instructs the user to proceed to the next configuration step after setting credentials.
Details how to configure the camera's IP address, subnet mask, and gateway.
Explains how to configure wireless connection mode, SSID, and WEP keys.
Guides the user to restart the camera to save the configuration settings.
Instructs the user to click 'Link' to open the camera's web interface.
Explains how to change the camera's IP address if it's invalid for the network.
Guides on entering Admin ID and Password for camera access.
Explains how to access the camera's configuration page via a web browser.
Describes the options (ActiveX, Java, Setup) available on the camera's home screen.
Details the options available on the configuration page for setup.
Explains how to access and modify system settings like camera name and IP assignment.
Describes the fields for setting a descriptive camera name and location.
Details how to manually assign an IP address, subnet mask, and default gateway.
Explains how to use RARP, BOOTP, or DHCP for automatic IP address assignment.
Explains DNS server settings and Dynamic DNS for easier access.
Describes connection modes (Infrastructure, Adhoc) and WEP encryption settings.
Explains how to use hexadecimal format for WEP keys.
Allows customization of Power and LAN LED behavior (Normal, Off, Dummy).
Specifies the location for the Xplug Control (ActiveX) plug-in program.
Details how to open additional ports for remote viewing, especially for multiple cameras.
Explains how to apply or cancel configuration changes.
Outlines the 4-step procedure for installing a single camera behind a router.
Details the 5-step procedure for installing multiple cameras behind a router.
Guides on setting a unique camera name and location for network identification.
Explains how to assign a local IP address, subnet mask, and default gateway.
Details opening unique ports for each camera to enable remote viewing.
Explains how to find the router's WAN IP address for external access.
Guides on configuring virtual server ports (port forwarding) on the router.
Explains how to access the camera feed via a web browser locally and over the internet.
Details how to adjust video resolution, compression, frame rate, brightness, contrast, and hue.
Explains how to adjust light frequency for optimal image quality based on region.
Guides on assigning user permissions for remote monitoring access.
Details how to add new user accounts with usernames and passwords for camera access.
Explains how to synchronize the camera's time with a time server or set it manually.
Describes protocol options (NTP) and time zone selection for accurate timekeeping.
Explains how to reset the device to its default factory settings.
Displays information about the camera, including model, firmware, MAC, and IP address.
Guides on returning to the home screen and adjusting focus after configuration.
Explains how to view video images using the ActiveX control in the web browser.
Explains how to view video images using the Java Applet in the web browser.
Guides the user to initiate the software installation process from the CD-ROM.
Instructs the user to select the 'Install IPView Lite' option from the CD-ROM menu.
Directs the user to proceed through the InstallShield Wizard steps.
Instructs the user to accept the license agreement to proceed with installation.
Guides the user to select the destination folder for the wizard.
Guides the user to select or create a program folder for IPView Lite.
Warns about potential issues if hardware drivers haven't passed Windows Logo testing.
Advises on handling file replacements if newer versions already exist.
Instructs the user to click 'Finish' to complete the IPView Lite installation.
Explains how to start the IPView Lite application after installation.
Shows the default List View format of the IPView Lite application interface.
Describes how IPView Lite allows managing multiple cameras from one location.
Guides on changing the administrator username and password for IPView Lite.
Explains how to initiate the process of changing a camera's IP address in IPView Lite.
Details searching for cameras and changing their IP address, subnet mask, and gateway.
Guides on adding new cameras to IPView Lite by IP address or browsing the network.
Explains how to add a detected camera to the IPView Lite list view.
Describes how to add or delete cameras from the IPView Lite list view.
Explains how to format the view to display up to 4 cameras simultaneously.
Describes how to rotate the video feed 90 degrees to the right or left.
Guides on how to capture a still image (snapshot) from the camera feed.
Explains how to start recording video from the camera.
Guides on how to stop the video recording process.
Covers settings for camera name, location, and administrator information.
Details IP address assignment options: Manually Assign or Assign Automatically.
Explains DNS server configuration for domain name resolution.
Covers wireless connection mode, SSID, and WEP key settings.
Configures LED control, ActiveX location, and second port settings.
Adjusts image quality parameters like brightness, contrast, resolution, and frame rate.
Guides on setting up user accounts with usernames and passwords for camera access.
Covers setting camera time and date, either synchronized or manual.
Displays camera model, firmware version, MAC address, and IP address.
Covers resetting the camera and updating its firmware.
Explains manual, dynamic, and scheduled recording options.
Details how to set specific times and dates for file recording.
Explains how to set up recording based on motion detection and sensitivity.
Covers adjusting file size and setting file paths for recorded video.
Describes file-related functions like opening, saving, and exiting lists.
Explains viewing capabilities like columns, list view, and camera modes.
Details the list view format for displaying camera properties and actions.
Covers adding, deleting, enabling, and taking snapshots of cameras.
Accesses account and system configuration settings for IPView Lite.
Allows administrators to change user name and password for IPView Lite.
Configures overwrite options for recorded files and loading settings.
Explains how to overwrite old recorded files based on HDD space or time.
Configures proxy server settings for internet connection.
Provides access to camera details and software version information.
Lists hotkeys and context menu options for IPView Lite functions.
Explains how to use context menus for various camera operations.
Guides the user to confirm the uninstallation of the IPView Lite application.
Instructs to click 'Finish' to complete the uninstallation and restart the computer.
Addresses common questions regarding camera features and capabilities.
Answers frequently asked questions about camera installation and requirements.
Provides solutions for issues related to accessing the camera from a web browser.
Addresses common problems with the Power LED and LAN LED not lighting up.
Explains why the camera might work locally but not externally, covering firewalls and conflicts.
Provides solutions for noisy images and improving overall image quality.
Guides on resolving issues where no images are displayed in the web browser.
Explains how to use the PING command to test network connectivity to the camera's IP.
Interprets PING command results, indicating successful or failed connections.
Lists various time zones relative to GMT for setting camera time.
Continues the list of GMT time zones for accurate camera time settings.
Instructions for installing the Xplug Control application to a web server.
Guides the user to start the X-Plug installation from the CD-ROM.
Instructs the user to select the 'Xplug Control' option to begin the installation.
Directs the user to proceed with the InstallShield Wizard for Xplug Control.
Guides the user to accept the license agreement for Xplug Control installation.
Instructs the user to click 'Finish' to complete the Xplug Control installation.
Explains how to adjust the camera lens for optimal image focus.
Provides notes on further image quality adjustments and warnings about sunlight exposure.
Lists technical specifications related to video resolution, sensor, exposure, etc.
Details image compression, frame rate, resolution, and control ranges.
Lists system hardware details like LAN and WLAN connectors.
Specifies LED indicators and power supply requirements.
Lists supported communication methods and protocols.
Outlines requirements for web configuration and IPView Lite.
Lists compliance standards such as FCC, CE, and VCCI.
Provides telephone and email contact information for technical support in the US.
Provides telephone and email contact information for technical support in Canada.
Details the one-year limited warranty for hardware and 90 days for spare parts.
Outlines the warranty for the software portion of the product.
Explains the process for submitting a warranty claim to D-Link.
Lists necessary documentation and procedures for submitting a warranty claim.
Specifies conditions and product states that are excluded from the limited warranty.
States D-Link's liability limitations regarding product use and warranty service.
Mentions governing law (California) and trademark ownership.
Provides warnings and statements regarding CE and FCC compliance for radio interference.
Encourages online product registration for support and warranty.