MNL-00007 [3] Proprietary and Confidential Page 42 of 63
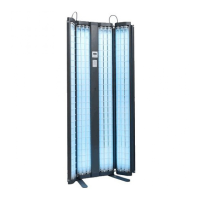
25.4 1 Series Lamp Removal and Replacement
Lamps may need to be replaced due to burnout or because their energy output has decreased to
the point that you may no longer be receiving an effective treatment.
DO NOT REPLACE LAMPS INDIVIDUALLY. ALL LAMPS SHOULD BE REPLACED
AT THE SAME TIME TO AVOID UNEVEN TREATMENTS OR ERYTHEMA.
PLEASE CONTACT THE DAAVLIN SERVICE DEPARTMENT PRIOR TO
REPLACING YOUR LAMPS TO OBTAIN IMPORTANT INFORMATION ON HOW
THE OUTPUT OF YOUR UNIT WILL BE AFFECTED BY THE CHANGE.
Because of differences between brands, replace lamps with the same brand as originally
installed.
1. Unplug the unit and using a Phillips screwdriver, remove the two screws on each side of
the unit. Once removed, lift off the top of the device (like removing the top from a gift
box).
2. On each lamp there are two clear plastic clasps that hold the lamps in position. To
remove them position both thumbs on the top of the clasp and use your index fingers to
pull the sides of the clasp outward until it releases, and the clasp can be removed.
3. On top of each lamp socket there will be a red button that, when pushed, will allow you
to remove the base of the lamp from its corresponding lamp socket. With one hand,
firmly press and hold the red button down. While holding the red button down use your
other hand to carefully lift the lamp up and out of the socket.
4. With one hand near the base of the lamp and the other at the opposite end, grasp the lamp
and pull both ends upward at the same time until it clears both clasps and the lamp
holder/socket.
5. To replace the lamp simply reverse the removal process.
Note: Please see section 10.0 Lamp Inspection on page 12, for the correct specifications of
replacement lamps and the Maintenance section for instructions on how to reset the lamp age
monitor.
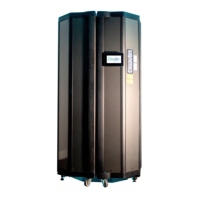
25.5 Special Notes for 1 Series Units Equipped with Integrated Dosimetry
25.5.1 Treatment Distance
Your 1 Series has been equipped with our Integrated Dosimetry Control System. Your unit has a
built-in light sensor that reads the light output of your unit. While a treatment is in progress the
sensor is constantly evaluating how much light has been administered and will stop the treatment
once the programed dose has been delivered or the safety backup time has elapsed.
Note: More information about the 1 Series Integrated Dosimetry Control System can be found in
section 18.0 Flex Dosimeter Instructions: 1 Series on page 19.
Your 1 Series has been specifically designed to deliver accurate and effective treatments from
two distinct treatment distances. Treatments can be administered directly on the acrylic surface
(0 in) or at a distance of nine inches away (9 in). Due to the inherent nature of phototherapy, the
 Loading...