MNL-00007 [3] Proprietary and Confidential Page 40 of 63
PLEASE CONTACT THE DAAVLIN SERVICE DEPARTMENT PRIOR TO
REPLACING YOUR LAMPS TO OBTAIN IMPORTANT INFORMATION ON HOW
THE OUTPUT OF YOUR UNIT WILL BE AFFECTED BY THE CHANGE.
Because of differences between brands, replace lamps with the same brand as originally
installed.
1. Unplug the unit and remove both feet by unscrewing the four thumb screws on each side.
Once the feet have been removed lay the unit flat on a table with the lamps facing up
2. Using a Phillips screwdriver, remove the four screws on each side of the unit. Once
removed, lift off the top of the device (like removing the top from a gift box).
3. On each lamp there are two clear plastic clasps that hold the lamps in position. To
remove them position both thumbs on the top of the clasp and use your index fingers to
pull the sides of the clasp outward until it releases, and the clasp can be removed.
4. On top of each lamp socket there will be a red button that, when pushed, will allow you
to remove the base of the lamp from its corresponding lamp socket. With one hand,
firmly press and hold the red button down. While holding the red button down use your
other hand to carefully lift the lamp up and out of the socket.
5. With one hand near the base of the lamp and the other at the opposite end, grasp the lamp
and pull both ends upward at the same time until it clears both clasps and the lamp
holder/socket.
6. To replace the lamp simply reverse the removal process.
Note: Please see section 10.0 Lamp Inspection on page 12, for the correct specifications of
replacement lamps and the Maintenance section for instructions on how to reset the lamp age
monitor.
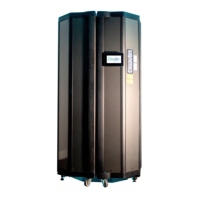
25.0 1 Series X and 1 Series T Information
25.1 Electrical Requirements
Daavlin 1 Series Phototherapy equipment can be equipped with UVA, UVA-1, Blue Light,
Narrowband UVB, and Broadband UVB lamps. While the type of ultraviolet lamp (UVA, UVB,
or Blue) does not influence the electrical requirements, the number of lamps contained in a unit
does determine the amperage necessary to safely support operation. The table and diagrams
below define these requirements for each model variation. All domestic 100/125-volt 60/50 hertz
models require a grounded, three prong electrical outlet rated for at least 15 amps and comes
equipped with a grounded, three prong plug. Units designed for other voltages may be shipped
with no wall plug, which would then have to be locally obtained, and require an appropriate
outlet that must be installed to meet local standards and requirements. All power cords must be
an approved hospital grade cord rated 300V, 1.5mm
2
minimum. The power cord is the main
disconnect device. Each unit is equipped with an IEC 320 style power inlet, which incorporates
two, 5x20mm fuses.
Note: This unit should be on a dedicated circuit and all connections for power must be grounded.
 Loading...