4–12 FRONT
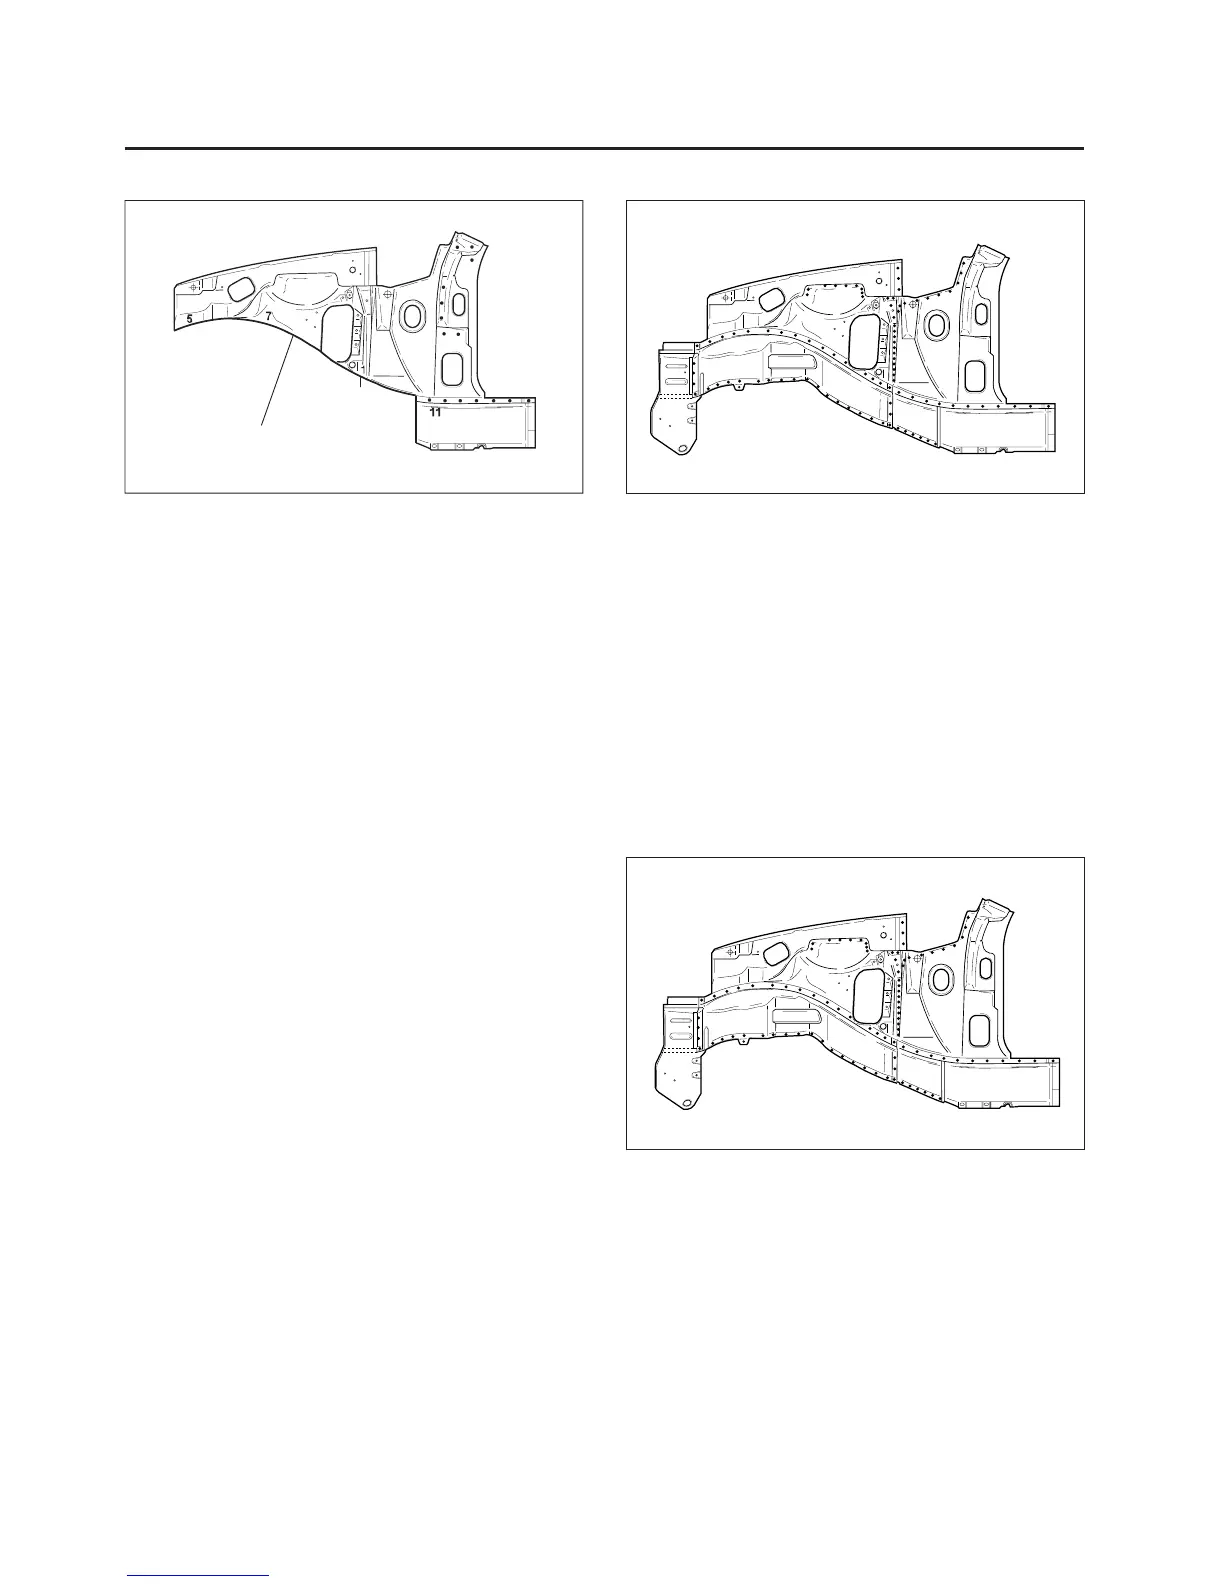
Fig. 18
6. Cut the new front longitudinal to align it with body,
then set the wheelhouse and front panel.
• Cut the new front longitudinal with a hand saw
and it will be butt welded.
• Grind both sides of the welding section of the front
longitudinal and wheelhouse with a disc sander
to remove the paint and expose the steel plate.
CAUTION : To prevent eye injury, wear goggles or
safety glasses whenever sanding, cutting, or grind-
ing.
• Tighten the new front longitudinal against remain-
ing parts with the vise grips and pliers.
• Place a jack under the front longitudinal end and
support it, and measure the positions for correct
setting.
• Set and clamp the front panel in place with the
vise grips.
NOTE: Use of jigs is recommended for correct posi-
tions and check that the both front longitudinal and
wheelhouse are parallel.
• Tack weld the clamped section for temporary in-
stallation.
7. Perform the main welding.
• Weld as much as possible with the jig still
mounted.
• Make MIG or gas welds at the butt joints at the
front longitudinal, carefully.
Fig. 19
3
5
12
3
7
5
7
3
3
11
6
1
1
11
2
2
• Spot weld the wheelhouse with the front longitu-
dinal flange areas and front panel.
CAUTION: To prevent eye injury and burns when
welding, wear an approved welding helmet, gloves
and safety shoes.
• Perform a trial welding first, and check the weld-
ing condition.
• Increase the number of spot by 20% for areas to
be spot welded.
Fig. 20
3
5
12
3
7
5
7
3
3
11
6
1
1
11
2
2
• Level the weld beads at the longitudinal butt joints
area with disc sander.
• Make the stiffener(Thickness: 2.8 mm Min., Width:
80 mm) according to the form of longitudinal butt
joint areas and weld the stiffener at the longitudi-
nal butt joint areas with MIG welder.
FRONT WHEELHOUSE