7–6 FENDER, HOOD AND TRUNK LID
3
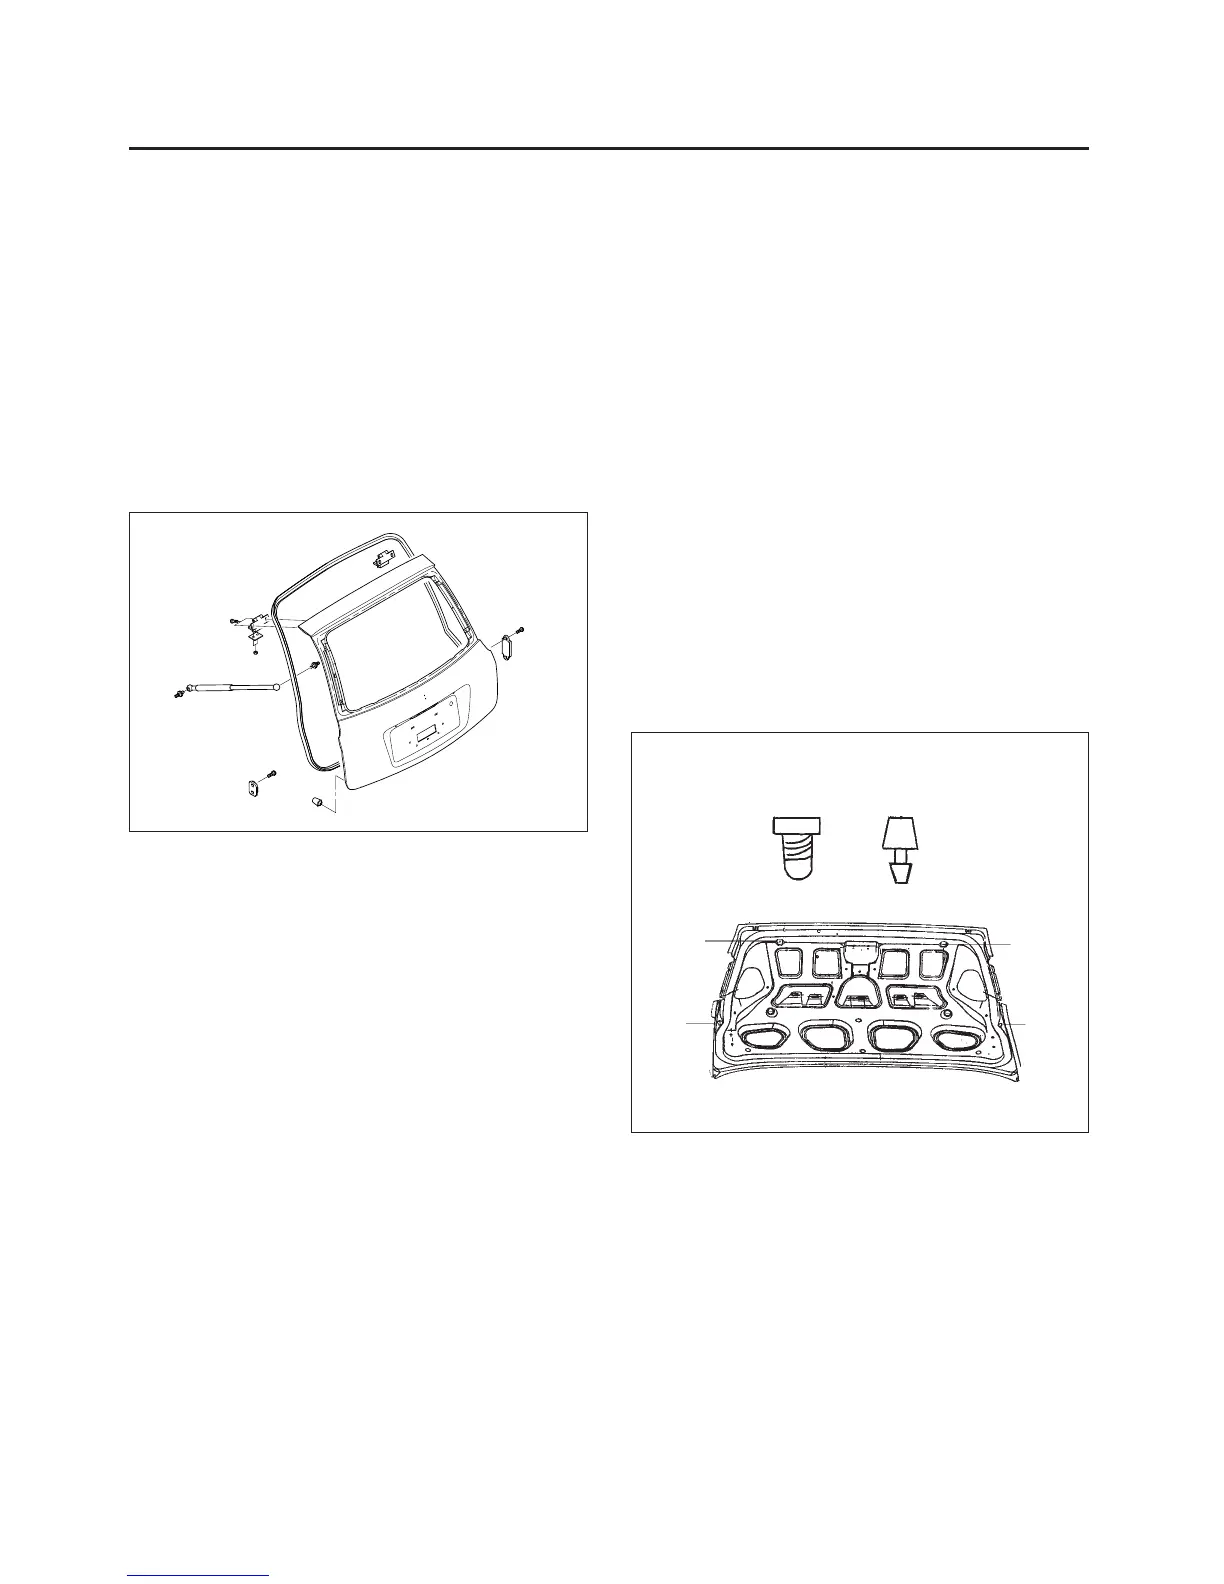
3. TRUNK LID
3-1. REPAIR PROCEDURE
1. Remove the related parts.
• Wiring harness and solenoid valve.
• Lock set, latch set and others.
2. Remove the trunk lid.
• Remove the trunk lid mounting bolts from two
hinge bows.
Fig. 8
3. Preparation of the new trunk lid.
• Preparation of the new trunk lid and check dam-
aged areas.
4. Apply the paint.
CAUTION
• Ventilate when spraying paint. Most paint contains
substances that are harmful if inhaled or swal-
lowed.
Read the paint label before opening paint con-
tainer.
• Avoid contact with skin. Wear an approved res-
pirator, gloves, eye protection and appropriate
clothing when painting.
• Paint is flammable. Store in a safe place, and
keep it away from sparks, flames or cigarettes.
5. Preinstall the trunk lid.
• Fasten to the trunk lid hinges bows at two places
with four bolts, carefully.
• Install bumper.
Fig. 9
BUMPER
4
2
1
(1,2) (3,4)