4–20 FRONT
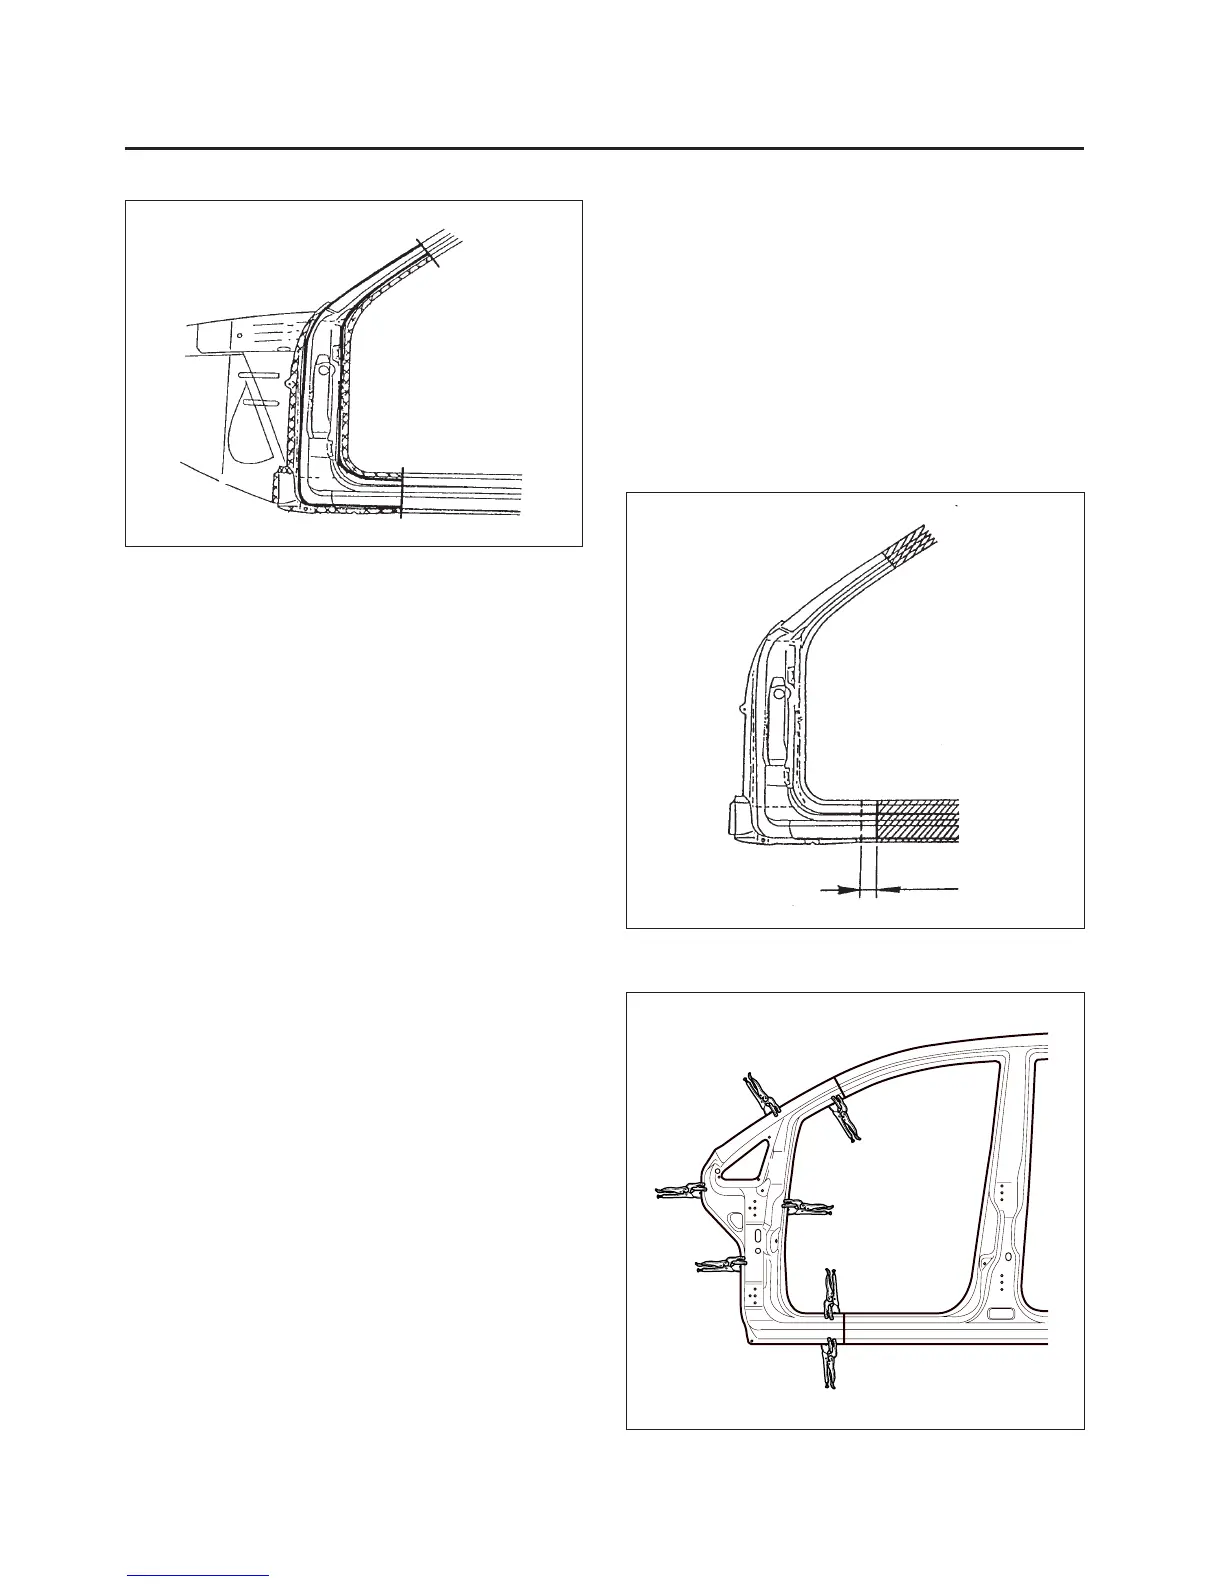
Fig. 29
• Center punch around the spot weld imprints with
the rear wheelhouse, front body pillar inner, rein-
forcement front body pillar inner and floor panel
side.
• Use the special spot cutter to drill holes at the
spot weld nuggets on the front pillar.
NOTE: When drilling holes be careful not to drill down
to the front body pillar inner, reinforcement front body
pillar inner and floor panel side themselves.
• Pry off the remaining flanges from the body with
an air chisel and leaving the welding flanges.
• Level and finish the burrs from the pried off spot
welds with a hammer, dolly and disc sander.
CAUTION: To prevent eye injury, wear goggles or
safety glasses whenever sanding, cutting, or grind-
ing.
6. Mold damaged related parts.
• Fill any holes drilled by welding.
CAUTION: To prevent eye injury and burns when
welding, wear an approved welding helmet, gloves
and safety shoes.
• Use a hammer and dolly to mold damaged areas
of the remaining inner panel and even out the
welding flanges.
7. Set the new front pillar.
• Align the new part with the top section, then cut
it with a hand saw.
• Cut the floor panel side joint area so it will over-
lap by 30mm(1.18in.) in the floor panel side with
a hand saw.
• Grind both sides of the welding section with a disk
sander to remove the paint and expose the steel
plate.
• Clamp the new panel in place with the vise grips.
• Tack weld the clamped section for temporary in-
stallation.
Fig. 30
Fig. 31
30mm(1.18in.)