ROOF, BACK PANEL AND REAR FLOOR PANEL 5–13
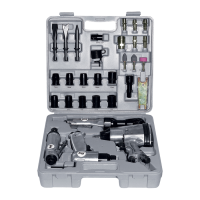
7. Cut the new rear floor to align it with the body, then
set the new rear floor and extension rear floor.
• Cut the new part so it overlaps the cross member
rear seat by approximately 40mm.
Fig. 17
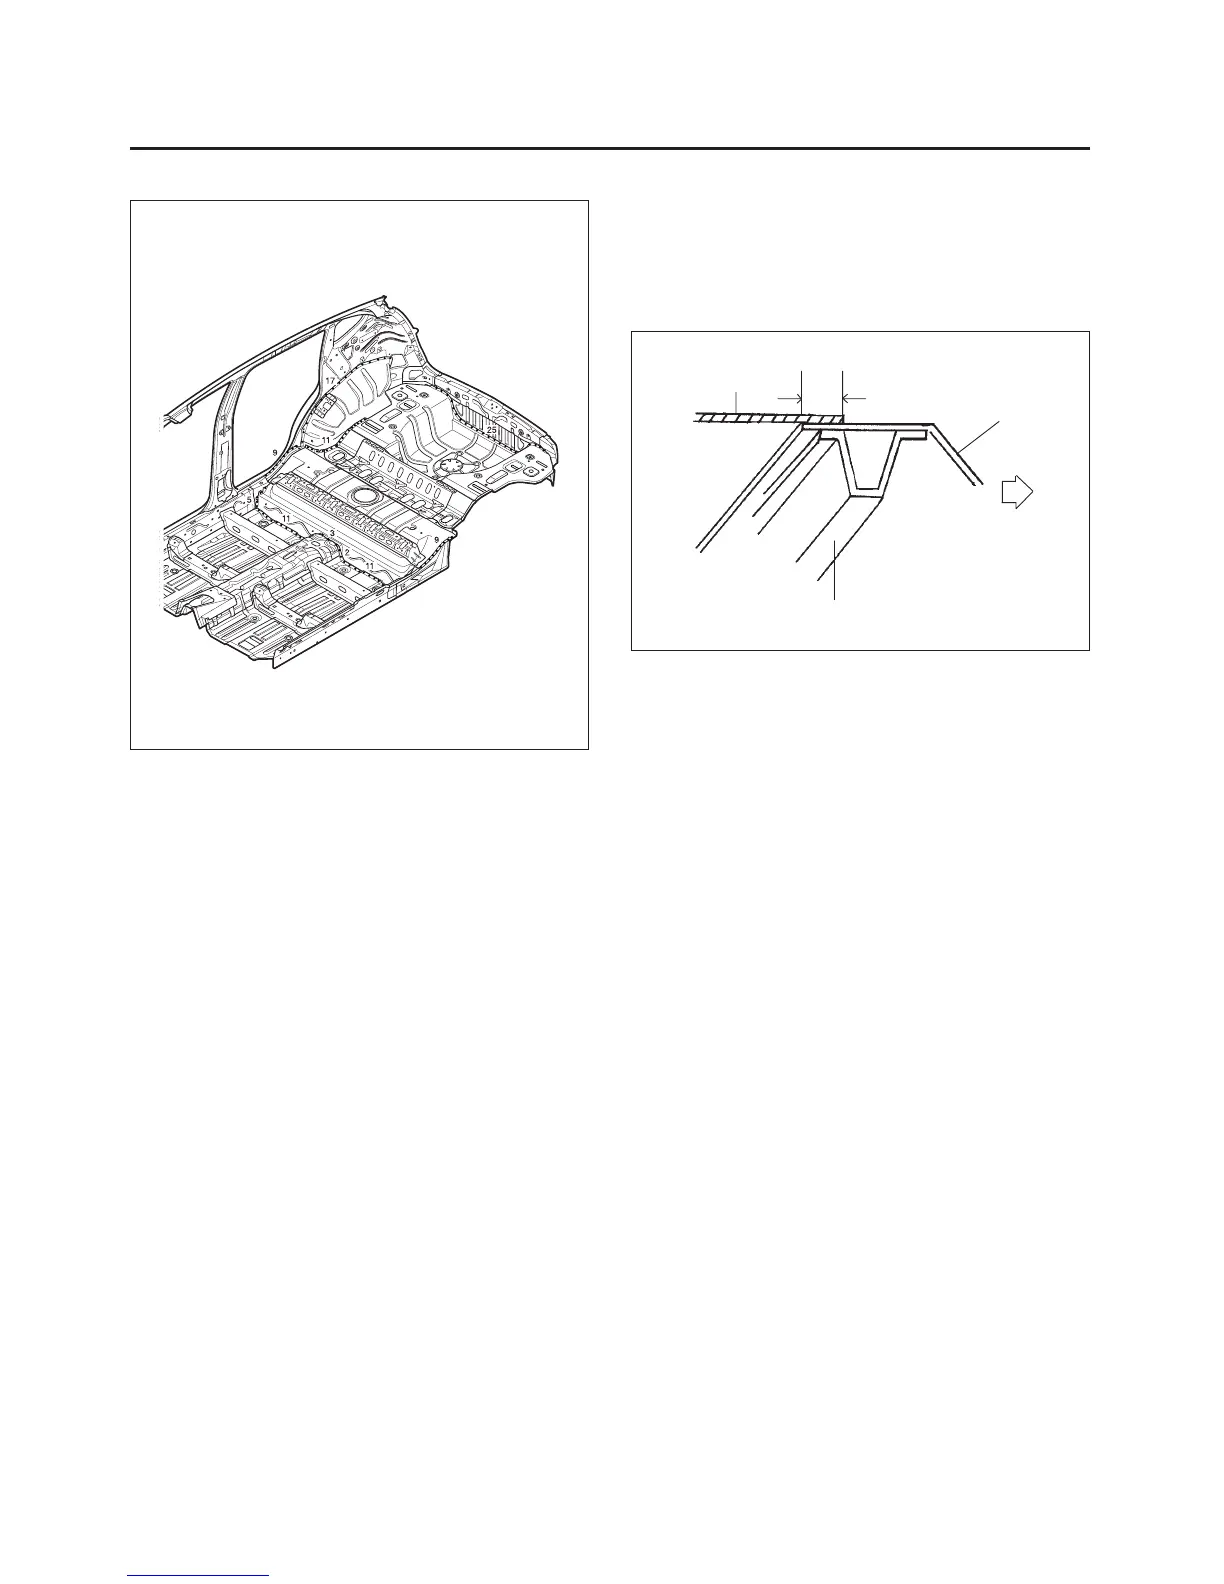
5. Peel off the undercoat and sealer.
• Heat the undercoat and sealer at the welding
areas with a gas torch and peel off the undercoat
and sealer with a steel spatula.
6. Mold damaged related parts.
• Use a hammer and dolly to mold damaged areas
of the rear longitudinal and extension rear longi-
tudinal.
• Even out the welding flanges with a hammer and
dolly.
• Fill any holes drilled by welding.
CAUTION: To prevent eye injury and burns when
welding, wear an approved welding helmet, gloves
and safety shoes.
• Level and finish the burrs from the pried off spot
welds with disc sander.
• Sand off the paint and undercoat from both sides
of the flange to be welded.
Fig. 18
FORWARD
REAR FLOOR
NEW REAR FLOOR
CROSS MEMBER REAR SEAT
40mm
• Grind both sides of the welding section of the rear
floor and extension rear floor with a disk sander
to remove the paint and expose the steel plate.
CAUTION: To prevent eye injury, wear goggles or
safety glasses whenever sanding, cutting, or grind-
ing.
• Set and clamp the new panel in place with the vise
grips.
NOTE: Use of jigs is recommended for correct posi-
tions and check that the both rear logitudinal is par-
allel.
• Tack weld the clamped section for temporary in-
stallation.
CAUTION: To prevent eye injury and burns when
welding, wear an approved welding helmet, gloves
and safety shoes.
• Remove the vise grips and temporarily install the
rear panel, then check the alignment, level dif-
ferences and outer appearance.