6–4 FRAME DOOR OPENING, DOOR AND SIDE PANEL OUTER
• Perform a trial welding first, and check the weld-
ing condition.
• Increase the number of spot by 20% for areas to
be spot welded.
5. Set the new frame door opening.
• Grind both sides of the welding section of the pre-
pared frame door opening part with a disk sander
to remove the paint and expose the steel plate.
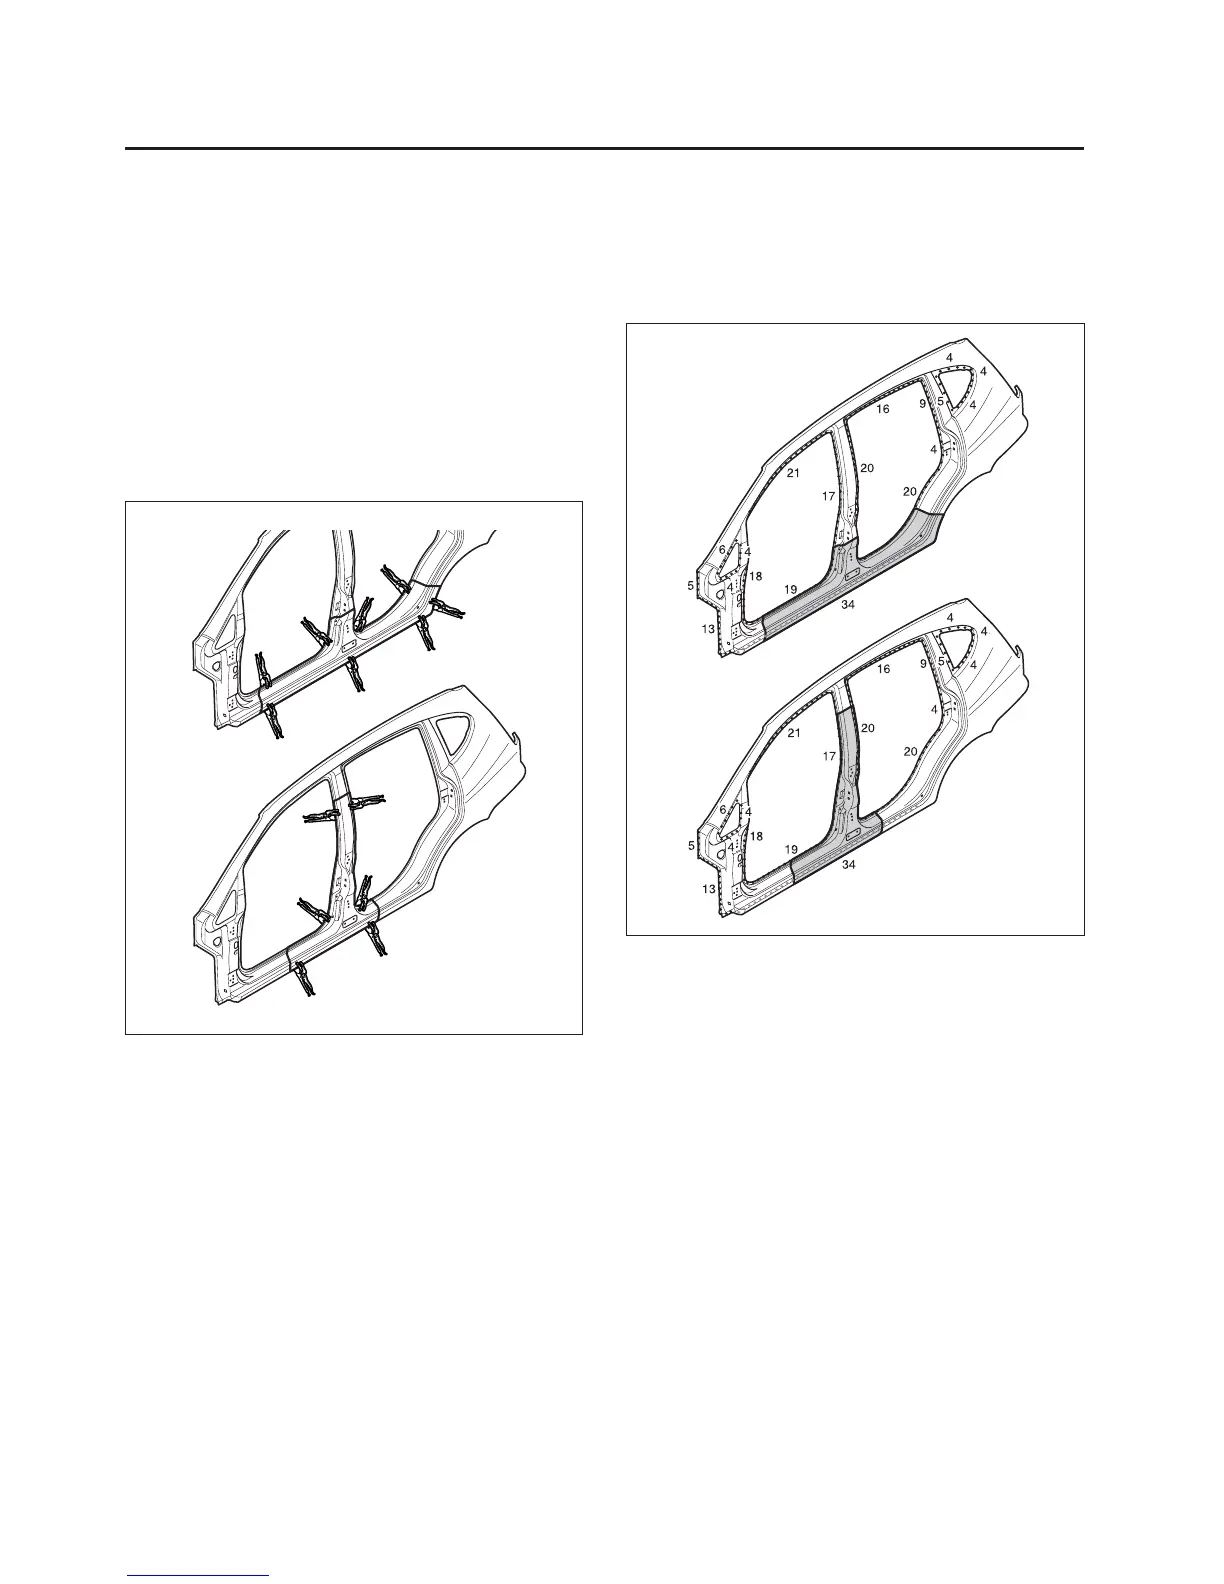
• Clamp the new panel in place with the vise grips.
• Tack weld the clamped section for temporary in-
stallation.
CAUTION: To prevent eye injury and burns when
welding, wear an approved welding helmet, gloves
and safety shoes.
7. Finish the welding areas.
• Level the gas or MIG welded areas with a disc
sander, then even out high areas with a hammer
being careful not to deform them.
CAUTION: To prevent eye injury, wear goggles or
safety glasses whenever sanding, cutting, or grind-
ing.
• Use a hammer and dolly to even out the spot
welded flanges for a close fit with the surface of
the frame door opening panel.
• Fill in deformations and level differences of the
welded areas with solder or putty, then finish.
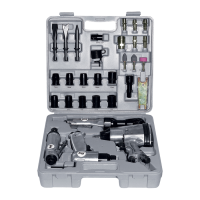
8. Apply the sealer.
• Apply the sealer to the matching surfaces of the
floor and frame door opening.
Fig. 4
• Remove the vise grips and temporarily install the
fender and doors, then check the clearances, level
differences and outer appearance.
6. Perform the main welding.
• Weld the front, rear frame door opening and cen-
ter pillar at the butt joints with a gas or MIG
welder.
• Spot weld the frame door opening and center
pillar as shown.
CAUTION: To prevent eye injury and burns when
welding, wear an approved welding helmet, gloves
and safety shoes.
Fig. 5