7 Installation
Installer reference guide
47
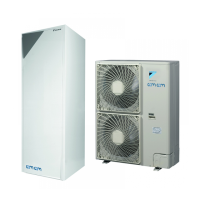
ERGA04~08DAV3(A) + EHVH04+08S23DAV
Daikin Altherma – Low temperature split
4P499573-1 – 2017.12
X1M
X2M
A8P
X5M
1 2 3 4 5
X801M
S6S
S7S
S8S
S9S
a
a Installation of EKRP1AHTA is required.
2 Fix the cable with cable ties to the cable tie mountings.
7.9.17 To connect the safety thermostat (normal
closed contact)
1 Connect the safety thermostat (normal closed) cable to the
appropriate terminals as shown in the illustration below.
2 Fix the cable with cable ties to the cable tie mountings.
NOTICE
Make sure to select and install the safety thermostat
according to the applicable legislation.
In any case, to prevent unnecessary tripping of the safety
thermostat, it is recommended that …
▪ … the safety thermostat is automatically resettable.
▪ … the safety thermostat has a maximum temperature
variation rate of 2°C/min.
▪ … there is a minimum distance of 2 m between the
safety thermostat and the 3‑way valve.
INFORMATION
After it is installed, do NOT forget to configure the safety
thermostat. Without configuration, the indoor unit will
ignore the safety thermostat contact.
INFORMATION
The preferential kWh rate power supply contact is
connected to the same terminals (X5M/9+10) as the safety
thermostat. It is only possible for the system to have
EITHER preferential kWh rate power supply OR a safety
thermostat.
7.9.18 To connect the anti-legionella heater
power supply
WARNING
The anti-legionella heater MUST have a dedicated power
supply and MUST be protected by the safety devices
required by the applicable legislation.
CAUTION
To guarantee the unit is completely earthed, always
connect the anti-legionella heater power supply and the
earth cable.
Make sure that the power supply is in accordance with the anti-
legionella heater capacity, as listed in the table below.
Anti-legionella
heater capacity
Power supply Maximum running
current
2.4kW 1N~230V 11A
Connect the anti-legionella heater power supply cable as follows:
a Factory-mounted cable connected to the anti-legionella
heater contactor inside the lower switch box (K3M)
b Field wiring (see below)
F2B Overcurrent fuse (field supply). Recommended: 2‑pole;
20A; curve 400V; tripping class C.
K3M Contactor (in the lower switch box)
Q1DI Earth leakage circuit breaker (field supply)
SWB 2 Lower switch box
X8M Terminal (field supply)
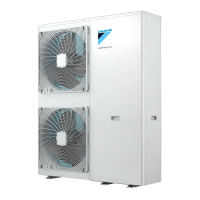
7.10 Finishing the outdoor unit
installation
7.10.1 To finish the outdoor unit installation
1 Insulate and fix the refrigerant piping and interconnection cable
as follows:
Final English - Tanslations in progress
 Loading...