Removal Procedure SiBE81-909
80 Humidifying Air Purifier
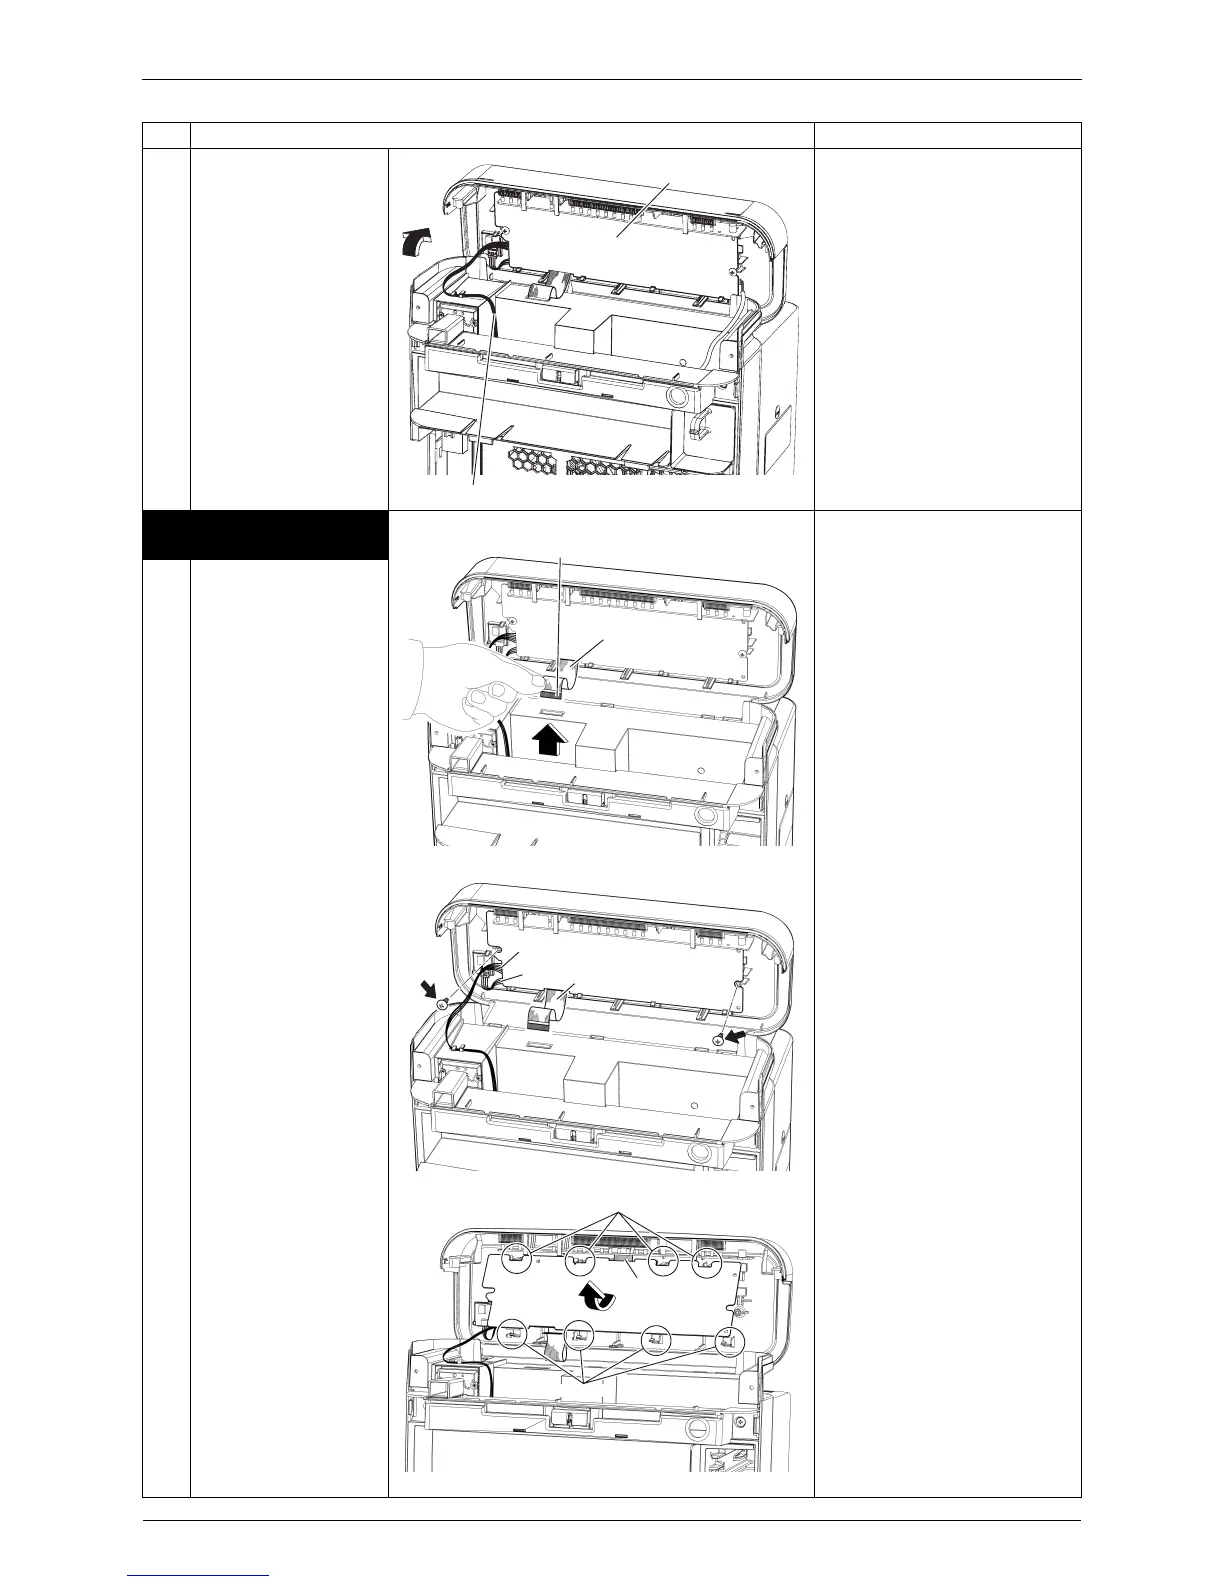
7
Open the operation
sign cover.
★
Be careful as the linkage
connector is connected.
2. Removal of the
operation PCB
★
When assembling, wire
harness shall be inserted
securely. Do not insert it
aslant.
★
Insert the linkage connector
until the silver part cannot be
found.
1
Disconnect the linkage
connector from the
power supply / control
PCB.
2
Remove the 2 screws. [S1] : Dust sensor
[S3] : Humidity sensor
[S128] : Connector for power
supply / control PCB
[S118]
[S129] : Connector for display
PCB [S400]
3
Release the 8 hooks.
Remove the operation
PCB.
Step Procedure Points
(R9769)
Operation PCB
Wire harness for dust sensor
(R9815)
Insert the wire harness
(for display) horizontally.
Linkage
connector
(R9816)
[S1]
[S3]
[S128]
(R9817)
Hooks
[S129]
Hooks
 Loading...