All level controls are center detented making neutral positions easy
to establish. All frequency ranges have been carefully selected
following extensive examination of all types of music (and noise).
Test comparisons of other equalizers helped the D&R design team
create an equalizer that sounds very musical , but at the same time,
raising the standard in specs and sound quality. Noise and
distortion are kept to an absolute minimum.
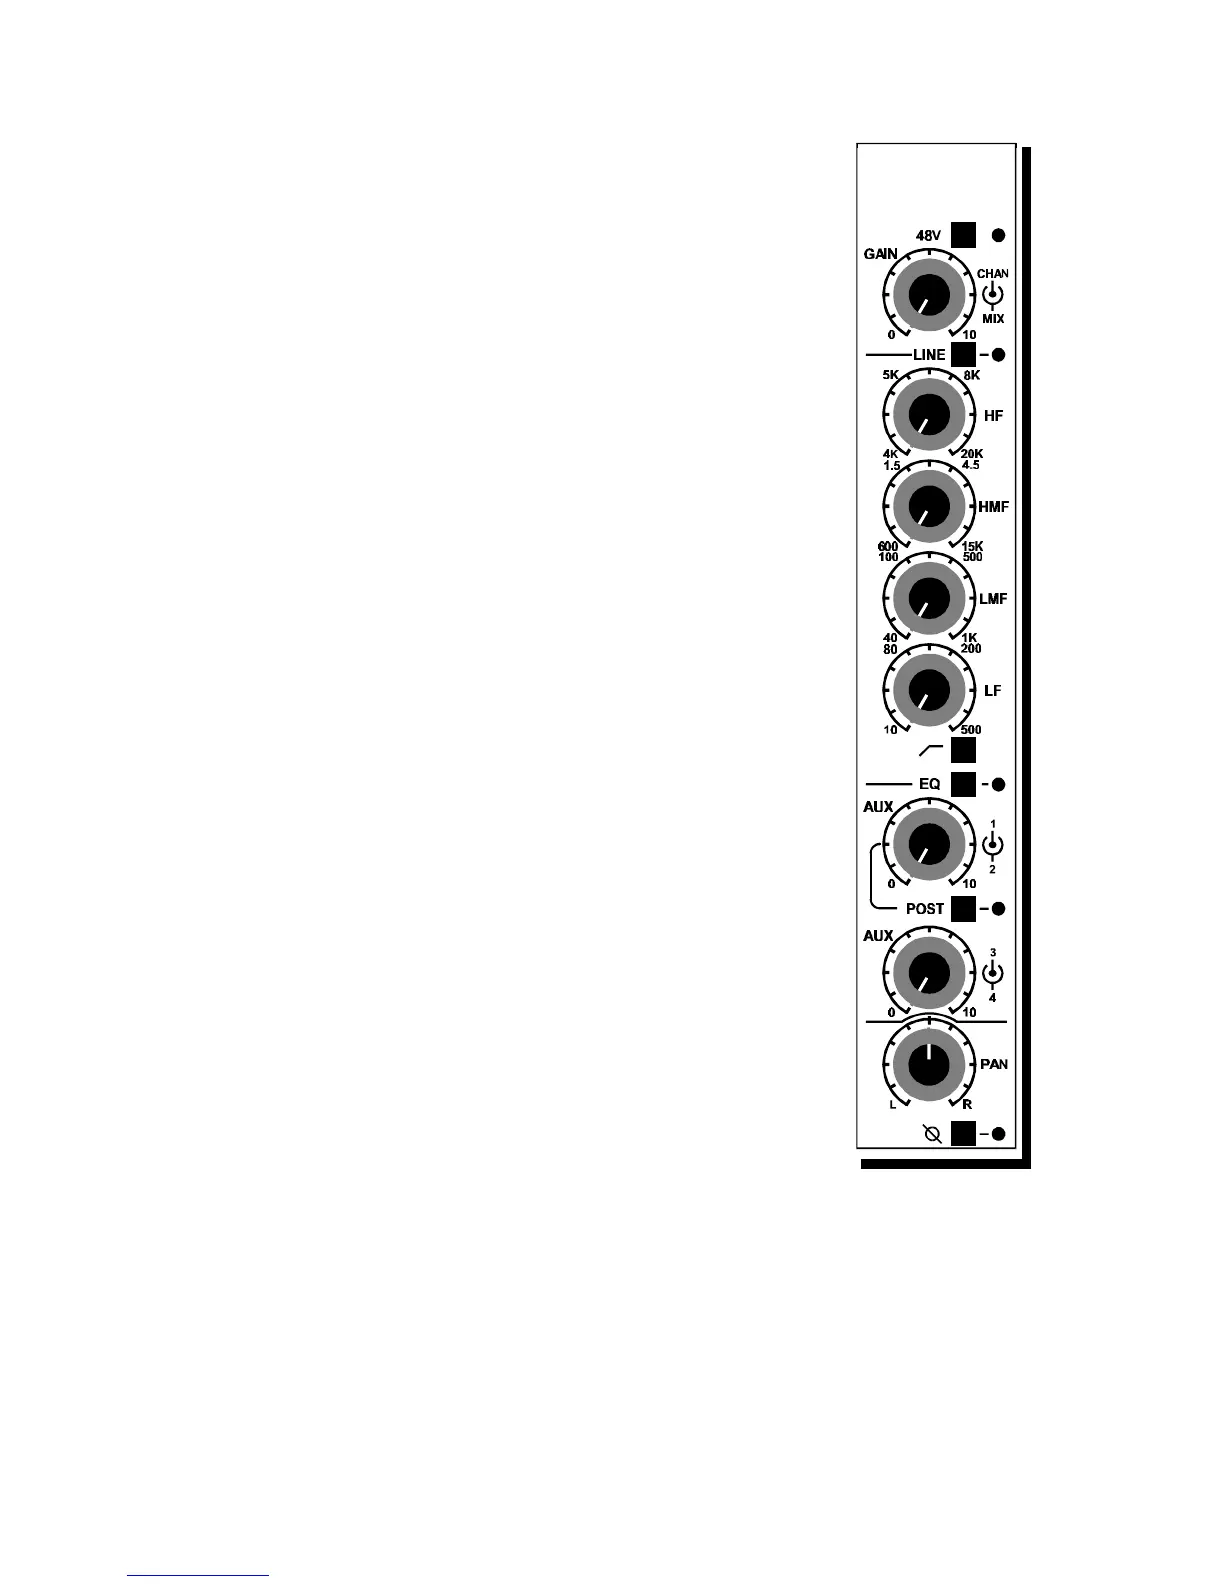
A High Pass Filter in / out switch is fitted to roll off the low
frequencies at 100 Hertz.
An equalizer on - off switch is fitted to allow easy comparisons.
3.3 AUX 1 - 4 SECTION
Aux 1 through 4 are 4 dedicated individual aux sends from the
CHAN section of the module. PRE/POST switching for Aux 1/2
is selected locally on every module with a LED indicator as
reminder of the setting.
AUX 3/4 is factory jumpered to be post-CHAN fader.
The PCB allows for a PRE-CHAN setting when desired. Aux 3/4
are sourced always from the CHAN part of the module.
3.4 PANPOT
Cinemix's panpot is built to achieve minimum crosstalk between
two selected busses. A center detent with -3 dB attenuation is
standard.
3.5 PHASE
The PHASE switch below the CHAN pan control is used to
reverse the phase of any mike or line input. A successful method
of checking for out of phase signals is to press the mono switch on
the master section and listen closely to the mix. If an unexpected
sound is heard or if something appears to be missing from the mix,
press the phase switch on the channel suspected to be in error. If
the sound improves, then that channel was out of phase with the
others.
3.6 INSERT
The insert can be found in the patchbay and has ground
compensated balanced sends and true balanced returns.
3.7 SEL
The SEL switch determines the automation mode of the automated fader. Either
off (no LED's on) Read (R), Write (W) or Update/Trim both Read and Write
LED's on.
Note: These functions are only active when PowerVCA is loaded and active
on your PC!
Cinemix manual page: 31