3. Install the control module and six cap screws (D250).
Torque sequence
4. Using a 5 mm internal hex wrench, torque the cap screws (D250) to 13.3 Nm [9.8 lbf ft].
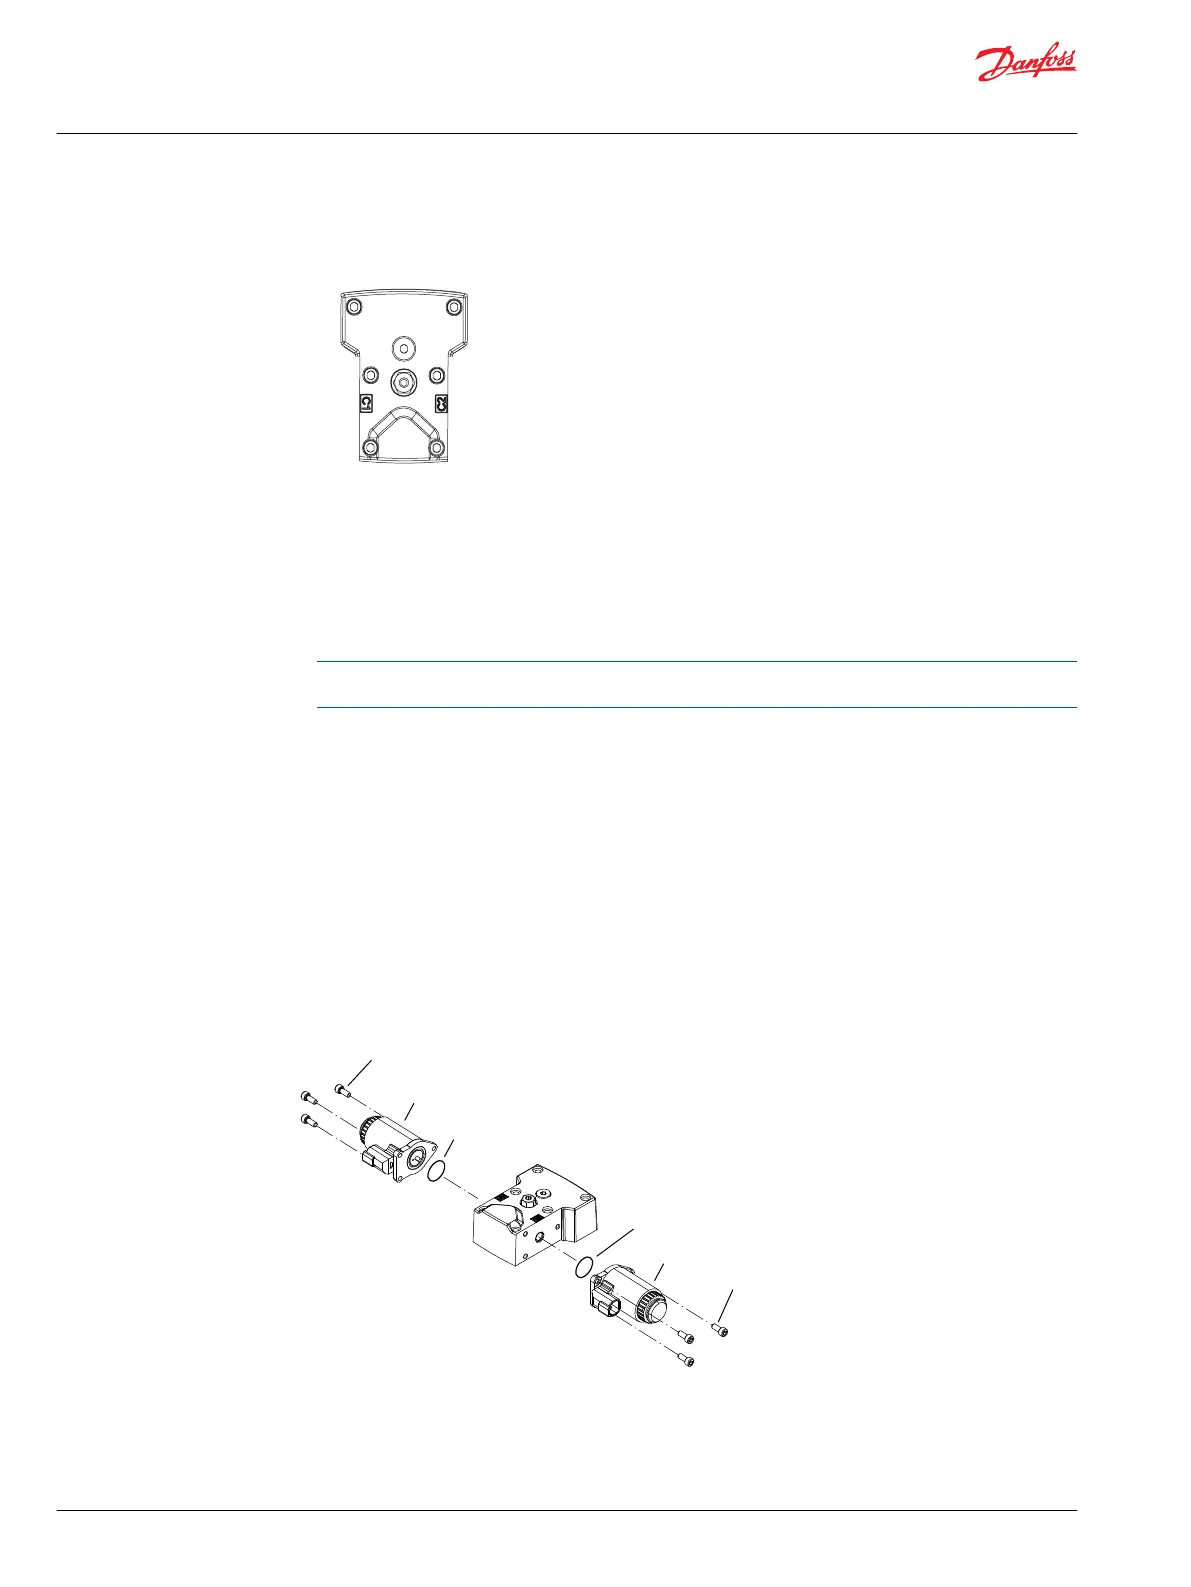
MP1 control solenoids/actuator housing replacement
1. Disconnect electrical/hydraulic connection and remove the three cap screws (D050) using a 4 mm
internal hex wrench.
2. Remove the solenoid/actuator housing (D025/QD77) and O-ring (D025A/QD26). Discard the O-ring.
Individual coils may be replaced. Use a 12 point 26 mm socket. Torque the coil nut to 5 N•m [3.7
lbf•ft].
3. Inspect the machined surface on the control. If you find any nicks or scratches, replace the
component.
4. Lubricate new O-ring (D025A/QD26) using petroleum jelly and install.
5. Install solenoid/actuator housing with three cap screws (D050) using a 4 mm internal hex wrench.
Torque screws to 5 N•m [4 lbf•ft].
6. Reconnect electrical/hydraulic connections and test the pump for proper operation.
MP1 control solenoid identification
Control solenoid removal
D025A
D050 (3X)
D025
D025A
D050 (3X)
D025
EDC
Service Manual
MP1
Minor repair
54 |
©
Danfoss | April 2019 AX00000244en-000201