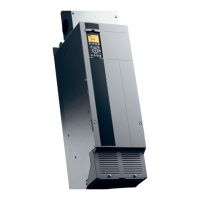
8.4.2 Inverter Section Tests
NOTICE
PARALLEL MODULE ISOLATION
Before performing these tests in a parallel drive system,
isolate the individual module to be tested. To isolate the
module, remove the:
•
DC link connection.
•
Motor busbar/cable links.
•
Input busbar/cable links.
NOTICE
MOTOR CABLE REMOVAL
Disconnect motor cables when testing the inverter
section. When leads are connected, a short circuit in a
single phase reads in all phases, making isolation
dicult.
The inverter section consists primarily of the IGBTs used for
switching the DC bus voltage to create the output to the
motor. The IGBTs are grouped into modules. D-sized drives
use 1 module per phase. E-sized drives use 2 modules per
phase.
Inverter test part I
1. Set the meter to diode scale.
2. Connect the positive (+) meter lead to the (+)
positive DC bus.
3. Connect the negative (–) meter lead to terminals
U, V, and W in sequence.
Innity is the correct reading. The meter starts at a low
value and slowly moves toward innity due to the meter
charging capacitance within the drive.
Inverter test part II
1. Reverse the meter leads by connecting the
negative (-) meter lead to the positive DC(+) bus.
2. Connect the positive (+) meter lead to U, V, and
W in sequence.
A diode drop indicates a correct reading.
Inverter test part III
1. Connect the positive (+) meter lead to the
negative DC(-) bus.
2. Connect the negative (-) meter lead to terminals
U, V, and W in sequence.
A diode drop indicates a correct reading.
Inverter test part IV
1. Reverse the meter leads by connecting the
negative (-) meter lead to the negative DC(-) bus.
2. Connect the positive (+) meter lead to U, V, and
W in sequence.
Innity is the correct reading. The meter starts at a low
value and slowly moves toward innity due to the meter
charging capacitance within the drive.
Incorrect reading
An incorrect reading in any inverter test indicates a failed
IGBT module. Replace all the IGBT modules. Following an
IGBT failure, verify that the gate drive signals are present
and the wave form is correct. See chapter 8.5.11 IGBT Gate
Drive Signals Test.
8.4.3 Brake IGBT Test
This test can only be carried out on units equipped with a
dynamic brake option. If a brake resistor is connected to
terminals R-(81) and R+(82), disconnect it before
proceeding. Use an ohmmeter set on diode check or Rx100
scale.
Brake IGBT test part I
1. Connect the positive (+) meter lead to the brake
resistor terminal 82 (R+).
2. Connect the negative (-) meter lead to the brake
resistor terminal 81 (R-).
Innity is a correct reading. The meter starts at a value and
climbs toward innity as capacitance is charged within the
drive.
Brake IGBT test part II
1. Connect the positive (+) meter lead to the brake
resistor terminal 81 (R-).
2. Connect the negative (-) meter lead to the brake
resistor terminal 82 (R+).
A diode drop indicates a correct reading.
Brake IGBT test part III
1. Connect the positive (+) meter lead to the brake
resistor terminal 81 (R-).
2. Connect the negative (-) meter lead to the
negative DC(-) bus.
Innity is a correct reading. The meter starts at a value and
climbs toward innity as capacitance is charged within the
drive.
Test Procedures Service Guide
MG94A502 Danfoss A/S © 02/2019 All rights reserved. 101
8 8
 Loading...


