XPS Card Printer Driver User’s Guide 85
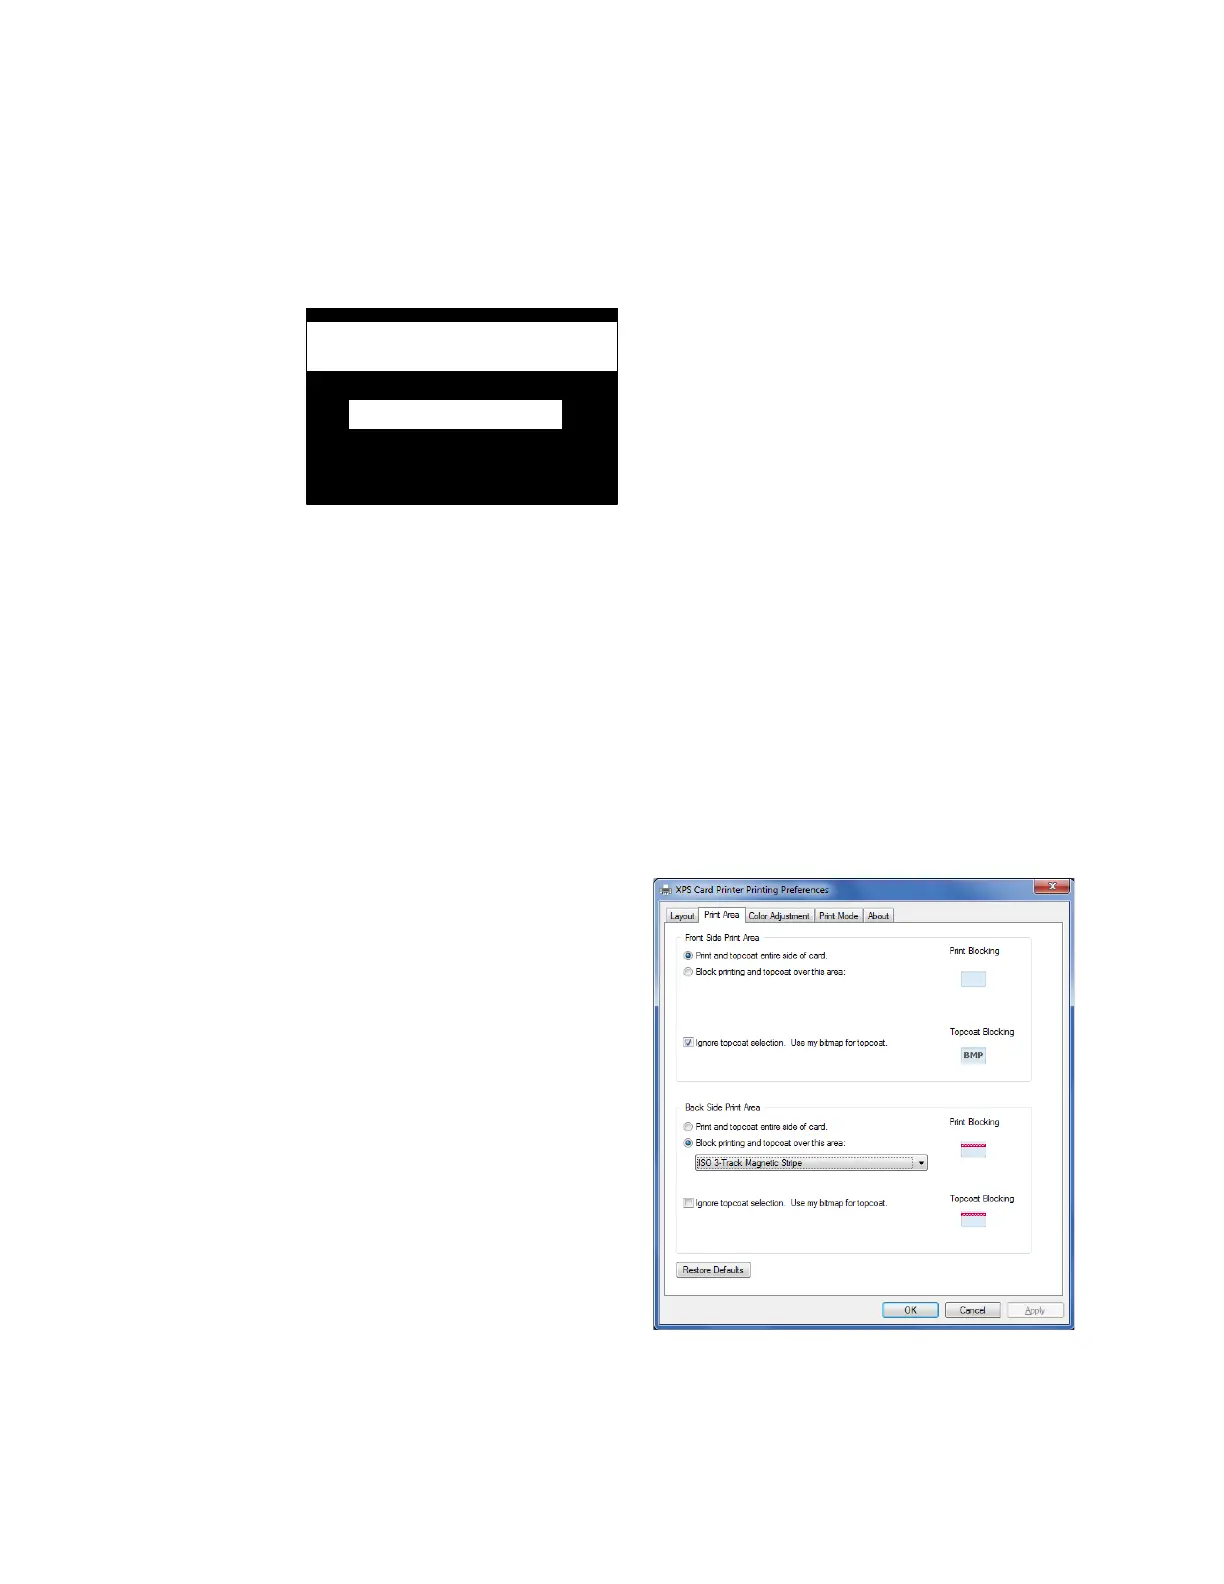
3. Create a new blocking area by drawing a white shape or pasting a graphic. The following
example shows a possible signature area below the magnetic stripe area on the back of a
card. The magnetic stripe and signature areas were created by drawing a white rectangle on
the black background of the file CRDLandTopcoatBack.bmp.
4. Save the file using the same name in the C:\CardPrinter folder.
HINTS & TIPS
If you use a user-defined topcoat bitmap, you must define all card elements in the bitmap,
including smart card chip and magnetic stripe locations. Driver-defined preset masks or ID
software topcoat blocking areas are not used.
The purpose of topcoat is to protect the printed image on a card. Any area with color printing
eventually fades if it lacks a topcoat. Make sure that most color printing is covered with
topcoat.
Select a User-Defined Bitmap
1. Open the Printing Preferences window.
2. Select the Print Area tab.
3. For the side of the card that you want to
use the user-defined bitmap, select
Ignore topcoat selection. Use my bitmap
for topcoat. The Topcoat Blocking icon
displays as BMP.
The driver uses the correct bitmap based
on the card orientation you specified on
the Layout tab.
4. Click Apply to save the setting, and then
click OK to close the Printing Preferences
window.
5. Send the card to print.
6. Check the card to verify the topcoat is being applied correctly. Print sample cards until you
are satisfied that the topcoat meets your card design requirements.