S-Class 35
4.2 Start of Print & Cut/Tear Adjustment
If none of the preset Stock ID parameters meet the needs of your
application, then the Start of Print (SOP) and Cut/Tear (C/T)
Adjustments can be used to visually set the required positions. To begin:
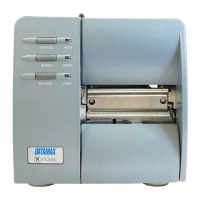
If on-line, press the PAUSE button
to place the printer off-line.
Press and hold (approximately 6
seconds) the F3 button until the On-
Line Indicator is lit then release.
The SOP setup is first, to adjust:
Press the F1 button to increase the current distance (pressing
and holding will rapidly move the ticket).
Press the F2 button to decrease the current distance (pressing
and holding will rapidly move the ticket).
Press the F3 button to print a ticket showing the new setting.
After completing the SOP adjustment, press and hold (approximately
6 seconds) the F3 button until the On-Line Indicator is lit then
release.
Next, adjust the Cut/Tear position
using the F1, F2 and F3 Buttons
as described above.
After completing the Cut/Tear
adjustment, return the printer to
the off-line mode by pressing and
holding the F3 button until the On-Line Indicator is lit then release.
Press the PAUSE button to return to the on-line mode.
Notes: This procedure must be performed in its entirety, even when no
change is desired for one of the settings.
After completing the adjustments, always confirm the new settings
by printing several test tickets.
If using the optional cutter, the cut position on the ticket should
occur just behind the perforation, never in front of the perforation.
 Loading...
