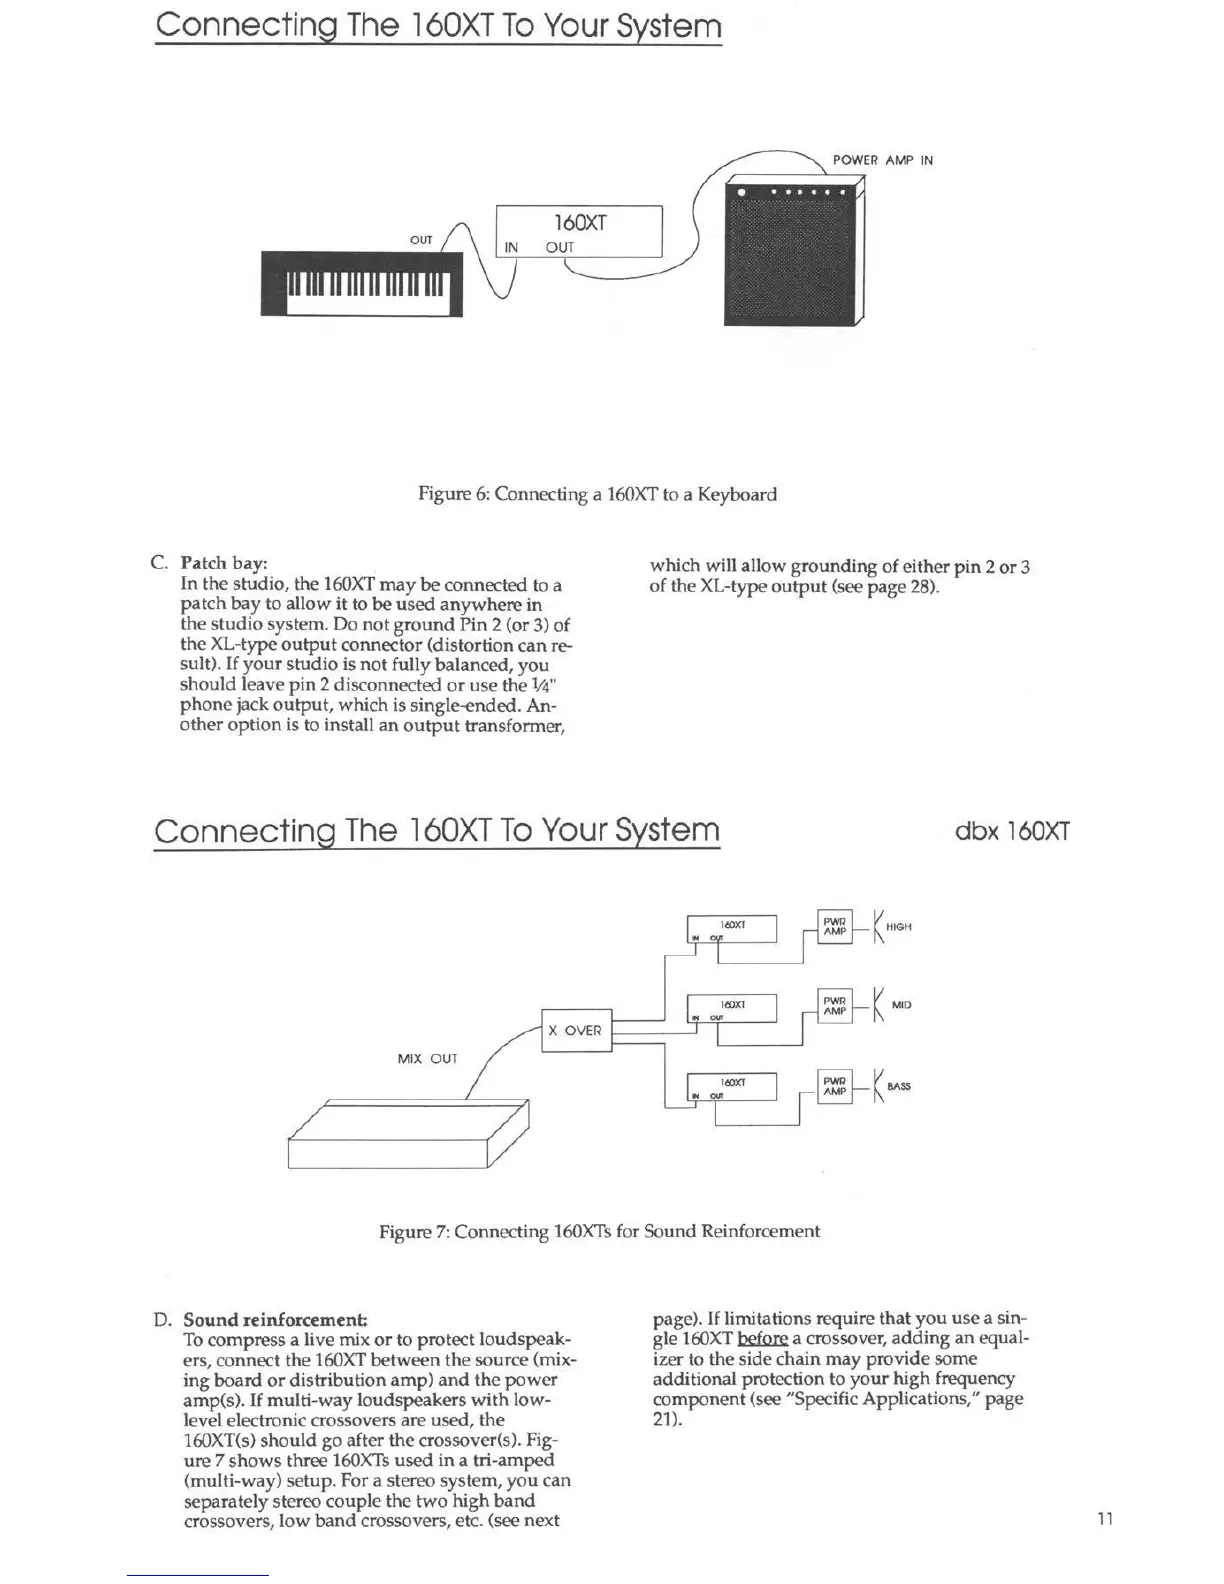
Connecting The l 60XT To Your System
POWER AMP IN
I
160XT I
._I_N_--=0--=U_T ___ -'
Figure 6: Connecting a 160XT to a Keyboard
C. Patch bay:
In the studio, the 160XT may be connected to a
patch bay to allow it to be used anywhere in
the studio system. Do not ground Pin 2 (or 3) of
the XL-type output connector (distortion can re-
sult). If your stu dio is not fully balanced , you
should leave pin 2 disconnected or use the ¼"
ph one jack output, which is single-€nded. An-
other option is to install an output tran sformer,
which will allow grounding of either pin 2 or 3
of the XL-type output (see page 28).
Connecting The l 60XT To Your System
dbx 160XT
IIOXT
PWR
-
AMP
._.
.. -·-
I
1(10)(1
PWR
I-
- AMP
"' our
K MID
X OVER
I
MIX OUT
IIOXT
e-
.. -
-
'
K BASS
/
/
Figure 7: Connecting 160XTs for Sound Reinforcement
D. Sound reinforcement:
To compress a live mix or to protect loudspeak-
ers, connect the 160XT between the source (mix-
ing board or distribution amp) and the power
amp(s). If multi-way loudspeakers with low-
level electronic crossovers are used, the
160XT(s) should go after the crossover(s). Fig-
ure 7 shows three 160XTs used in a tri-amped
(multi-way) setup. For a stereo system, you can
separately stereo couple the two high band
crossovers, low band crossovers, etc. (see next
page). If limitations require that you use a sin-
gle 160XT before a crossover, adding an equal-
izer to the side chain may provide some
additional protection to your high frequency
component (see "Specific Applications," page
21).
11