Back to Contents Page
ExpressCard Cage
Dell™ 500 Service Manual
Removing the ExpressCard Cage
CAUTION: Before you begin the following procedure, follow the safety instructions in the Product
Information Guide.
1. Follow the instructions in
Before You Begin.
2. Remove the center control cover (see
Removing the Center Control Cover).
3. Remove the keyboard (see
Removing the Keyboard).
4. Remove the display assembly (see
Removing the Display Assembly).
5. Remove the palm rest (see
Removing the Palm Rest).
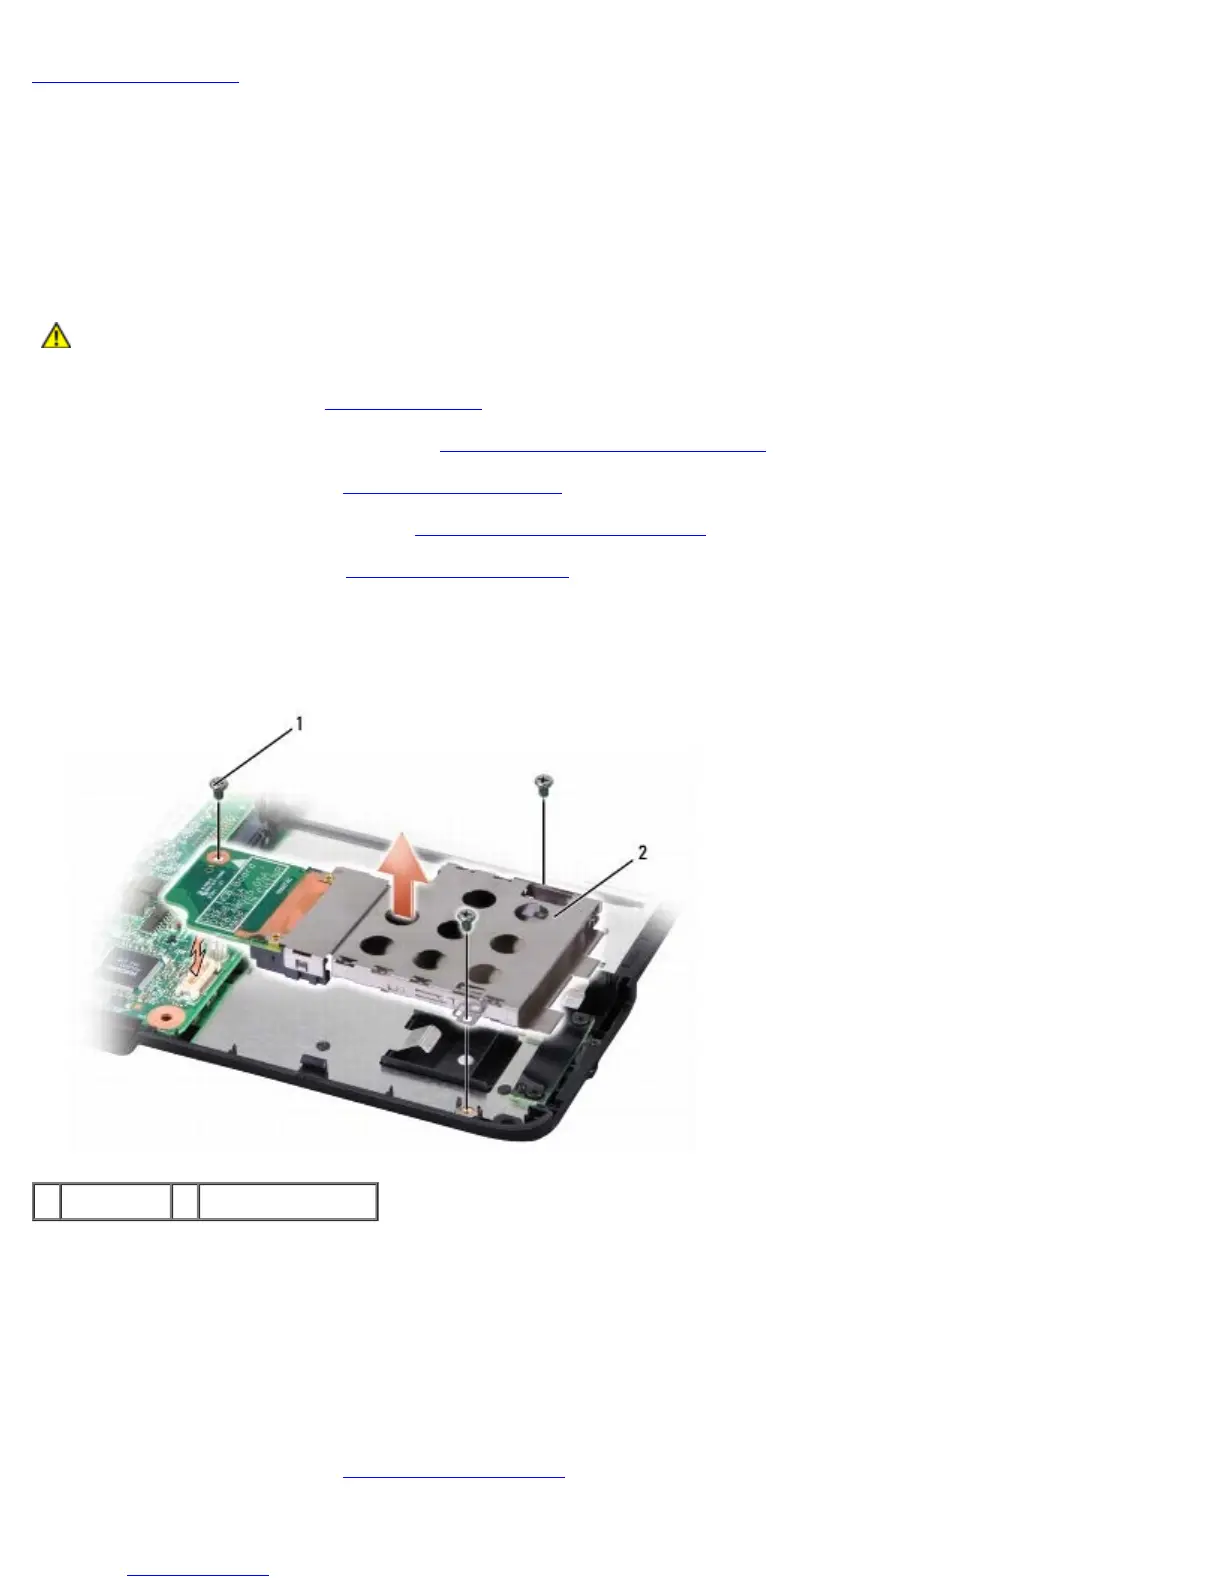
6. Remove the three screws securing the ExpressCard cage to the computer base.
7. Lift the ExpressCard cage gently out of its system board connector and remove it.
1 screws (3) 2 ExpressCard cage
Replacing the ExpressCard Cage
1. Seat the ExpressCard cage on the system board connector by gently pressing it down.
2. Replace the three screws securing the ExpressCard cage.
3. Connect the ExpressCard cable connector to the system board.
4. Replace the palm rest (see
Replacing the Palm Rest).