4. Align the screw hole on the solid-state drive cover with the screw hole on the chassis.
5. Replace the M2x3 screw to secure the solid-state drive cover to the chassis.
Next steps
1. Follow the procedure in after working on your device.
Solid-state drive daughter board
For systems with solid-state drive in the hard drive module will not support hard drive.
Removing the daughter board
Prerequisites
1. Follow the procedure in before working inside your device.
2. Remove the solid-state drive in the hard drive bay:
● M.2 2230 solid-state drive or
● M.2 2280 solid-state drive
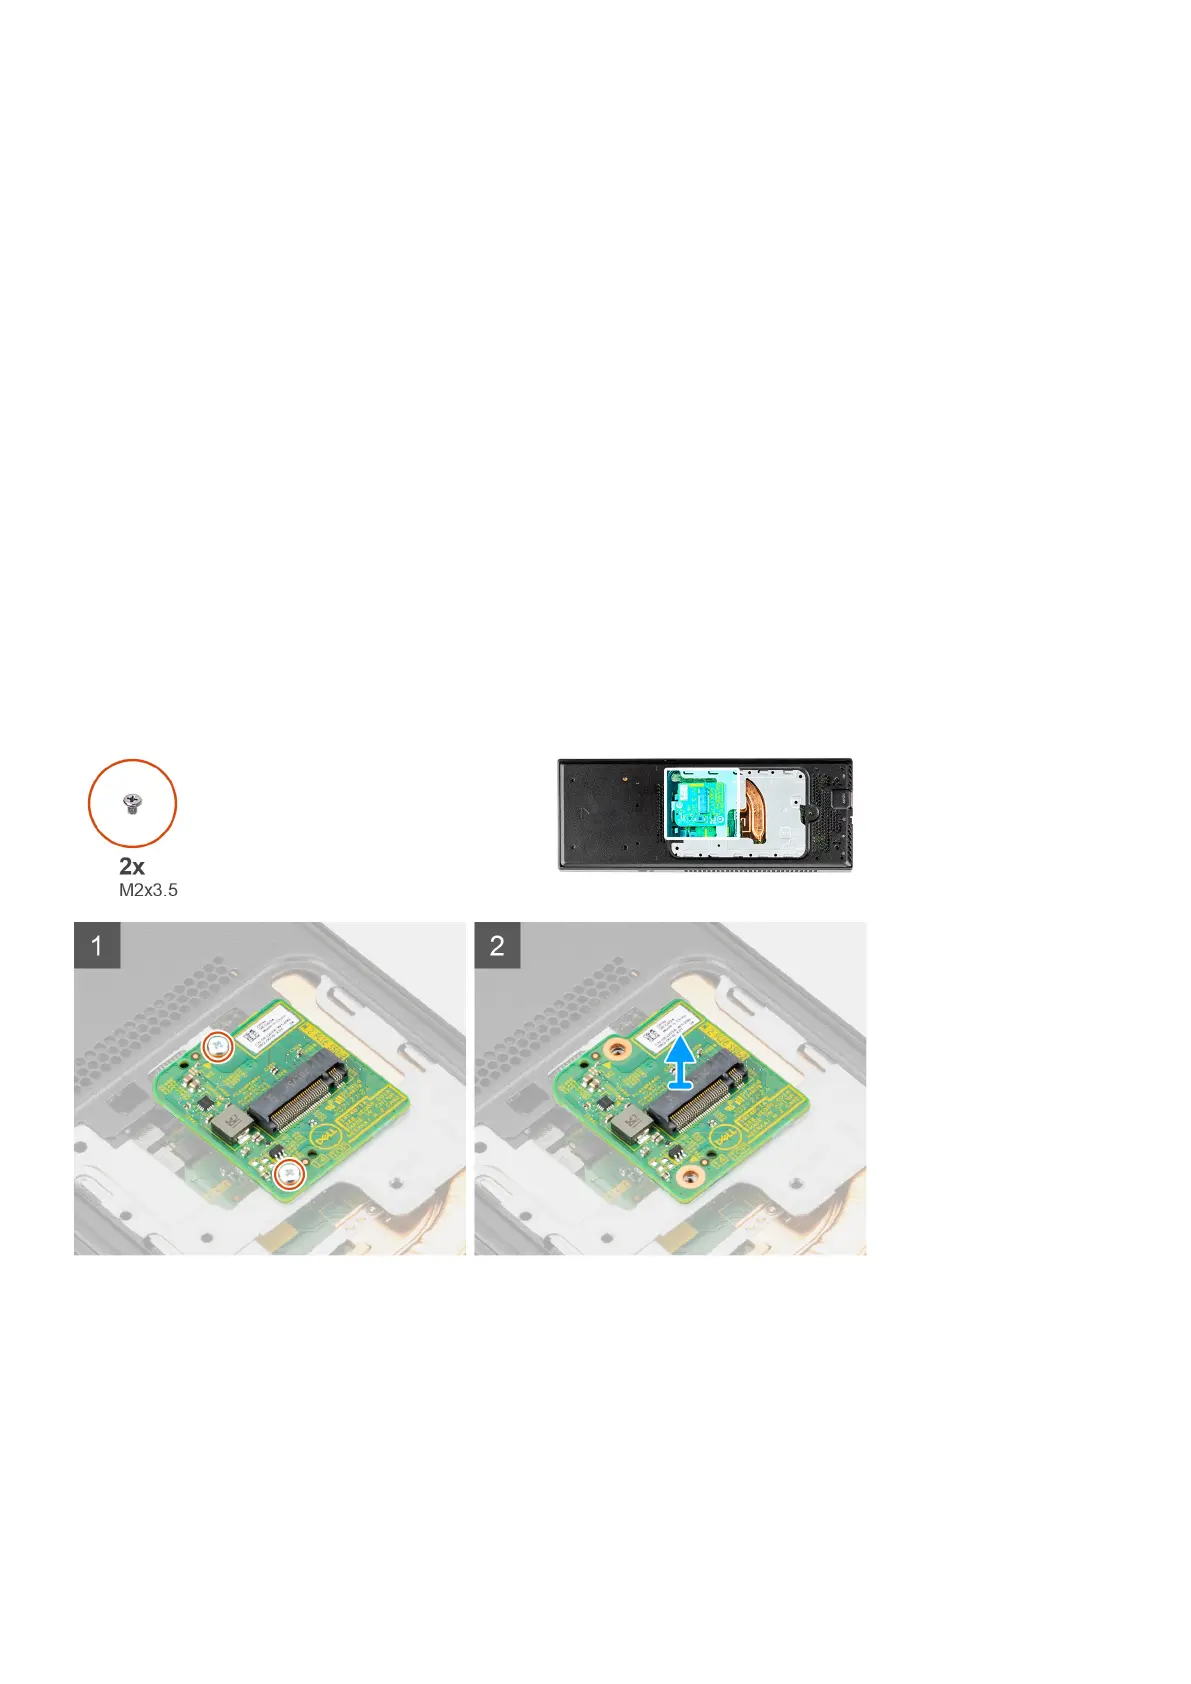
About this task
The figure indicates the location of the daughter board and provides a visual representation of the removal procedure.
Steps
1. Remove the two (M2x3.5) screws that secure the solid-state drive daughter board to the chassis.
2. Disconnect the solid-state drive daughter board from the connector in the system board and lift it from the chassis.
24
Removing and installing components