Installing the solid-state drive daughter board
For systems with solid-state drive in the hard drive bay will not support the hard drive.
Prerequisites
If you are replacing a component, remove the existing component before performing the installation procedure.
About this task
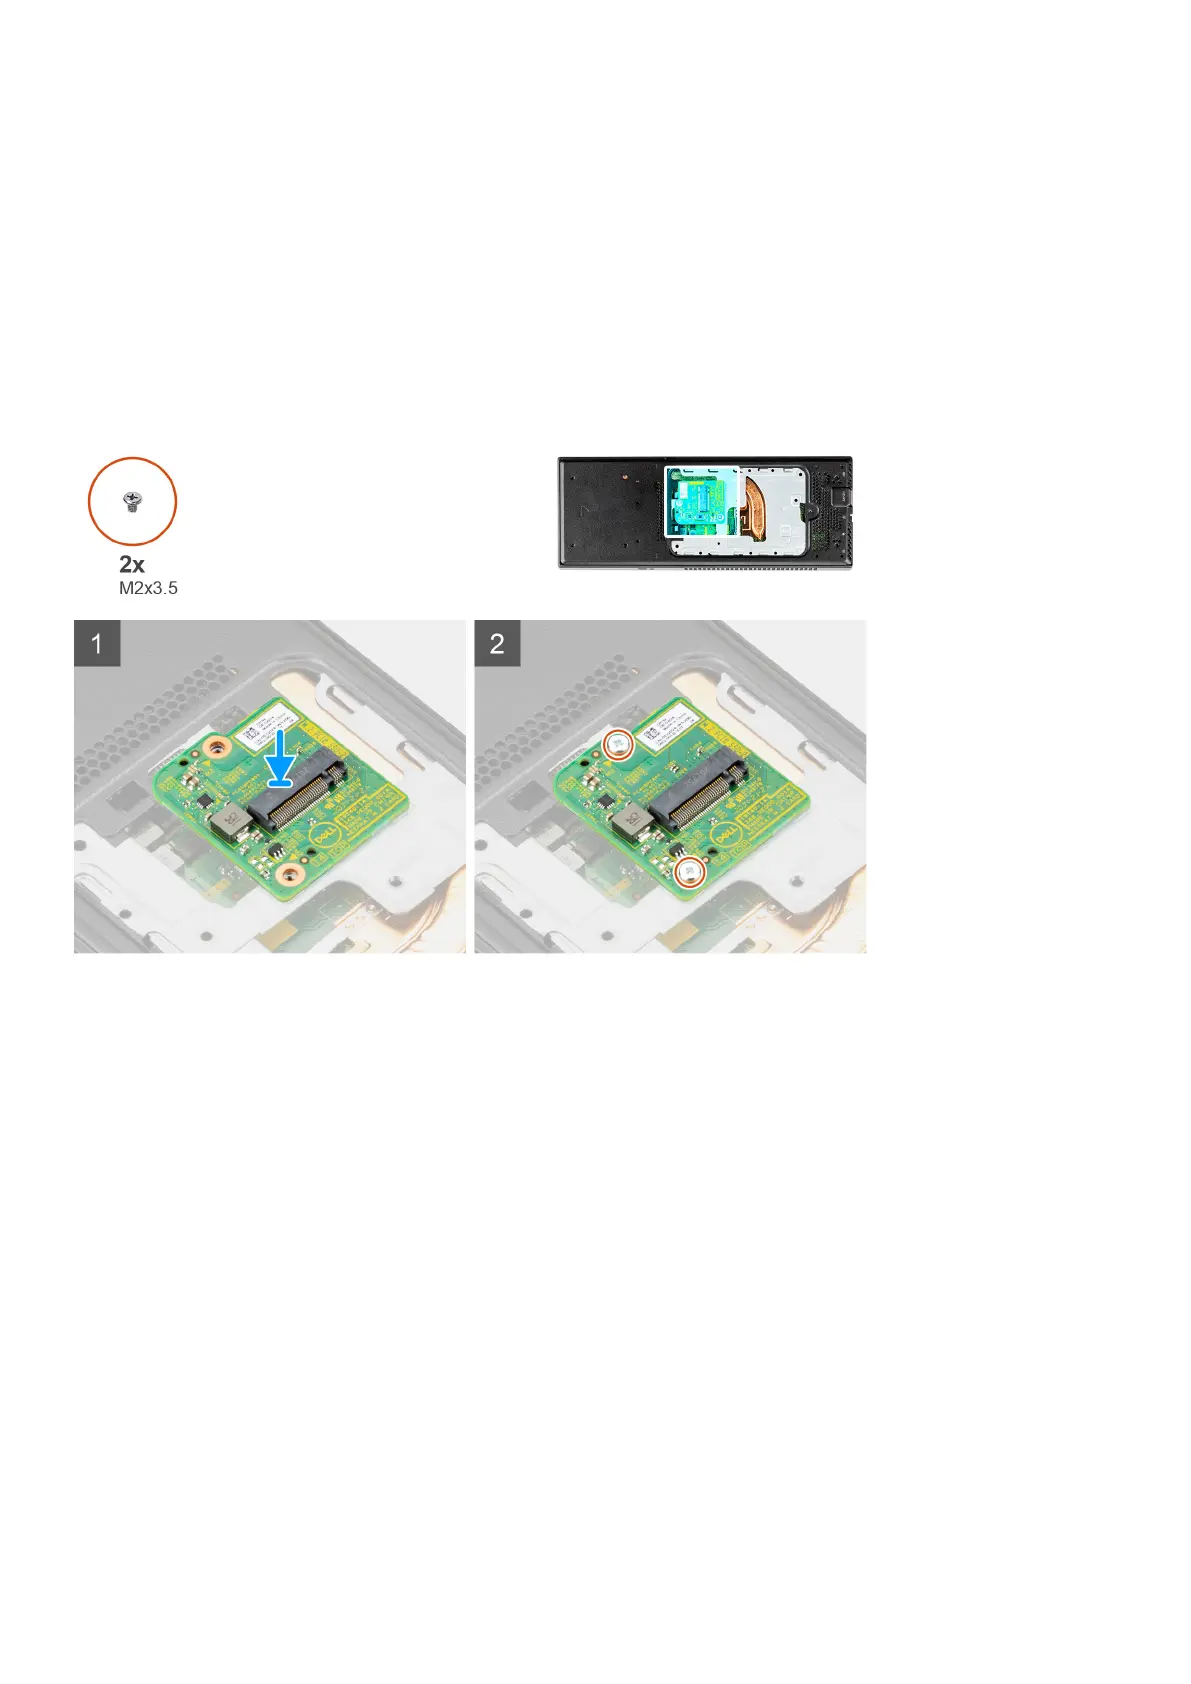
The figure indicates the location of the solid-state drive daughter board and provides a visual representation of the installation
procedure.
Steps
1. Align the screw holes on the daughter board with the screw holes on the chassis.
2. Press to connect the solid-state drive daughter board to the connector on the system board.
3. Replace the (M2x3.5) screws to secure the daughter board on the chassis.
Next steps
1. Install the solid-state drive in the hard drive bay:
● M.2 2230 solid-state drive or
● M.2 2280 solid-state drive
2. Follow the procedure in after working on your device.
Cover
Removing the cover
Prerequisites
1. Follow the procedure in before working inside your device.
Removing and installing components
25