Removing heat sink assembly
1 Follow the procedure in Before working inside your computer.
2 Remove the:
a Micro SD
b SIM card tray
NOTE: To remove both cards if equipped and no need to remove the blank ller
c Base cover
d Battery
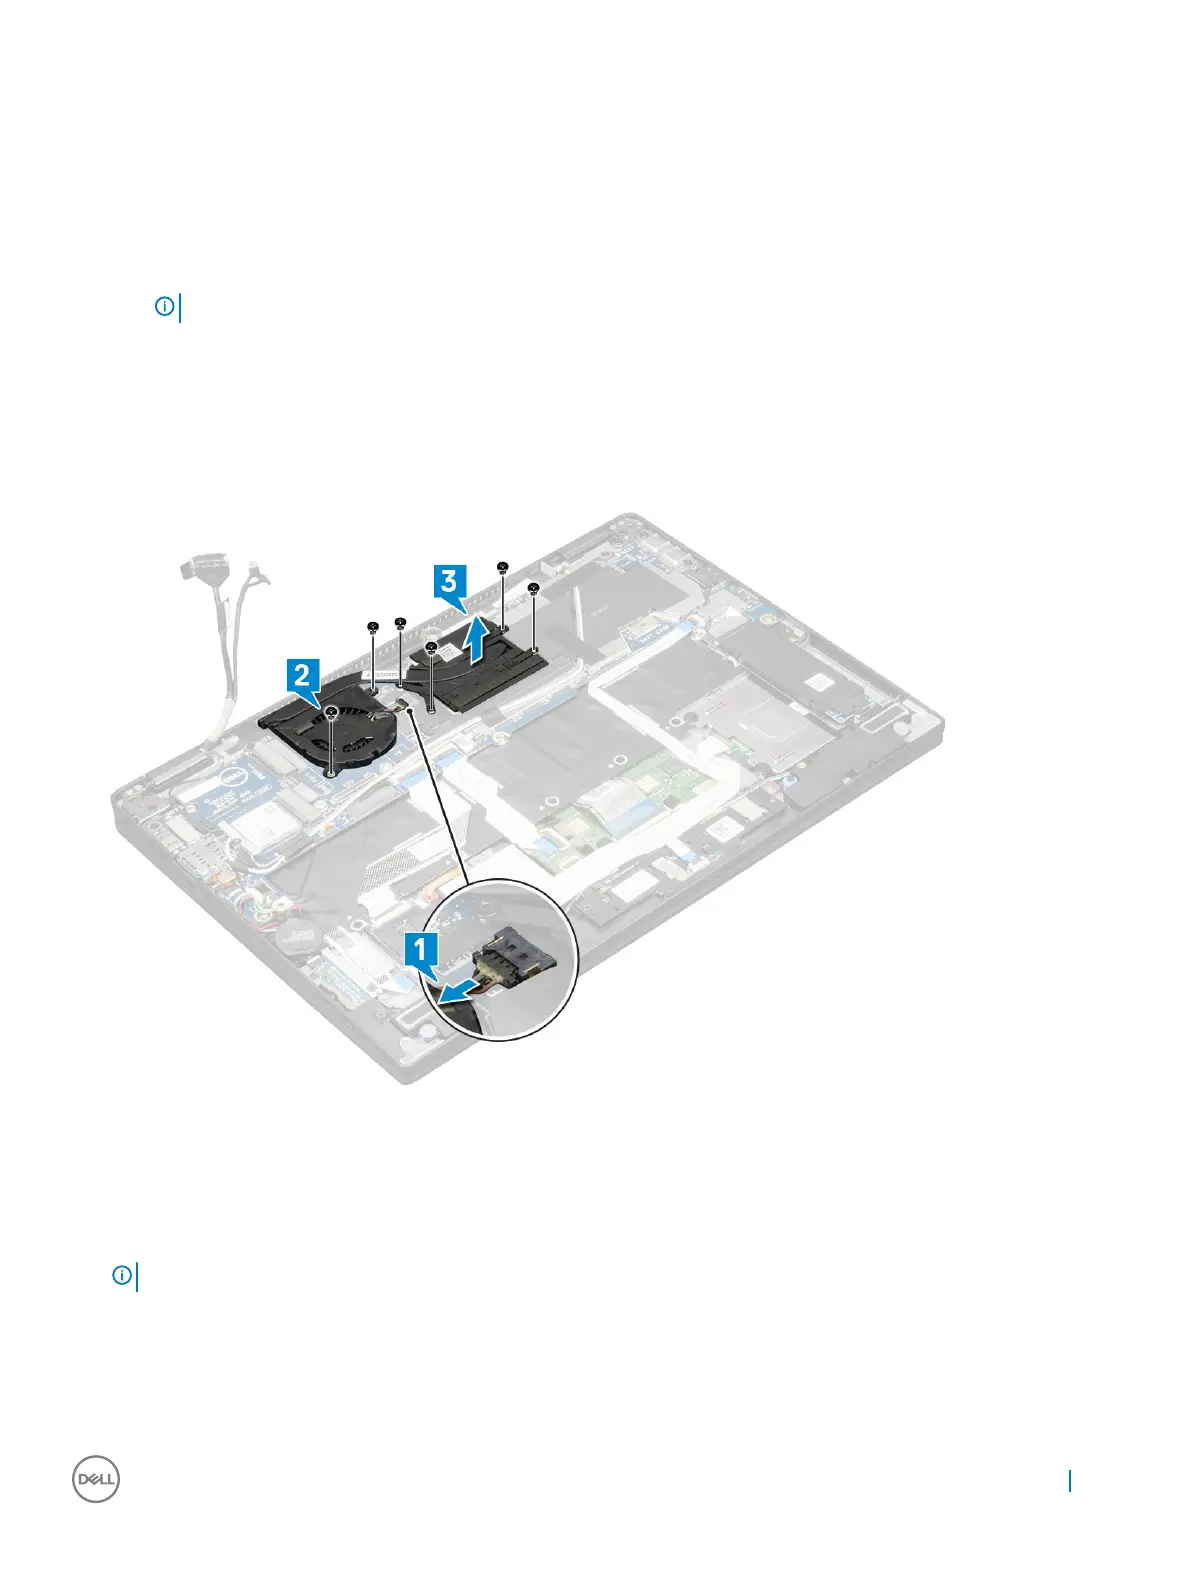
3 To remove the heat sink assembly:
a Disconnect the fan cable from the system board [1].
b Remove the 2 (M2.0 x 3.0) screws that secure the fan to the system board [2].
c Remove the 4 (M2.0 x 3.0) screws that secure the heat sink to the system board [3].
d Lift the heat sink assembly from the system board.
Installing heat sink assembly
1 Align the heat sink assembly with screw holders on the system board.
2 Replace the 4 (M2.0 x 3.0) screws to secure the heat sink to the system board.
NOTE
: Tighten the screws on the system board in the order of the callout numbers [1, 2, 3, 4] as indicated on the heat sink.
3 Replace the 2 (M2.0 x 3.0) screws to secure the fan to the system board.
4 Connect the fan cable to the connector on the system board.
5 Install the:
a Battery
b Base cover
Removing and installing components
23

 Loading...