EasyManuals Logo

Dell Latitude 7390 2-in-1 User Manual

Dell Latitude 7390 2-in-1
72 pages
To Next Page IconTo Next Page
To Previous Page IconTo Previous Page
Page #35 background imageLoading...
Page #35 background image
Touchpad Buttons
Removing the touchpad
1 Follow the procedure in Before working inside your computer.
2 Remove the:
a Base cover
b Battery
c SSD module
d WLAN card
e WWAN card
f Heat sink assembly
g Speaker
h Display assembly
i System board
j Keyboard
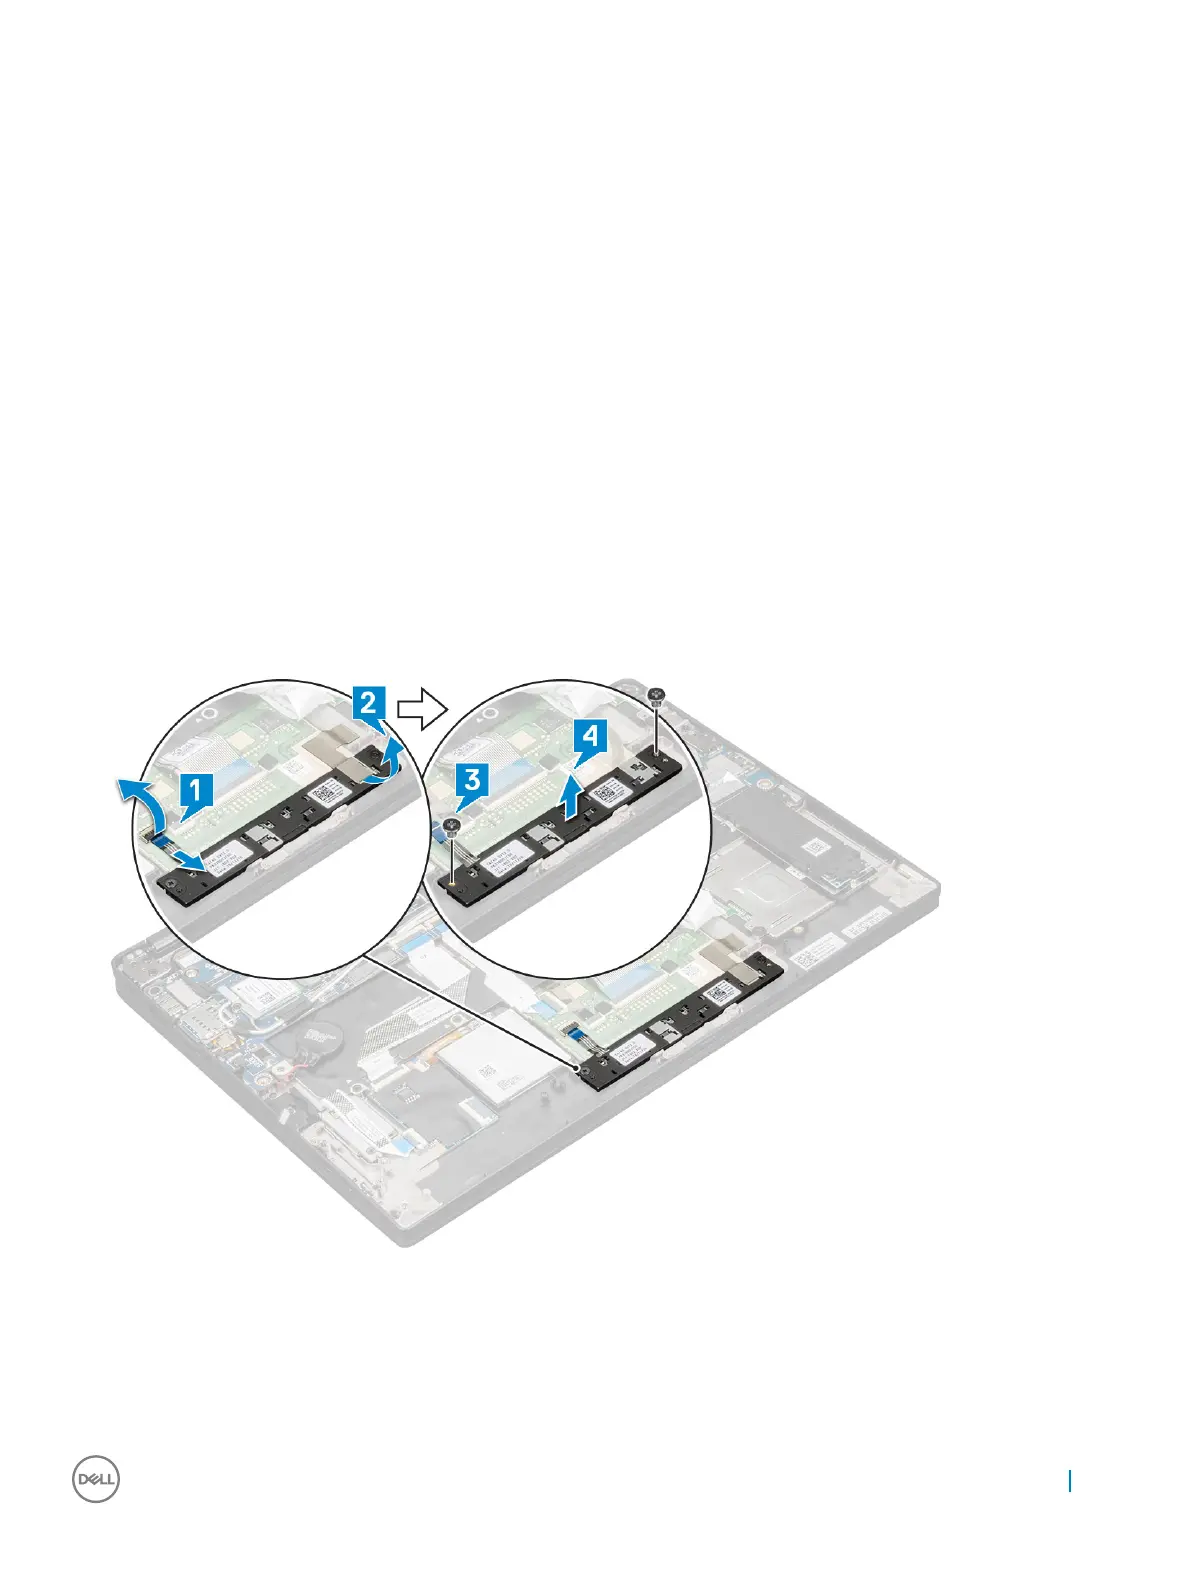
3 Removing the touchpad buttons.
a Disconnect the touchpad cable [1].
b Remove the tape that secures the touch buttons to the system board [2].
c Remove the 2 (M2 x 3) screws that secure the touchpad buttons [3].
d Lift the touchpad buttons from the computer [4].
Installing the touchpad
1 Place the touchpad buttons into the slot.
2 Replace the 2 (M2xL3) screws that secure touchpad buttons.
Removing and installing components
35

Table of Contents

Other manuals for Dell Latitude 7390 2-in-1

Questions and Answers:

Question and Answer IconNeed help?

Do you have a question about the Dell Latitude 7390 2-in-1 and is the answer not in the manual?

Dell Latitude 7390 2-in-1 Specifications

General IconGeneral
GraphicsIntel UHD Graphics 620
Operating SystemWindows 10 Pro
Processor8th Generation Intel Core i5/i7
Display13.3-inch FHD (1920 x 1080) touch screen
RAM8GB or 16GB LPDDR3
StorageUp to 1TB PCIe SSD
Battery4-cell 60Whr
Weight1.42 kg (3.12 lbs)
Ports1 x microSD card reader, 1 x headphone/microphone combo jack
WirelessIntel Dual Band Wireless-AC 8265, Bluetooth 4.2
Webcam720p

Related product manuals